Introduction to Control Cables & Overview (Cont.)
| CSS Drop Down Menu by PureCSSMenu.com | < Previous Page|Next Page > |
209
®
HOW TO MEASURE CONTROL CABLES “MEASURE TWICE. ORDER ONCE.”
FOR A NEW INSTALLATION:
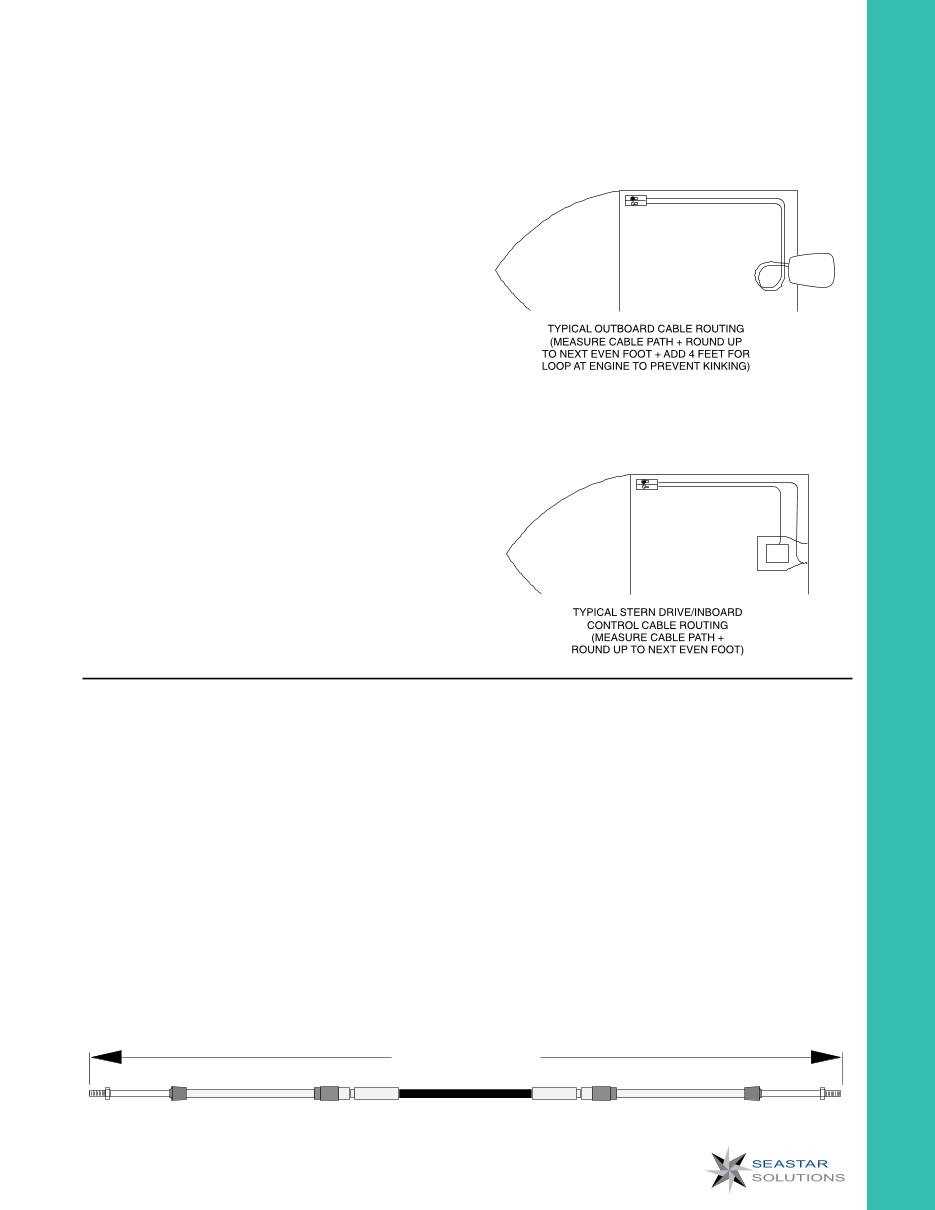
Measure cable routing path from control head
attachment point to engine connection, as follows:
OUTBOARDS:
Measure from control along unobstructed cable
routing to center of outboard. Add four feet to
allow for loop, which provides unrestricted engine
movement. Round up to the next foot and order
required cable part number. (Last two digits of cable
part number equal cable length in feet.)
INBOARDS & STERN DRIVES:
Measure from control along unobstructed cable
routing to shift and/or throttle connection. Round
this dimension up to the next foot and order required
cable part number. (Last two digits of cable part
number equal cable length in feet.)
CONTROL CABLE
LENGTH IN FEET
TYPICAL OUTBOARD
CABLE ROUTING:
TYPICAL STERN DRIVE (I/O) OR INBOARD CABLE
ROUTING:
FOR REPLACEMENT OF EXISTING CABLE:
If you removed the old cable, measure for replacement
cable as follows:
Measure from tip to tip and round up to the next
foot, if necessary (aftermarket cables are sold in foot
increments up to 30 feet. After that use only even
foot increments).
The control cable part number contains its length.
SeaStar Solutions cables are usually listed as CC???XX,
where XX = length in feet.
FOR EXAMPLE:
Part Number CCX63320 = 20 ft. CCX633
Control Cable
or
Morse® Part Number *032377-03-240.0 = 20 ft. 33C
Control Cable
(240" = 20')
* This cable is no longer available.
Use CCX633xx as a replacement
CONTROL CABLES - Measuring Cables