Logo

Powerhead rebuild or not

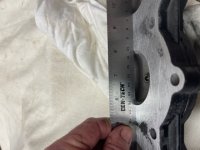
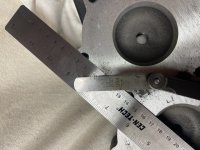
Guys I figured that was coming! So I'll look around on eBay and check with Stoudsmarine maybe they'll have something better but you guys know how much heads are!! How about this, I'll screw a plug in and see what kind of clearance I have maybe it can come down enough to get the pits out. What do you think also the block deck and the 0.007 thousands am I in the safety zone with that it should I put the crank and a piston in without the rings and see how things look at top dead center.. on the head maybe I can work it the poor man's way.. J said he just didn't want to keep sanding away on it.
 
Sorry guys what was I thinking, there's so much space left! Why can't I go down further and get this where it needs to be.
 

Attachments

  • 052847F2-4F55-4BFC-A697-5F16D1F7EB09.jpeg
    052847F2-4F55-4BFC-A697-5F16D1F7EB09.jpeg
    98.1 KB · Views: 16
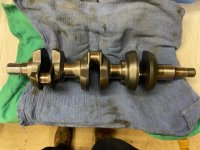
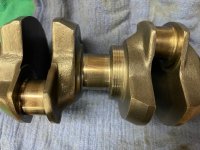
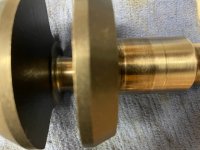
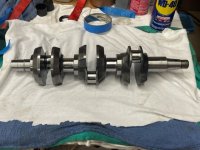
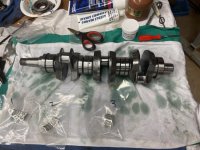
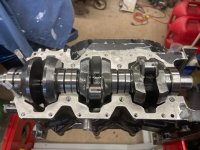
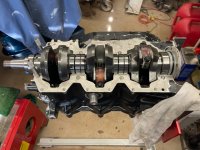
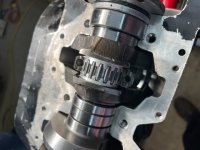
R1&FB, here's some pics of the crank for ur inspection. Can I build on it or should I polish the journals? I'd say they need a polish job and would like to do it at home using 800-1000 paper with shoe strings, you know like you see on YouTube. Appreciate any thoughts or advice on this. I'd like to shoot for getting the pistons and crank installed over the weekend.
 
Pics of the crank.
 

Attachments

  • FEFDD40C-30E2-4411-A502-B8E98A094648.jpeg
    FEFDD40C-30E2-4411-A502-B8E98A094648.jpeg
    172.8 KB · Views: 8
  • 1CE1FA11-ADF9-4FD0-99CE-3306112243B6.jpeg
    1CE1FA11-ADF9-4FD0-99CE-3306112243B6.jpeg
    143.5 KB · Views: 12
  • D9FC8171-D5B9-463B-B081-AC05CAD4A654.jpeg
    D9FC8171-D5B9-463B-B081-AC05CAD4A654.jpeg
    115.7 KB · Views: 7
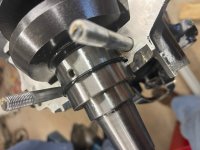
Green scottsbrite and 1/4 nylon cord . Cut SB to width of journal,wrap SB around journal so it overlaps at least a 1", wrap nylon cord around SB, add your favorite spray lube and get at it.
 
FB! Check this out! The Scotchbite pad are awesome! Took some time and a little patients but I think it will pass!
 

Attachments

  • 361D2A90-396F-4B4D-9830-9E77ECD65627.jpeg
    361D2A90-396F-4B4D-9830-9E77ECD65627.jpeg
    136 KB · Views: 16
Go ahead and install pistons and install head loosely. Flip over and install crank and bearings,end caps with new seals and o-rings. Stick a couple of the 1/4 bolts in caps to keep crank from shifting.
 
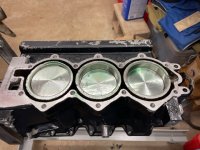
Here is todays progress! WSM pistons and RIK rings installed. No problems I used my ring expander and ring compressor and oiled everything up and all 3 slipped right in. Here are some pics!
 

Attachments

  • CD8FBBBA-93BC-419B-8EAF-D8BC934BFECF.jpeg
    CD8FBBBA-93BC-419B-8EAF-D8BC934BFECF.jpeg
    139.9 KB · Views: 8
  • F57CE7F6-D10E-4852-8952-E9CE6D44EE4C.jpeg
    F57CE7F6-D10E-4852-8952-E9CE6D44EE4C.jpeg
    130 KB · Views: 7
  • 6E60AE33-EDCE-4880-88E4-76E6B3C1290C.jpeg
    6E60AE33-EDCE-4880-88E4-76E6B3C1290C.jpeg
    134.1 KB · Views: 8
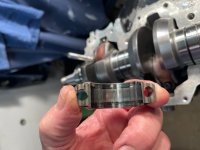
Crankshaft install took some patience, first it was installing all the bearing on the crankshaft. Here’s a pic, I followed the manual making sure on orientation again!
 

Attachments

  • C496D425-F147-4163-A1D6-25E0E033D465.jpeg
    C496D425-F147-4163-A1D6-25E0E033D465.jpeg
    152 KB · Views: 8
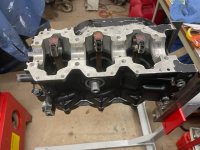
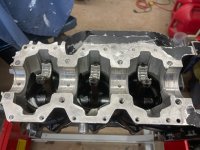
Next up installing the crank in the block, a little tricky lining the bearings up On the studs in the block. Once the crank is in its time to get started with the rods.
 

Attachments

  • 3D3427BD-F979-4070-A0BF-230E74DFE6CB.jpeg
    3D3427BD-F979-4070-A0BF-230E74DFE6CB.jpeg
    120.1 KB · Views: 3
  • B1F807AB-4E05-4922-91E6-6451D9FB9C9C.jpeg
    B1F807AB-4E05-4922-91E6-6451D9FB9C9C.jpeg
    135.7 KB · Views: 7
<p>
FB-R1 I’ve got all the rods made up and and snugged down lightly. I don’t have the special jig for the rods to line things up. I read several places about dragging your fingernail across joint in the cap to make sure it’s smooth. That’s what I did to make them up and slightly snugged the rod bolts down. Will that work? I’d like to make sure before I torque them down. The manual calls for 30-32 in stages what do you think of 10-20-30..32?</p>
 
Last edited:
Guys I really need some advice on the rod caps, will they really be perfectly smooth across the joint? I’ve got them on and snugged up and they look lined up and are smooth but I can still feel my fingernail hit the joint, it doesn’t hang up. Is that ok? I don’t want to mess them up.
 
Well been couple of days now and no advice from anyone so I searched for threads on the rod cap subject and found some! Guess I'll go try my luck again...
 
I was taught many years ago by a mechanic much older than me to take a sharpened pencil and run the point over the milled surfaces of the rod and rod cap to feel if they're aligned.Worked great for me.
 
S55 thanks for the tip! I’ve been using one! Geez I looked on EBay for the special tool but yikes!!! $$$$ looks like it’s the pencil and scratch for me. Got in from work yesterday had dinner and went do the the shop (just for a few minutes I said) and before I knew it it was 10pm! 3 hrs of playing with one rod cap! Seemed like 30 mins. I get one side where nothing catch’s but can’t get the other side. For now that seems to be the trend. I’ve had them back apart and made absolutely sure they are clean I even used blew them off with the air hose but still they are not perfect. Heading down again in a few wish me luck!
 
Ok so anyone! For cleaning my rods all I’ve done is use some spray brake cleaner and wiped them out with a clean white rag to make sure they are good and clean! No scotchbrite pad or anything on that line. That being said if you look at the rod you can tell it’s a used one. For the rod journal install just a squirt of oil lay 1/2 the bearing in the rod pull it up the the crank journal squirt of oil on the crank journal lay the other half of the bearing on then the cap squirt of oil on the cap bolts and then try and do a line up. Am I missing something or doing something wrong?
 
Sorry busy building customer 225hp.(will post some pic's) Install the caps and tighten down snug with hand and get one side perfect. Tighten to 10 ft lbs. If other side is not aligned, take a brass drift and tap it and it with seat. Then tighten to spec in steps of 3.
 
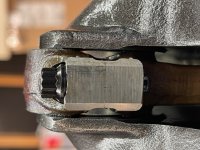
FB! Glad you chimed in!!! I’m ready for all the 225 build pics you want to post!!! Ok the rods!
 

Attachments

  • B90275BF-0D09-4B0C-96E9-CBF3A3540B2D.jpeg
    B90275BF-0D09-4B0C-96E9-CBF3A3540B2D.jpeg
    187 KB · Views: 11
  • 1984295C-0B26-43E4-A62F-CC8F98823DE5.jpeg
    1984295C-0B26-43E4-A62F-CC8F98823DE5.jpeg
    115.7 KB · Views: 8
  • 3D99C25D-68D2-4BA8-A85C-D5CA51268A57.jpeg
    3D99C25D-68D2-4BA8-A85C-D5CA51268A57.jpeg
    97 KB · Views: 10
#3 is almost invisible except for that left bevel so close! The cap yeah it looks ugly but it just looks ugly, so smooth and clean to the max.
 
Back
Top