

Logo

Honda B100L Timing/Stumped

nhellman84

New member
Hello everyone,
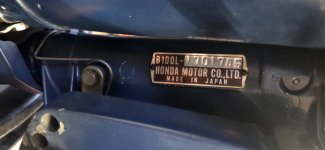
I have a few questions about a Honda B100L outboard that I picked up a few weeks ago. Serial number 1701745, should be a CDI ignition from what I can find. Bought this from a seller locally who said it was on a sailboat he bought. The seller said he had it running a few weeks before I looked at it, but at the time we couldn't get it to start. It would try to fire, but never started. I got it for $200 non running. I'm fairly mechanically inclined and have worked on lots of small engines previous to this. When I got it home I got rid of the old fuel and pulled and cleaned the carb. Ran new fuel lines and fuel filter on the engine and cleaned and gapped the plugs. After all of this I could only get a slight pop out of each cylinder, almost like it was trying to fire later then it should. I should also mention that this thing can be a bear to pull over. With that I checked the compression across the two cylinders and got roughly 150 PSI at both cylinders. I did notice even with the plugs out and turning the flywheel by hand there is a spot when this pistons are near the top of the stroke that its hard to turn. No grinding or anything like that just like it has a lot of compression in that area, but it shouldn't because the plugs are removed. After doing some reading on this site I pulled the carb 4-5 times more to check and re-clean it. I bought a carb off amazon just to rule the carb out and it still doesn't want to start. Just spits and attempts to fire. I'm wondering if the timing could have slipped somehow? Could someone point me in the right direction on the timing procedure or a picture of what should be lined up and where if its timed correctly please. Thank you!
 

Attachments

  • honda outboard.jpg
    honda outboard.jpg
    211.6 KB · Views: 19
  • honda outboard 2.jpg
    honda outboard 2.jpg
    324.6 KB · Views: 21
Hi,
In the picture you posted, you can see the pull starter support. Next to the bolt hole there is a stamped line.

To time the valves, bring the top cylinder piston to TDC on compression stroke (valves closed) and the "T" should align with the stamped line next to the bolt hole.

There is either a line or two punch marks on the outer edge of the cam pulley. The line or the gap between the punch "dimples" also needs to align with the mark on the starter case support and with the "T" on the flywheel. In other words, all three marks need to align.with each other.

The "F" mark is an IGNITION timing mark used mostly for the older breaker points adjustment but is also a reference for the CDI system pulsar coil under the cam pulley cover. It shiuldn't need adjustment unless the pulsar coil is being replaced, has come loose or someone has messed around with it. I would definetly take a look in there in this particular case.


When new compression was listed at 151 p.s.i.
Your seeing 150 is odd to me. It makes me wonder if someone may have been "altering" the valve timing to try to raise the compression since a long used engine usually has considerably lower than "as new" compression. Who knows? Maybe I'm just overly suspicicious but have seen much weirdness with diy "repaired" engines. Done some weirdness meself methinks.

I recommend that you check valve lash while you're verifying the timing so you'll be positive that's good.

She looks really clean. Almost unused even.

Try oiling the valve rockers, valve stems, cam lobes and bearings when you have the VC off.

Squirt some engine oil in the cylinders while the spark plugs are out and the outboard is tilted UP as high as possible to get the pistons vertical so that their tops are as near horizontal as possible. That allows the oil to seep down the piston skirts, cylinder walls and on to the rings

Let it sit for a bit like that and then pull it over a few times before re-installing the plugs to remove any excess oil.

You might also consider over filling the oil case to make sure the crank bearings and journels get wet with oil and then drain the excess. Do that only when the outboard is tilted down and in the vertical poition.

Oil capacity for this engine is less than 1 us qt. .08 qt is the spec.
Over filling with oil causes problems but it happens alot so double check before running.


It's an old piece and there's no telling who's been "tinkering" or what's been done to her. Good or bad.

Good luck.

P.S..The valve clearances should be 0.002" to 0.004" for both intake and exhaust. (All four valves)

Original standard spark plugs are NGK DR-5HS gapped to 0.024" to 0.028"

Use conventional 10w40 engine oil.

The seals weren't made to be compatible with synthetic oil and might leak if you use it.
 
Hi,
In the picture you posted, you can see the pull starter support. Next to the bolt hole there is a stamped line.

To time the valves, bring the top cylinder piston to TDC on compression stroke (valves closed) and the "T" should align with the stamped line next to the bolt hole.

There is either a line or two punch marks on the outer edge of the cam pulley. The line or the gap between the punch "dimples" also needs to align with the mark on the starter case support and with the "T" on the flywheel. In other words, all three marks need to align.with each other.

The "F" mark is an IGNITION timing mark used mostly for the older breaker points adjustment but is also a reference for the CDI system pulsar coil under the cam pulley cover. It shiuldn't need adjustment unless the pulsar coil is being replaced, has come loose or someone has messed around with it. I would definetly take a look in there in this particular case.


When new compression was listed at 151 p.s.i.
Your seeing 150 is odd to me. It makes me wonder if someone may have been "altering" the valve timing to try to raise the compression since a long used engine usually has considerably lower than "as new" compression. Who knows? Maybe I'm just overly suspicicious but have seen much weirdness with diy "repaired" engines. Done some weirdness meself methinks.

I recommend that you check valve lash while you're verifying the timing so you'll be positive that's good.

She looks really clean. Almost unused even.

Try oiling the valve rockers, valve stems, cam lobes and bearings when you have the VC off.

Squirt some engine oil in the cylinders while the spark plugs are out and the outboard is tilted UP as high as possible to get the pistons vertical so that their tops are as near horizontal as possible. That allows the oil to seep down the piston skirts, cylinder walls and on to the rings

Let it sit for a bit like that and then pull it over a few times before re-installing the plugs to remove any excess oil.

You might also consider over filling the oil case to make sure the crank bearings and journels get wet with oil and then drain the excess. Do that only when the outboard is tilted down and in the vertical poition.

Oil capacity for this engine is less than 1 us qt. .08 qt is the spec.
Over filling with oil causes problems but it happens alot so double check before running.


It's an old piece and there's no telling who's been "tinkering" or what's been done to her. Good or bad.

Good luck.

P.S..The valve clearances should be 0.002" to 0.004" for both intake and exhaust. (All four valves)

Original standard spark plugs are NGK DR-5HS gapped to 0.024" to 0.028"

Use conventional 10w40 engine oil.

The seals weren't made to be compatible with synthetic oil and might leak if you use it.
Thank you very much for the detailed response. I will give that a shot when I get up later today. I'll post back with results. Thank you much for your time and help!
Nick
 
Hi,
In the picture you posted, you can see the pull starter support. Next to the bolt hole there is a stamped line.

To time the valves, bring the top cylinder piston to TDC on compression stroke (valves closed) and the "T" should align with the stamped line next to the bolt hole.

There is either a line or two punch marks on the outer edge of the cam pulley. The line or the gap between the punch "dimples" also needs to align with the mark on the starter case support and with the "T" on the flywheel. In other words, all three marks need to align.with each other.

The "F" mark is an IGNITION timing mark used mostly for the older breaker points adjustment but is also a reference for the CDI system pulsar coil under the cam pulley cover. It shiuldn't need adjustment unless the pulsar coil is being replaced, has come loose or someone has messed around with it. I would definetly take a look in there in this particular case.


When new compression was listed at 151 p.s.i.
Your seeing 150 is odd to me. It makes me wonder if someone may have been "altering" the valve timing to try to raise the compression since a long used engine usually has considerably lower than "as new" compression. Who knows? Maybe I'm just overly suspicicious but have seen much weirdness with diy "repaired" engines. Done some weirdness meself methinks.

I recommend that you check valve lash while you're verifying the timing so you'll be positive that's good.

She looks really clean. Almost unused even.

Try oiling the valve rockers, valve stems, cam lobes and bearings when you have the VC off.

Squirt some engine oil in the cylinders while the spark plugs are out and the outboard is tilted UP as high as possible to get the pistons vertical so that their tops are as near horizontal as possible. That allows the oil to seep down the piston skirts, cylinder walls and on to the rings

Let it sit for a bit like that and then pull it over a few times before re-installing the plugs to remove any excess oil.

You might also consider over filling the oil case to make sure the crank bearings and journels get wet with oil and then drain the excess. Do that only when the outboard is tilted down and in the vertical poition.

Oil capacity for this engine is less than 1 us qt. .08 qt is the spec.
Over filling with oil causes problems but it happens alot so double check before running.


It's an old piece and there's no telling who's been "tinkering" or what's been done to her. Good or bad.

Good luck.

P.S..The valve clearances should be 0.002" to 0.004" for both intake and exhaust. (All four valves)

Original standard spark plugs are NGK DR-5HS gapped to 0.024" to 0.028"

Use conventional 10w40 engine oil.

The seals weren't made to be compatible with synthetic oil and might leak if you use it.
Hi,
In the picture you posted, you can see the pull starter support. Next to the bolt hole there is a stamped line.

To time the valves, bring the top cylinder piston to TDC on compression stroke (valves closed) and the "T" should align with the stamped line next to the bolt hole.

There is either a line or two punch marks on the outer edge of the cam pulley. The line or the gap between the punch "dimples" also needs to align with the mark on the starter case support and with the "T" on the flywheel. In other words, all three marks need to align.with each other.

The "F" mark is an IGNITION timing mark used mostly for the older breaker points adjustment but is also a reference for the CDI system pulsar coil under the cam pulley cover. It shiuldn't need adjustment unless the pulsar coil is being replaced, has come loose or someone has messed around with it. I would definetly take a look in there in this particular case.


When new compression was listed at 151 p.s.i.
Your seeing 150 is odd to me. It makes me wonder if someone may have been "altering" the valve timing to try to raise the compression since a long used engine usually has considerably lower than "as new" compression. Who knows? Maybe I'm just overly suspicicious but have seen much weirdness with diy "repaired" engines. Done some weirdness meself methinks.

I recommend that you check valve lash while you're verifying the timing so you'll be positive that's good.

She looks really clean. Almost unused even.

Try oiling the valve rockers, valve stems, cam lobes and bearings when you have the VC off.

Squirt some engine oil in the cylinders while the spark plugs are out and the outboard is tilted UP as high as possible to get the pistons vertical so that their tops are as near horizontal as possible. That allows the oil to seep down the piston skirts, cylinder walls and on to the rings

Let it sit for a bit like that and then pull it over a few times before re-installing the plugs to remove any excess oil.

You might also consider over filling the oil case to make sure the crank bearings and journels get wet with oil and then drain the excess. Do that only when the outboard is tilted down and in the vertical poition.

Oil capacity for this engine is less than 1 us qt. .08 qt is the spec.
Over filling with oil causes problems but it happens alot so double check before running.


It's an old piece and there's no telling who's been "tinkering" or what's been done to her. Good or bad.

Good luck.

P.S..The valve clearances should be 0.002" to 0.004" for both intake and exhaust. (All four valves)

Original standard spark plugs are NGK DR-5HS gapped to 0.024" to 0.028"

Use conventional 10w40 engine oil.

The seals weren't made to be compatible with synthetic oil and might leak if you use it.
Lined up the timing marks this morning and it was about three teeth off on the cam gear. Slid the belt up and the cam gear lined itself up right on the dimple. Put the belt back on and it fired right up and runs perfect. Now I'm curious to do compression test and see what the numbers show. I still need to adjust the valves, but it will have to sit overnight before I do that. Thanks again for the help, I appreciate it!
 
Sounds like you'6re making progress.

Since it's "new to you", it would be a good idea to, at some point, to check and possibly change the lower unit gear oil and maybe look at the condition of the thermostat and it's housing.

Getting a shop manual would definetly be a big help for you to keep what looks like a sweet old outboard and a good deal in tip-top shape.

Those might be available in digital form but I don't know. The printed one can be found at the link below:


Keep us posted about how it's going and....

....Good luck
 
Sounds like you'6re making progress.

Since it's "new to you", it would be a good idea to, at some point, to check and possibly change the lower unit gear oil and maybe look at the condition of the thermostat and it's housing.

Getting a shop manual would definetly be a big help for you to keep what looks like a sweet old outboard and a good deal in tip-top shape.

Those might be available in digital form but I don't know. The printed one can be found at the link below:


Keep us posted about how it's going and....

....Good luck
That was my next step was to change the lower unit oil. I'm not sure if this one has a thermostat installed. It seems to pee water from the moment it starts? I could be wrong. Glad to have her running.
 
That was my next step was to change the lower unit oil. I'm not sure if this one has a thermostat installed. It seems to pee water from the moment it starts? I could be wrong. Glad to have her running.
Not knowing your boating experience, I will say that, because the waterpumps are self priming, you should never start it dry....out of the water. The pump is very powerful and will produce damaging heat in just seconds without water for lubrication. That will destroy the impeller and melt and deform the very expensive, plastic pump housing almost instantly.

There are still plenty of parts available for it but who knows for how much longer? Lots of them have been discontinued. You might want to inspect the pump components and replace what looks questionable while you can.

Check out items 1, 2, 3, 5, and 11 in the link.


Item 3, cover, is the plate that the impeller wipes and seals against. It's important to the pump's efficiency. It should be perfectly smooth but it gets worn down and grooves in it. It should be replaced if like that.

Here's an interesting stat to consider....
...over 50% of all major engine failures begin with faulty cooling systems.

Not trying to annoy,

Just sayin'.
 
Not knowing your boating experience, I will say that, because the waterpumps are self priming, you should never start it dry....out of the water. The pump is very powerful and will produce damaging heat in just seconds without water for lubrication. That will destroy the impeller and melt and deform the very expensive, plastic pump housing almost instantly.

There are still plenty of parts available for it but who knows for how much longer? Lots of them have been discontinued. You might want to inspect the pump components and replace what looks questionable while you can.

Check out items 1, 2, 3, 5, and 11 in the link.


Item 3, cover, is the plate that the impeller wipes and seals against. It's important to the pump's efficiency. It should be perfectly smooth but it gets worn down and grooves in it. It should be replaced if like that.

Here's an interesting stat to consider....
...over 50% of all major engine failures begin with faulty cooling systems.

Not trying to annoy,

Just sayin'.
Gotcha. Not annoying at all, very good information and I appreciate it. I always start it in a garbage can of water if it's not on the boat. I need to set the valves and do the lower unit oil next. I'm so happy to have it running.
 
Back
Top