Logo

No water through alpha drive.

jorma

Member
Hi,
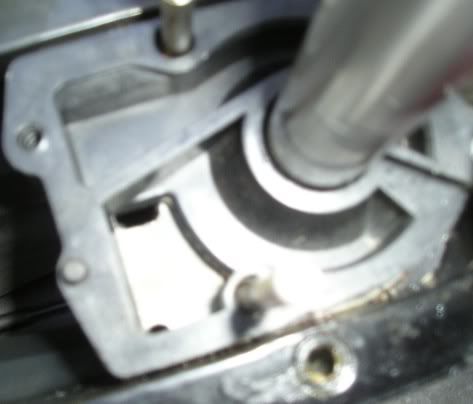
I have an Alpha drive. I have installed a new water pump in the leg but am unable to get water to reach the thermostat. I have checked the water hose from the gimble housing to the thermostat and it is clear. The leg is in the down position. The problem is when i connect "ear muffs" to the leg and turn the water on, no water flows to the engine. The blockage / problem is definitely in the leg somewhere. Can anyone please help??
 
Last edited:
separate the lower unit from the upper gear case.

There is a copper tube that connects from the impeller housing to the upper gear case.

Did you out that back?

If so there are two (one on each end) rubber tube seals. many times the upper one gets pinched and stops water flow. You need to look up with a flash light and see whats going on. Also the upper tube seal fits into a plastic square piece and sometimes if you had over heated prior then that could be bad and may need to be replaced.

Which Alpha? gen I or Gen II Gen II is post 1990 ish

Alpha 1 Gen I parts break out
see item 34 and 44 seal and tube

http://www.marineengine.com/parts/m...5577-thru-0d469858/gear-housing-driveshaft-mr


Upper housing items 3 and 6, seal and tube(again) and item 2 the square plastic piece

http://www.marineengine.com/parts/m...ru-0d469858/driveshaft-housing-and-driveshaft
 
Jack, Thank you so very very much. That is great advice. I will have a look more closely at these parts. Not sure if i have a Gen 1 or 11......

reduced.jpg
 
Jack,

Items 34 & 44 are new but looks like i need to check 2,3 and 6 as i have not inspected these.
Many many thanks.

Gary
 
Ayuh,.... It appears to be an Alpha 1, 'n not a Gen.II,....

What vintage is it,..?? Pre-'91,..??


Hi, Yes, i believe it is 1990. i have a few more developments....
Stripped the leg, top case tube is fine and water will run freely through it.
Bottom tube / water pump.... when i pour water through this tube some of it comes out via the inlets but a lot of it escapes from the pump chamber via this small groove in the pump facing.. i have indicated this groove with the tip of the screwdriver. is this groove normal? Pump is new.

IMAG0046.jpgIMAG0047.jpgIMAG0048.jpg
 
That stainless steel piece lying beside the drive on your bench....

there needs to be two gaskets, one on the bottom of this and one on the top.

Where are these gaskets
 
Also on top of the black housing that covers the impeller there should be a large rubber (square edged) o ring that sits on top of the housing. This is called a slinger and keeps exhaust gasses from entering the impeller housing. This needs to be sitting on top of the housing and a small amount of grease put under it as it spins on top of the housing.

I will also say those plastic parts look beat..........You installed a impeller only.............correct?

When replacing the water pump assembly it is best to replace the housing and all components and the base. The base contains seals for the vertical drive shaft and it is good practice to change them when doing a major impeller service.

By any chance did you grease the impeller? If you did you must remove all grease and reassemble.

Grease will not allow the impeller blades to create the suction and pressure it is supposed to.

One other question...did you install the KEY into the shaft that keys the impeller to the shaft? I don't see it..........
 
Last edited:
Hi,
I am new to this game so please bear with me.
I installed a complete top half of the pump including plastic housing, impeller, gaskets etc. The only thing i did not replace was the impeller base when, looking at it now shows signs of melt.
No grease on the impeller
Only gaskets were a paper one which sits under the SS one and the SS one itself.
Key was installed.
The slinger slides down the drive shaft, correct? I remove this before taking the photos.
IMAG0049.jpgIMAG0050.jpgIMAG0051.jpg
 
You definitely need a new base.............

that is a MR lower unit or at least a MR drive shaft as the oring groove below the splines indicates. MR was the predecessor to the pure Alpha 1 Gen 1

All parts are interchangeable/the same

If you get a new base...look closely at the underside....there is a oring that needs to be installed and there will be several to choose from in the package so make sure you use the correct one. Also grease the inner seals lips well before installing so you don't tear or scratch the oil seal lips. and make sure to install the proper base gasket and carefully put it in place before installing the large oring........

Also look down below the base and look for any crap or old impeller pieces that may be stuck in the intake path.
 
Hi,

Found these....;-(

So... one on the bottom, then SS, then one on the top?
I will order a new base also.... what is the third gasket used for? it seems thinker than the other 2.
IMAG0052.jpg
 
thank you very very much for your assistance. New to this game but now realise that i need to take more care... problem i find is that when i buy new parts they dont come with instructions... thanks again.
 
Most parts from merc don't have instructions

that being said you should get a manual so you have instructions/picture diagrams to follow.
 
EXCELLENT Jack,
New base ordered. Delivery tomorrow...i hope.
Could not have got this sorted without your help. You ever in Belfast i owe you a few pints of the black stuff ;-)

Gary
 
Water will flow out that grove you pointed to I believe...

the outdrive is self draining when in the full down position.

This is important when winterizing so you don't need to attend to the outdrive only back flush rv antifreeze from water hose that connects to the thermostat housing back thru the outdrive.

If you have no water coming thru the incoming water hose at all the you must have something blocking it from the intake area to the impeller if you are sure water flows all the way thru the copper tube from the motor...............
 
Hi Jack,

Here are the different operations i carried out.
1. Attached water flow to hose which fits onto thermostat at the engine side. water escaped via the intake vents on the leg.
2. Remove leg.
3. Attached water flow onto water hole at the gimble face. The water escaped at the thermostat via the fist hose i used.
4. Split the leg.
5. Turned upper casing on its head and inserted funnel into copper tube. Water escaped via the water hole on the leg / gimble face.
5. Inserted funnel into water pipe which comes out from the water pump. Water escaped out via intake vents and a lot via the water pump plastic casing joint / groove so i believe you suggestion regarding the incorrect gasket fittings are correct. When the leg was on and everything connected, the water from the ear muffs could not reach the thermostat as it was leaking out from the wrongly inserted gasket joints and the groove..... would this be correct?

Gary
 
Last edited:
Also make sure you actually had the copper tube in the plastic tube when the two halfs go together........if you missed that then that would explain no water to motor.
 
And the gasket for the water pump base can be installed backwards,so be careful.
gasket2520backwards2520small.jpg
Water from the muffs does not reach the housing untill the motor runs
 
Last edited:
Hi Bt,
I have part of a manual it it says to .... connect muffs at half water pressure until the water passes through the engine and the dirty water runs clear from the propeller. Then start engine and run at idle for 10 minutes and check temperature..... So.. i will not get any water to the engine using muffs unless the engine is running?
 
Alpha dosent work like that, motor has to be running to get water. That would be true if there is a "flushing attachment" installed on the motor.
 
So when they say "flushing Attachment" they do not mean "ear muffs" which fit over the intake vents on the lower leg?
When i connect my ear muffs and turn on the water... i then need to start the engine to suck up the water... is that correct?

Gary
 
Yes that is correct.........uggggggggg

Without the motor running and thus turning the outdrive the impeller will not turn and no water will reach the motor...........


Some residual water from the pressure in the hose may make it but not enough to do anything
Motor must be running!!
 
First time i have ever used this forum and very very pleased with the help given.

Gary

It's a very bad day in life when you don't learn something new.....!!!!
 
Hi Again,

Another question. On the upper casing, copper water tube, there is a rubber collar on this tube where it goes into the square holder. On the rubber collar there is a rubber spud on the outside. Does it matter where this spud is orientated? does it have to sit in any particular position?


Item number 3 shown on this link......

http://www.marineengine.com/parts/me...and-driveshaft
 
Last edited:
Many thanks again Jack...... the problems just seem to come my way......
I got the water pump sorted out and ran the engine for approx. 10 minutes at idle.
All went good until i started to change the oil, which i had planned to do anyway and found that it was mixed with a lot of water.. I had put in fresh oil before i ran the engine..
Before i go to the expense... would anything else apart from the head gasket be causing water to mix with the oil?
MY initial thoughts were strip down and get the head skimmed before putting together with a new head gasket........... I would much rather play on the safe side and get the job done by experts but just wondering if it could be anything apart from a blown head gasket??

Help is as always very much appreciated.
Gary

As we say in Ireland.... "Looks like a have bought a Pig in a Poke"
 
And so the story continues............

Hi,

Can someone please tell me if there should be a small hole on the lower right side of the lower gear casing on an Alpha Gen 1 MR drive?
I notices water coming through this small hole during a water test using ear muffs.
Now i have notice gear oil leaking out of this hole.18758-mercruiser-alpha-one-gen-ii-lower-unit-drive-162-to-1-ratio-1991-up-815822a43 (1).jpg
 
Back
Top