Logo

Installing and setting points on Johnson ldl-10 5 hp

Magnafique

New member
I just purchased a 1965 Johnson LDL-10 outboard with the long shaft. It starts and runs nicely for awhile and just quits like it is running out of fuel. Then I have to let it sit for awhile pump the bulb and it will start again for about 5-10 minutes at medium idle and then quit. Since I want to get it ship shape I ordered a new coil, points and condenser to install and save the old ones for use if needed. I sometimes can hear noise at the fitting on the tank like it is sucking air. Trying to diagnose how to approach this. I hope it is not the fuel pump!! The previous owner put a very large fuel filter on the fuel hose and it never fills up after repeating pumping. After all of this it seems that I have to pull the fly wheel to get to the points, condenser and coil right?

What ya think??? Thanks Tom
 
LDL10 = 1965 5hp Johnson.

Yes, you need to pull the flywheel in order to get at the points, etc. You can use a steering wheel puller or a harmonic balance puller. NOTE: Be sure to tighten the flywheel nut to the proper specifications (40-45 Foot Pounds) when re-installing the flywheel. To do otherwise will result in a sheared flywheel key and damaged crankshaft and flywheel tapers.

The noise you hear at the tank indicates that the fuel pump is drawing air. Either install a new "O" Ring in that fuel line fitting or install a new complete fitting. As it stands, the engine is using the fuel in the carburetor to run for a short time, then as the air manages to gain access to the carburetor... your problem occurs.

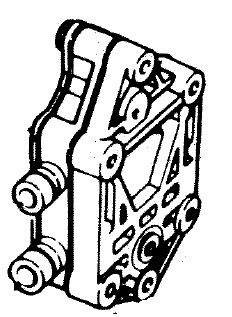
(Magneto & Driver Coil Alignment)
(J. Reeves)

To align the coils properly, have the metal vertical portion of the coil yokes aligned with the inside edge of the bevel that exists on the top portion of the aluminum seat upon which the coils sit. This creates the proper distance between the coils and the flywheel magnets. Faulty alignment creates friction and the yokes of the coils heat up, turn blue and expand.

********************

(Point Setting Of Magneto Models)
(J. Reeves)

Set the points as follows. Have the flywheel key aligned with the fiber rubbing portion of the ignition points. Adjust the gap so that a .020 gauge will pass thru but a .022 will not. Should there be any question of the points being dirty (touching the contact with your finger would cause them to be dirty), clean them with a small brush and acetone or lacquer thinner.

NOTE 1: Should the operating cam have a small portion on it with the word "SET" imprinted, align this portion with the fiber rubbing portion instead of the flywheel key.

NOTE 2: Should the cam have the word TOP embossed on the top of it, that is a cam that could be installed upside down and this is simply telling you which side is up. It is not a position where one would set the points.

Thousands of parts in my remaining stock. Not able to list them all. Let me know what you need and I'll look it up for you. Visit my eBay auction at:

http://shop.ebay.com/Joe_OMC32/m.html?_dmd=1&_ipg=50&_sop=12&_rdc=1

********************


(Now.... Whichever carburetor your engine may have, adjust as follows:)

(Carburetor Adjustment - Single S/S Adjustable Needle Valve)
(J. Reeves)

Initial setting is: Slow speed = seat gently, then open 1-1/2 turns.

Start engine and set the rpms to where it just stays running. In segments of 1/8 turns, start to turn the S/S needle valve in. Wait a few seconds for the engine to respond. As you turn the valve in, the rpms will increase. Lower the rpms again to where the engine will just stay running.

Eventually you'll hit the point where the engine wants to die out or it will spit back (sounds like a mild backfire). At that point, back out the valve 1/4 turn. Within that 1/4 turn, you'll find the smoothest slow speed setting.

When you have finished the above adjustment, you will have no reason to move them again unless the carburetor fouls/gums up from sitting, in which case you would be required to remove, clean, and rebuild the carburetor anyway.

--------------------------------------------------
(Carburetor Adjustments - Two Adjustable N/Vs)
(J. Reeves)

Initial settings are: Bottom high speed = seat gently, then open 1 turn out. Top slow speed = seat gently, then open 1-1/2 turns.

Setting the high and low needle valves properly:

NOTE: For engines that DO NOT have a shift selection, obviously there is no NEUTRAL position. Simply lower the rpms to the lowest setting to obtain the low speed needle valve adjustment.

(High Speed) Start engine (it will run pretty rough), shift into forward gear, take up to full throttle. In segments of 1/8 turn, waiting for the engine to respond between turns, start turning in the bottom high speed needle valve. You'll reach a point whereas the engine will either start to die out or spit back (sounds like a mild backfire). At that point, back out the needle valve 1/4 turn. Within that 1/4 turn, you'll find the smoothest setting.

(Low Speed) Slow the engine down to where it just stays running. Shift into neutral. Again in segments of 1/8 turns, start to turn the top needle valve in. Wait a few seconds for the engine to respond. As you turn the valve in, the rpms will increase. Lower the rpms again to where the engine will just stay running. Eventually you'll hit the point where the engine wants to die out or it will spit back. Again, at that point, back out the valve 1/4 turn. Within that 1/4 turn, you'll find the smoothest slow speed setting.

When you have finished the above adjustments, you will have no reason to move them again unless the carburetor fouls/gums up from sitting, in which case you would be required to remove, clean, and rebuild the carburetor anyway.

Thousands of parts in my remaining stock. Not able to list them all. Let me know what you need and I'll look it up for you. Visit my eBay auction at:

http://shop.ebay.com/Joe_OMC32/m.html?_dmd=1&_ipg=50&_sop=12&_rdc=1

********************

And that's what I think! :cool:
 
Thanks to you all for some GREAT information. This particular engine has no gear shift and runs in forward gear all of the time. I am going to replace the fuel fittings first and see if that fixes it. I do however have new points and condenser on the way.

You guys ROCK :) Tom
 
Hello Joe. Do you have a coil for this engine and a fuel pump??? If so what is the price. I only bought one coil from Marine Parts as I didn't know the engine had two.
 
A new diaphragm for the fuel pump is available.----Why spend big bucks when a few $$ for the diaphragn is all that is needed to fix a bad fuel pump !
 
Hello again Joe, the coil was $6.99 from Marine Parts and the Fuel Pump is listed at $100.00 less gasket. What can you do???? I guess I just might need a new diaphram or impeller for the pump and a gasket not the entire pump. Thanks Tom
 
Sorry Joe actually the coil was $24.50 not $6.99. That was for the condenser. Also does this engine have two coils or one. The illustrated parts diagram only shows one and does not mention a second. Does one coil work for both cylinders? Perhaps it has two but no reference to it. Thanks Tom
 
After the part # it says 2 required per assembly-----And it was stated that there are 2 coils.----Thus it has 2 coils !---2 sets of points and 2 condensers too.
 
Last edited:
Hello Joe. Do you have a coil for this engine and a fuel pump??? If so what is the price. I only bought one coil from Marine Parts as I didn't know the engine had two.

Sorry my friend.... I sold out of most of my ignition and fuel components some time ago.
 
Right you are Racerone. I just didn't read the small print. I found a new Fuel pump today and a new hose, bulb, and new connectors. I am putting it together now and then will put it back in the run tank and see what gives.

Thanks, Tom
 
Where did you find it?????? I put on the new fuel pump and hose/bulb/and new ends. Primed it with the bulb and it started up first pull. I warmed it up and ran it for about an hour at different engine speeds and she just purrs. I pulled the fuel hose off of the engine to let it run the carb dry and it took over two minutes and when it finally died I swear it was only turning over 100-150 rpm. Thanks for all of the help. I will buy a new diaphragm if I can find your source and put in in the fuel pump I have left. The replacement pump is much smaller than the OEM pump that was on it. Thanks much Racerone Tom
 
I'm glad you got it fixed. I had in mind another possibility. About that sucking sound you heard at the tank. Evidently the new hose fitting fixed it, but it could also be the o-ring around the pin that gets pushed in when you plug on the hose. The tank outlet can be disassembled to repair it. Consider it if you still hear the slurping sound.
 
No sucking sounds now Fdrgator but thanks for the response. I can't believe a 50 year old motor runs this well. Next, put in on my 10 ft Portaboat and take it out for my maiden voyage with this boat and motor this coming weekend.

Best Regards, Tom
 
The small square pump was used for many years.--------Look at different years / models for that small pump.--------Even used in 1998 model at 90 hp as a vapour extractor.---------Your bigger pump will also have repair kits offered and it was not original to your motor.---------It just takes a few clicks to find these parts.
 
Well I have been clicking all over the internet but I have not found just a diaphragm for my fuel pump. Would you kindly enlighten me where you found it???

Thanks Tom
 
Thanks, it looks like this kit is for the pump I just installed. The oem pump which I removed is showing obsolete/unavailable.

The oem pump is part number

click-image-to-enlarge.gif
[h=1]0380016[/h]
 
380016 was a good pump. But parts for it are not available.
 

Attachments

  • Furl Pump 380016.jpg
    Furl Pump 380016.jpg
    89.5 KB · Views: 103
Last edited:
Thanks, yes your picture is the one I removed. However mine might be still operational as I removed it and replaced it with a new one along with a new hose/bulb/connector kit but I think the new hose/bulb/and connectors did the trick as I was getting air leaks from the old connections. At my next service I will put the above pump on and see if it still is operational. Never hurts to have an extra one. I just dropped the propeller group and put in a new water pump. The old impeller had a LOT of memory in it. Now I begin the process of prepping the engine and removable parts for priming and painting. Found a new set of Decals for this 1965 engine that I will apply and also purchased some zinc chromate primer and paint (same white color as mine). And then begin enjoying this sweet little engine.
 
Last edited:
Back
Top