Logo

Stripped Jet thread on carb.

Keithm18

Regular Contributor
Hi Guys. I need your help please.

in my search to confirm if my carbs had the right jets for the new altitude, like an idiot i tried to install a jet at the wrong angle and stripped the aluminum carb threads.

1991 200hp V6. On the top carb there are two jets, one on either side of the carb. Known as progression air jets in the diagram. I removed one and when putting it back managed to cross thread it. When it wouldn't tighten down i removed it and found strands of aluminum that used to be threads in the carb neatly wrapped around the brass jet.....

When I look into the carb i can find see some threads remain, but they are deeper than the jet and where the jet makes contact there are now no threads.

i've been reading up on where guys have used all sorts of material to try and "make threads" using all kinds of epoxies/glues/jb weld. I tried myself with a little liquid metal, but the whole space is so small it never worked.

I'm sure i can glue it ok, using the liquid metal or some equivalent, but i am worried that at some point it works loose and the motor swallows it down the carb throat....

i've tried to find a replacement carb, but these WMA 1's are rare and hard to find.

does anyone have any ideas for me???

P.s. I already know i'm a moron for this one.....
 
Uuuugghhh! Not sure you can get a helicoil in there. You might have to look for another carb on eBay. See them on there all the time, and fairly cheap.

Jeff
 
is this a 3 carb engine?i hit ebay a bit for you and only came up with what i think are your carbs but they wanted to sell a 3 carb set for 275 us dollars...if you try to glue it make sure you dont use super glue..its water soluble ...if it was mine i would use a good epoxy after really cleaning both the jet and the hole where it goes...you should have enough thread left to assure a good hold ....but i would continue to look for a carb(s) thru ebay and every forum on the web..there are also old time mechanics that keep every scrap motor they ever worked on..every city has at least one of those guys if its a boating town...they also usually have a coffee pot or a beer box handy so it wont be a complete waste of time to drop in on them...
 
Hi Guys. Merry Xmas to all, these all good suggestions and ideas and exactly what I was looking for. I think my first prize is to get a spare carb, second to have a new Jet Machined and third to use eopxy.

kimcrwbr1, the ones on e-bay look very similar, but I see the top part of what is accelerator pump on my carbs is missing on these. I know they did away with them on later models, would they work on mine? The number stamped on the top of the carb is 3308-9672-C. Not sure what the A-C indicate

I would be forever greatful if you could help me get some new ones and shipped to me.

Racerone, I think this is also a great idea. Should I speak to an engineering shop for that?
 
Last edited:
Hi Guys. Merry Xmas to all, these all good suggestions and ideas and exactly what I was looking for. I think my first prize is to get a spare carb, second to have a new Jet Machined and third to use eopxy.

kimcrwbr1, the ones on e-bay look very similar, but I see the top part of what is accelerator pump on my carbs is missing on these. I know they did away with them on later models, would they work on mine? The number stamped on the top of the carb is 3308-9672-C, I'm not sure what the A or C indicates.

I would be forever greatful if you could help me get some new ones and shipped to me.

Racerone, I think this is also a great idea. Should I speak to an engineering shop for that?
 
Just a machine shop that has a small biece of brass to turn to the size you want and the correct drilled hole in it.-------Make it the same as the jet with a bigger OD.
 
Hi Kim. Yes, this is the exact carb. I can't spend what they want for it though. I am speaking someone on ebay now as per the earlier link as I think that the ones they have will work on mine if I just switch out the accelerator pump as you suggested.

I am also going to take the current carb to a local machine shop and see if they can make me a longer jet with the same diameter as there are threads still on the bore bu they are deeper than the current jet will reach. if not I will ask them to make a slightly larger jet and tap the carb for it.
 
Careful using "homemade" jets. Their flow rates are not just based on the hole size; the radius of the jet where the fuel comes in is critical to their flow rate.

Jeff

Trivia question: On most old Mercs ('80s and older), which way does the gas flow through the jet? From the side with the number on it, or from the back side?
 
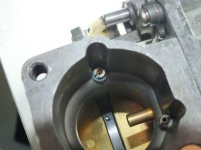
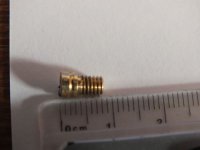
HI Jeff. the home made feel is also a worry for me...this seems to be an air metering jet. I have attached another picture where you can see how there are threads left in the bore but they are below the jet as the jet is a shorter and the removed threads are at the top of the hole. if the jet was two or three thread widths longer.....

The guys on line mostly have the carbs that don't have the accelerator pump on them. Not sure they will work 100% so I will keep lookingStripped Air Jet.jpg
 
Also really not sure on the trivia question. I always assumed that fuel/air flowed from the top/front of the jet and out of the bottom/back....
 
Hi All.

Quick update. All efforts to buy a replacement carb have come to nothing. All carbs are slightly different to mine and none have the accelerator pump I require.

Tomorrow I am meeting an engineer at his his shop. He runs a motor rebuilding business for cars and boats as a hobby and he is more than happy to help. He said he has some versatile epoxy that he has used before to rebuild threads of this kind on his own motor, if that doesn't work he will help me to find/make a jet that will work.

I will update all tomorrow evening my time. Thanks again for the help and advise.

guyjg, I tried liquid aluminium but perhaps I didn't clean the threads properly or the stuff was off, but it wouldn't dry properly and just "flaked" off in little pieces.

In preparation for the work tomorrow I took the carb off this morning, wiped it down with a rag then wiped the area with acetone and a few cotton buds and left it in the sun for a few hours. It's a lot less "greasy" now around that area. Hold thumbs for me, I really want to get out next weekend...
 
Hi Guys ok..... The last carb that was right for my motor sold for USD 400 over the weekend. A little too much for me.

I went to see the engineer and we settled with a two part epoxy solution. I forget the name of the stuff but it's unreal.

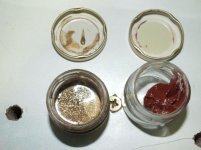
In short we cleaned the carb and jet with acetone. Put a release agent on the jet (Spray and cook from the kitchen), mixed up the epoxy, applied with a toothpick to the jet and inserted the jet gently into it's bore.
Left to dry for an hour and then removed jet gently. Took two tries and we ended up with a great set of threads left in the jet bore. I let it dry for 48 hours and then inserted the jet with blue lock tight a few minutes ago. It tightened down like a normal jet does and i'm now leaving it to dry another 24 hours before replacing on the motor.

I also have a local parts scout looking for a complete set of replacement carbs so that I have spare ones if needed.

Thanks for all the help, i trust I have this one done now. Hope to goodness I'm not posting bad news back when I get back from the lake on Sunday....

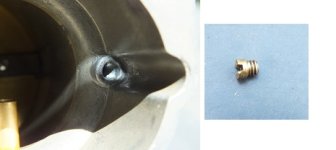
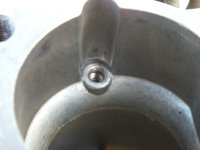
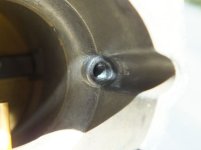
I've attached come pictures for your viewing pleasure.....

Carb Done.jpgCarb Epoxy Threads.jpgCarb Stripped Threads.jpgEpoxy.jpg
 
Last edited:
If the jet fails to stay tight, I'd suggest you have a new one made with more threaded "reach" to engage the good threads.
 
Hi Guys. Happy New Year. I've decided to have a new jet made as the epoxy didn't hold, just too little surface area I think.

I was pouring through a box of old jets at one the privateers places yesterday and have found a Yamaha jet with the right size threads and it's it reaches the remaining threads beautifully.

Quick question for those in the know. The Yamaha jets appear to use metric size and the Mariner jets appear to be Imperial. The correct jet is a 0.034 inches. that's around 0.8636 MM. I can find new jets that are 0.84 mm which is 0.033 Inches. What is the effect of reducing the size of the Progression Air Jet? From what I see this is a very critical part of the carb operation. I would imagine this would richen the mixture. Am I correct?

In case anyone is wondering there is no one in my area that is willing to make me a jet, they all say it's just too small and too much of a pain in the A for one jet....

I've also been to just about every used outboard centre within a hundred miles and not one of them has my carbs.... either the venturi is too small (Probably off the 150's) or it's the ones without the accelerator pumps....

How can something this small be such a show stopper?
 
Just remember this: the gas flows through the jet from the BACK to the front (where the number is).
Not always as the small merc 3.5/3.6, inline 40/45/50 walbro/Tillotson with fuel pumps,inline 4 75/80 with ADI, and the 3 & 4 cylinder loopers(70-125) flow from number to back :D
Just get a jewlers drill bit the right size and bore out the yamaha jet to the right size.
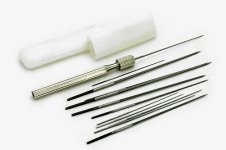
Jets are not drilled they are reamed to size. Use a jet reamer as swirl marks from bit can actuall make engine run leaner even if hole is larger. Theis is for fuel jets not air as most to rich anyway....
72 jet reamer kit dscn3835_500.jpg
 
Last edited:
Pretty sure that's an air only jet. I ran my Merc triple with NO jet in it (by accident) and it didn't make a lot of difference, so I'd think the sizing is not that critical.

Jeff
 
Hi All. So I have some feedback. I managed to find a proper Mariner jet in a size 0.031. It's also an air bleed jet and looks identical to the original. Same thread pattern too. Perhaps when I damaged the threads on the carb I also damaged the threads on the jet.

I "drilled" out the Jet by hand using a jewellers 0.80 mm bit and then used a small 0.80 mm burr, both are smaller than the 0.034 Inches needed but I played it safe and got the bur moving smoothly through the jet. Used a needle to confirm that the size is idential to the 0.034 in the other cylinders and then used Blue Loctite with 24 hours to dry before running. Took it out this weekend and it's still as tight today as when I installed it.

The plugs are surface gaps and the electrodes are all burning idential at a nice biscuit brown. goes smoothly from idle to intermediate and then to WOT, so I think I have that problem solved.

A new one popped up though with the motor now running way too hot, with a tell tale that could boil water....but I will submit a new thread on that. Thanks for all the advice and assistance on this.
 
Back
Top