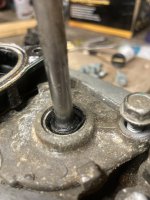
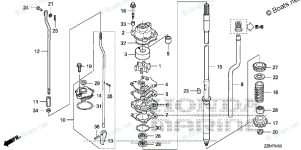
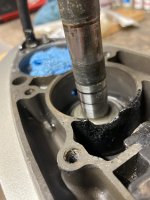
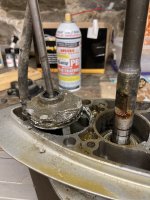
Too bad the thing was so hung up in there. Probably has much to do with the salt water. The parts page depiction shows the seals "stacked" with flat sides facing rearward/outward. I believe that is probably what you'll find in the shop manual. See item 23 in the link below. Sorry, I don't have access to the SI for the 50D.
https://www.boats.net/catalog/honda...-bbej-1000001-to-bbej-1099999/propeller-shaft That would be for maximum gear oil retention. I believe it's due to the pressure build inside the case as it heats up being more forceful than the vacuum created as it cools. But....I have never done the math on that. Just assuming their engineers did. I do have extensive background with stacked seals in hubs though and that is how they are installed as a general rule. Having said that, I know many will install them facing each other to eliminate the possibility of water intrusion. I wouldn't necessarily argue with doing that. If installed with care and prelubed the result, in either case, will be a sealed unit as long as the shaft surfaces where the lips ride are clean and unscored and the boretite compound on the seal shell isn't marred or chipped. The seals are small enough that getting them in the bore squarely shouldn't be too difficult but I might consider having an extra on hand in case I boogered one up. It happens...to me anyway. Good luck.