Logo

1972 Mercury 650 3 cyl carb floats

What would the performance symptoms be when the float valves have failed. Seeing fuel spil into the carbs when priming with the bulbs is certainly a symptom. But, what would one experience in performance? [FONT=&quot] e.g. failure to start, stalling, etc.?[/FONT]
 
The motor will not have a lot of power.----Yes it will stall.----Simple to correct and repair this issue.-----If you just bought this then install a water pump impeller before your first fishing trip.
 
Racerone, thanks for your help. I did just rebuild the water pump assembly with new components.
I will remove the carbs to check out why the floats are not working properly. It is a pain to remove the carbs but it may clear up my performance issues. I did see a suggestion to check the floats prior to reinstalling on the power head. That sounded like a good idea. i should get pressure/firmness in the bulb to tell me the float valves are working.
I will report back. Thanks again for your generous advice and suggestions.
 
Need to install plastic floats as if yours are original they are the foam type and ethanol damages them. Makes them absorb fuel and get heavy.
 
Gentlemen,
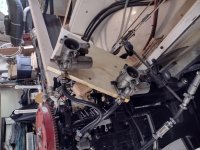
As you are probably aware, the design of the 3 cylinder Mercury 650 makes it a pain to remove the carbs although I am getting pretty good at it. (When Mercury engineers changed the design to 3 cyl from 4 cyl, they just moved the two carbs closer together without leaving room to access the carburetor mounting nuts.) I removed the carbs to inspect the floats. They are black foam. I don't believe I changed them when I rebuilt the carbs in the Spring of 2021. To test whether they should be replaced, I built a jig so I could mount the carbs with plenty of visibility to monitor the fuel leakage.carbs mounted on jig.jpg

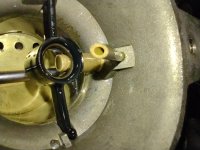
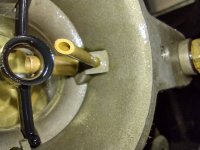
I then reattached the fuel line and pumped the bulb. I wanted to make sure the float valves were working properly. The bulb became firm. I figured I would leave the floats in the bath of fuel to see if they absorbed fuel. After a few minutes, I squeezed the bulb again. It was still firm but I noticed fuel inside the carb 2. On closer inspection, I could see that the fuel level inside the brass tube (is that called the main nozzle? I can't quite tell from the parts diagram) was right the top. Here are the two carbs:
carb 2 fuel level.jpg
Carb 2-fuel right at top of tube

carb 1 fuel level.jpg
Carb 1 - fuel below top of tube

Consistent with your assessment, I believe what is happening is the float absorbs fuel and sinks farther down into the bowl which allows the fuel level to be higher than it should be prior to turning off the valve. Thus, fuel simply bleeds out over the top of the brass tube. Am I thinking about this correctly?

So, to you experienced guys, would a faulty float, as described above, cause the engine to stall at higher rpms? I’ve reattached the video showing how the engine stalls out.
 
Do you know how the 2 carburetors supply fuel/air to 3 cylinders ?----Do you understand why the 2 carburetors are mounted the way they are ?
 
I have a general understanding but please share your knowledge.
I have not found a source for the engineering choices of outboard engine manufacturers. That's why I'm on this Forum.
 
Carburetors feed directly into 2 reed blocks / bearings.-----The top carburetor feeds the air to # 1 cylinder and 1/2 the air to #2 cylinder.-----The bottom carburetor feeds air to #3 cylinder and 1/2 the air to #2 cylinder.------The motor has 3 sealed / separated crankcases.-----The position / location of the 2 reed blocks determined that the carburetors were closer together.
 
Racerone, thanks for your reply with helpful information. i did not know how the reed blocks channeled the air/fuel mixture or that the crankcases were separate. My point about the positioning was that when Mercury chose to go to a 3 cyl 65hp engine from a 4 cyl 65hp engine, perhaps they could have paid a bit more attention to where the mounting studs and nuts were. I do now understand why, when I tilt the engine up when trailering, I get fuel from the carbs. I try to unhook the fuel and run the engine to drain the bowls so as to reduce the fuel escaping. I am planning to post the tricks that I have learned during this process to remove the carbs... probably all stuff you are experienced with.

But, back to my trouble shooting... do you agree it's time to replace the floats? and, by doing so, I may correct the stalling issue? That's my plan but wanted a bit of reassurance that my plan may work.
 
That 3 cylinder motor was designed in a hurry to compete with the hot selling Johnson / Evinrudes in those days.----Not my favorite motor.---Start with a compression test.---Post your numbers.-----Lots of issues with top cylinder.----Motor needs new impeller every 3 years too.
 
After a few days, here's an update. Two days ago, I borrowed a compression gauge from the local auto supply and checked compression. #1 70, #2 72, #3, 70. I found the results unusual since I recall checking the compression just prior to starting down this road and it was, as I recall, about 120psi. A few days ago, I bought a new compression test gauge. It arrived today. I didn't want to report the low psi until I gave it a second test with the new gauge although a nice even psi was nice to see. Anyway, today's test results were #1 120, #2 125, #3 120... much better. Seems no issue with that troublesome #1 cylinder.
I was going to visit my daughter in Seattle tomorrow but they have Covid in their home as of this morning. So, I'm not going...more time to put into this engine.
Tomorrow I will check for spark at each plug back to the CDI unit. Since nothing has been changed in the ignition circuitry, I am confident the CDI is working properly. But, I will test the voltage at the coil and that the CDI unit performs according to the testing specs. As a reminder, I have the CDI brand CDI box.
I did put in new floats last week and tried to start but no dice.
When I rebuilt the carbs, I didn't remove the old welch plugs and clean out the ports behind the welch plugs. Now I'm thinking that was an error.
So, if I have spark at each cylinder and the engine doesn't start, I supose I will need to clean out what's behind the welch plugs.
I also noticed a very slow fuel drip from the brass plug at the bottom of one carb.
Here are my questions for you experienced guys:
Is my plan as described above sound?
Should I expect no leakage at all from the carbs or is a drip here and there typical?

I have an appt with a local marine engine mechanic on July 6th. Other than the above steps, what can I do prior to bringing it into the mechanic?
Here are photos of the plugs. They appear normal to me. Any other thoughts would be appreciated.
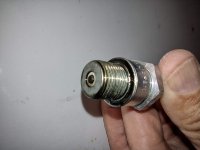
Plug #1 6-15-22.jpgplug #1

Plug #2 6-15-22.jpgplug #2

Plug #3 6-15-22.jpgplug #3
 
Put some fuel into each cylinder.----Install plugs.-----Crank it over.-------If there is spark the motor should " bark and roar " for a second.----Tells you if you have spark issue or something else.
 
I assume the distributor was removed for the carburetor work.-----Hopefully the belt was timed correctly on installation.-----Models with 3 coils used a different carburetor I think.
 
Last edited:
Thank you for your responses.

Does anyone know how to keep logged in for longer periods of time? It happened again that I lost my text when the forum said I needed to log in again. It is quite frustrating.

OK, back to business…
How much fuel goes into each cylinder?
Could I also squirt some fuel via the carbs?

As far as the engine year, the s/n is 3452923 which I believe I confirmed to be a 1972. (I also have a 1973 engine, s/n 3665250 for parts.) Both have a distributor. The 1972 has a CDI switch box p/n 114-4796 with a matching CDI brand coil. There is only one coil. The distributor trigger issue and timing/sync of timing belt was resolved previously.

The distributor does not have to be removed to remove the carbs. However, the starter motor does need to be removed. (Anyone who wants a writeup on how to remove the carbs, let me know. There are several tricks.)

As you may recall, the issue I’m trying to remedy is a high rpm stall as shown in this video.
<span style="font-size: 11pt; font-family: Arial; color: rgb(0, 0, 0); background-color: transparent; font-variant-numeric: normal; font-variant-east-asian: normal; vertical-align: baseline; white-space: pre-wrap;">

The things changed since that video are new carburetor floats, fuel bulb. I also played with the idle mixture and idle speed.

I’ll report back the results of my spark testing.

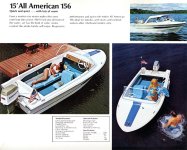
By the way, here is a page from the 1970 Larson brochure showing my All American. (My boat has green trim.
1970-Larson-Brochure-7.jpg
 
I see it hid in photo ..blends in with wood. If you have spark problems check coil output 1st, the coil wire, carbon pin in cap and finally the spring in boots
 
Faztbullet, I have an aftermarket CDI brand switch and coil. The green wire from the switch to the coil should register 200V. I haven't tested that yet but certainly can.
I've tested the switch to make sure it fires when its supposed to following the CDI troubleshooting guide. When you suggest checking the "coil output" what test procedure are you suggesting?
How would you test the coil wire? Simply continuity? And, are you referring to the wire from the switch to the coil or from the coil to the distributor cap?
The rotor and cap have been replaced recently.
I'm not sure what you are referring to by "spring in boots".
What type of spark tester do you use? I'm not sure the one I have is working properly. It is a simple device which allows one to set a gap between two electrodes and hooking one end to the source of the spark and the other to ground. I've read the spark should jump a 7/16" gap. Does that seem correct to you?
Thanks for your help.
 
Well, it seems I have a bad trigger. While I can’t find a sales receipt, I’m pretty sure I replaced the trigger in 2019 and the engine has run since. I’m pretty bummed right now with this engine.
I am aware that CDI sells a trigger tester. Does anyone have a procedure to test the trigger short of purchasing the CDI tester.
Here's what I've done so far:

  1. Checked voltage on the white wire going into the CDI switch box, 12.8 volts
  2. Jumped the black and white/black stripe wires, touched the blue wire to ground to see spark from the coil.
  3. Saw voltage on green wire when touching blue wire to ground
  4. See no voltage on green wire when cranking with the CDI switch box hooked up. This tells me the trigger is not sending a signal back to the CDI switch box.
What causes the trigger to fail? If the trigger has in fact failed, what other component is causing this failure.
Comments welcome.

 
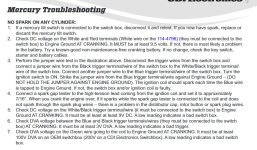
I found a CDI Electronics Troubleshooting Guide online at Marine Engine.com.
Here are the tests:
CDI troubleshooting pg 85.jpg
This set of tests added #6 to test the DVA voltage coming out of the trigger. A low reading (below 3V DVA) means a bad trigger.
Well, I got 3.5V DVA.
So then, I went on to test the DVA voltage at the green wire going to the coil. Since I have a CDI switch box, I needed 200V DVA. I only got 2.2V DVA.
Now my conclusion is a bad switchbox.
I plan to call CDI tech support on Monday to go through this with them.
So, I'm leaving the engine project for the weekend and going fishing...in my engineless drift boat!
 
Decided to go for a final day of shad fishing yesterday. So, today was the day to speak with technical support at CDI.
Here's what Clark said about my voltage on the green wire issue, "Reverse the probes of the ES DVA device. The ES device is polarity dependent whereas the CDI switch is not."
I also asked what could cause a failure of the CDI switch box. He said "poor ground" which was one of the issues I found earlier and fixed.
I also asked what could cause a coil failure. He said, "internal arcing."

Anyway, I returned to the engine to reverse the probes and run the test on the green wire again. Wahlah, 205 volts. So that pointed to the coil.
As it turns out, I already purchased a CDI coil. I don't remember why but I had one in my inventory. So, I swapped it out and tested again for a 7/16" spark and I got it. I tested for spark at the distributor cap end of the coil wire and I again got spark. I tested the spark plug end of each spark plug wire while cranking and I got a spark.

Now I'm back to timing and synchronization. For that I need to be outside and it is too hot in the sun.
My timing light should work since I have a spark.

I'm again cautiously optimistic about having the engine running so I can take my grandkids for a ride over the 4th of July weekend.

 
Where did everyone go?

Is it a good idea to set the timing with a timing light without the spark plug wires connected?
It seems I could attach the spark meter to the #1 spark plug wire, disconnect the other two wires and be able to set the throttle primary pickup at 0 to 2degrees BTDC and then the max spark advance to 23 degrees BTDC. But, I'm not sure this is a good idea.
I'd like to keep the engine inside the garage and not pull the boat out. the instructions day to burn all the fuel out of the engine so it won't fire when cranking to set the timing.
Thanks for your help.
 
Back
Top