This is not the first time this type of request has been posted but I have read about this on this forum and many other locations and I have tried suggestions of those who have so kindly responded. O Neptune, god of the sea and all who navigate her, enlighten me as to the solution (or anyone else who might have a clue as to what my next step should be. Thanks in advance.
I bought a 1964 Evinrude 9.5 Hp Sportwin outboard (two cylinder two cycle) from an older guy who said the motor ran before he put it away a couple years before. I’m now certain that was a lie. I took the carburetor off. The two screws con the upper section were corroded together. One head snapped off. I drilled it out and rethreaded it. The float bowl was loaded with white corrosion and crap. I installed a new float, needle and seat. I pulled the two Welch plugs out and cleaned every passage with a wire followed by compressed air. I pulled the bowl drain plug and tried to remove the high speed jet but I was scared that I’d damage it given my trouble in getting the screws out of the upper section. I could put a wire and carburetor cleaner through it and blew compressed air through it. I bought a brand new Attwood fuel tank and hose. (The fuel lines under the cowl from the connector on the engine to the carburetor looked like they were new. I removed the glass filter bowl and cleaned the screen inside. Using the squeeze bulb near the tank, it was easy to force the freshly mixed gas through the fuel system to the fuel line where I could get a gusher of fuel when squeezing. I replaced the fuel pump with a brand new aftermarket pump. I installed the low speed mix screw and backed it out 1-1/2 turns. Using the squeeze bulb with everything in place, there were no fuel leaks and the bulb was firm. (I installed regular tiny hose clamps or zip ties at all connections).
The guy that owned it said compression was 55 psi. I checked the compression myself and got 65 psi/upper70 psi lower. Other people who own this engine say 65-75 is the median to expect.
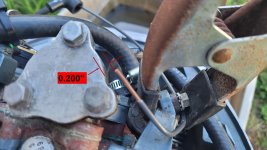
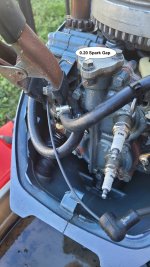
I got strong spark at each plug pulling over the engine.
After giving up pulling and pulling the rope starter, I used an electric drill with a ¾ socket on top of the flywheel to start the engine in a water tank. It would only run with the choke nearly closed and wouldn’t idle. The slowest I could go was about ¼ throttle. Water output from the pump was good. I thought maybe I’d missed something so I took the carburetor off again and disassembled and cleaned everything I could again making certain that every opening had a wire passed through it and then carb cleaner and then compressed air. I put it all back together, reinstalled and tried again. Same thing. The engine would not run without being nearly full choke. I also tried squeezing the bulb at the tanks to check if the engine was being starved BEFORE fuel got to the carburetor. While the bulb was slightly softer it was not soft and it had not collapsed like it wasn’t feeding.
I bought an ultrasonic cleaner. I removed the carburetor again, disassembled it and put it in the ultrasonic cleaner with about 1:4 sudsy ammonia to water and ran the cleaner for an hour with the solution at 140°F or so. It’s pretty remarkable what comes off when you think its already clean. I blew off the parts of the carburetor with compressed air including all the passages. I was confident it would do the job. It didn’t. The motor would still only run with nearly full choke. I thought that maybe the engine was sucking air from somewhere other than where it was supposed to so I took general purpose grease and dabbed it around the low speed adjustment screw assembly and around the throttle plate pivot shaft on both sides. Same thing. I tried opening the slow speed adjustment in ½ turn intervals until I got to about five turns out but it didn’t change the behavior. I’m running out of ideas to try. I’m wondering if anyone knows what the diameter of the high speed jet is as I’m tempted to find a drill to run through the orifice there.
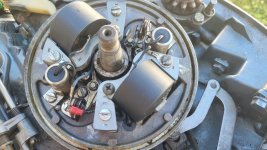
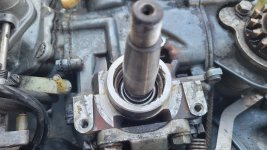
Regarding ignition, I pulled the flywheel and checked both sets of points. I ran an fingernail emery board between the surfaces and checked the gap for each was at 0.020”. Coils and wiring looked good. I reinstalled the flywheel and the key. I checked the sparkplugs. They appear to be quite new and they didn’t show signs of wear or fouling but I notice that they are Champion J8C and there appeared to be quite a bit of soot from running rich. These are probably hotter than is suggested by Evinrude but I don’t know what influence these would have on my problem.
I went to the auto parts store and got new plugs. They didn’t have Champion but I got the Autolite equivalent of both the Champion J4C (recommended plug by Evinrude on their website – my repair manual covers a bunch of engines and they don’t say) and the equivalent J6C. I installed the Autolite 353 (the equivalent J4C) plugs and they make the engine start much easier. The engine will start with one or two pulls when I choke it. I don’t have to use an electric drill to turn the engine over but the running-on-choke issue was the same.
I took the carb back off of the engine and disassembled it again and placed it back in the ultrasonic cleaner with water and a ton of Dawn Dishwashing liquid (after watching Tarryl Fixes All on YouTube where he evaluates different solutions of ultrasonic cleaners). I “cooked” it for an hour at 160°F. I blew it all out with compressed air. I very, very carefully checked the high speed jet (at the bottom of the float bowl) with a bright flashlight and could easily see down it and stick wires through it. A 0.031” copper wire goes through easily. Folded over to 0.062” it wouldn’t fit. I took an 0.034” strand from a steel cable that would go. I chucked it in an electric drill and slightly bent the end over and ran it up and down inside the orifice to make sure there was no calcified crap that I hadn’t gotten and then blew it all out with compressed air. I tried putting tiny welding tip brushes that I have in it but the smallest would not go.
Thinking again that I might be drawing air from somewhere and leaning out the mixture, I replaced the fiber washer on the bowl drain screw with a buna-N o-ring and I did the same thing for the washer on the low speed mix adjustment. The o-ring sits comfortably against the shoulder in the carb pocket and when snugged down, seals against the adjustment needle shaft though I had kind of already eliminated the possibility of air blow-by when I glommed a bunch of grease around the shaft earlier. Pulling at straws now.
I reinstalled the carburetor and started the engine. Same thing. I’ve mostly run out of ideas. I don’t think I can be more sure about the passages being open inside the carburetor. There aren’t many more locations for air to enter the carburetor to lean out the mixture except at the junction of the float bowl portion and the intake manifold and at the section between the two carburetor pieces. Both gaskets are new. Considering using RTV on both sides of each gasket to eliminate the possibility of air entering. That would be the last place, I think, where unwanted air could enter.
I am now considering ordering another carburetor (all used of course since they don’t make this motor or after market carbs for it). Don’t know what else to do.
I found a used carburetor from a 1968 model of the same engine that was being offered on eBay. I have seen a number of them come and go and they were all solidly over $100 , some over $200. This guy was parting out his engine and it was over Xmas so there happened not to be a lot of activity and I was lucky to bid and buy it and get it delivered to my door for $66.00. It looked good – clean even. I mounted it as it came to me without cleaning or replacing any of the components and the engine will now run better (kind of) without the choke on (sort of). At slower speeds, it sputters occasionally and I can’t get it to a low idle yet. I also ordered another rebuild kit which just arrived and tomorrow, I will again remove this “new” carburetor, disassemble it and put it in the ultrasonic cleaner and then install all new stuff.
I took the carburetor back off of the engine and disassembled it and put it into the ultrasonic cleaner at 160°F for an hour. After rinsing it off in clear water, I blew out all the passages and then reassembled it with a new float and seat and needle and a new o-ring around the low speed idle adjustment and a new fiber washer at the bowl drain screw and then reassembled the two halves of the carburetor with a new gasket between them and then mounted the “new” carburetor to the engine. I reattached the fuel line with a zip tie. I started the engine. Virtually no change from before cleaning until now. If I covered ½ the carburetor horn with my finger, the engine would run and wouldn't sputter. When I took my finger away, the engine started to sputter. I tried adjusting the low speed mix richer but there was no change. If I took my finger off the carb horn, the engine would eventually sputter and die.
I am now considering ordering yet another brand new aftermarket fuel pump and replacing all the fuel lines from the connector to the carburetor but I don’t have faith that this will fix the problem. Any recommendations? I’m out of ideas.


