I changed from graphite core spark plug wires (8mm) to solid core (7mm) because the factory manual specifies solid core but now the motor doesn't make enough power to get the boat on plane unless I remove the cowling.
How-ever your 1988 110hp (Evinrude or Johnson I assume) engine ran properly via using graphite core spark plug wires will remain the mystery of the ages! Those engines absolutely demand a steel wire inner core... there is no alternative. And unless you changed or damaged something else via the replacement of those wires, it's very likely you did something, however small & unlikely, improperly since it ran fine before you worked on it.
If you did not replace the spark plug boots... do so. Observe the mention "below" that states having the wire cut properly, folded back, and making actual contact with the attached metal items.
********************
(Replacing Regular Spark Plug Wires)
(J. Reeves)
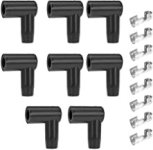
If you also need the spark plug boots and the spring terminals that connect to the spark plugs, purchase them from your local dealership (OMC Part #581027). This includes one boot and one spring connector.
Purchase whatever amount of spark plug wire you need. Be sure to purchase the kind that has a steel (or copper) twisted wire leading through the center of it... not the carbon type (graphite) plug wire that many automobiles now use.
Using your old plug wire, cut the new wire to a length about 3/4" to 1" longer. If you have no old plug wire, just make sure that the wire is longer than you'll need as you can trim the other end later.
The rubber boot, spark plug end.... With the wire cut to the length required, trim back 1/4" insulation again but do not solder tint the wires. Simply fan out the wires and fold them back against the insulation, cutting the excess off to coincide with the insulated diameter. Holding the spring wire terminal, estimate where the prong should be inserted so that the spring will be flush against the exposed wire. Hold the spring terminal away from the wires end (sideways) and insert the prong into the insulation and into the center wire, then swing the spring terminal in front of the exposed wire portion (makes a tight fit for continuity purposes). Spraying the inner portion of the boot where the wire will insert with a small amount of WD40 makes the installation of the wire a easy project.
Now, the other end that slides into the magneto coil... Look into the awaiting hole of the coil and you will see a somewhat threaded tapered prong. Double check to make sure that the wire is cut to the length required (better slightly longer than shorter), trim back 1/4" insulation again but do not solder tint the wires. Simply fan out the wires and fold them back against the insulation, cutting the excess off as explained above, then simply slide the wire into the coil so that the inner wire core of the wire is impaled by the tapered prong within the coil. That's it.... you're done.
********************
The moral of the above is that if the inner wire coil is not forcibly touching the metal contacts from one end to another.... the result is that the spark has at least one more gap to jump... and when under a load, that'll result in weird problems.
I see no mention of who long this engine may have been sitting since it ran normally, and I assume other members are assuming that the engine was running perfect and you just decided to change spark plug wires for some reason? Did you leave anything out?


