Racerone and others, I have an update for you. I now know what caused my splutter 100%!
I received my second overhaul kit I bought and decided to change the top carby float needle and valve too, seeing it has the original from 38 years ago and to minimize risk of that one possibly leaking in short term also. I took it off and re-installed the top carby once done but it started to splutter again after it was running really well on two fishing trips since the 26/11!

Now, I was finally confident it had nothing to do with the carby work I did. I studied everything again carefully and found that when you reinstall the 4 nuts on the carby onto the intake manifold,it can move very minimally BUT enough to make the throttle body not shut EVER so perfectly when the linkage arm is reinserted!! I could not believe this as I, by chance, removed the throttle arm and started it without realizing it was still off and it ran perfect on idle! It is not as if I had to move the throttle spring cam to slip the arm back into the plastic bushing at any stage of my re-installations as it went in firmly with no obvious movement of the cam to me. However, when I took the link arm off and on and snapped back the bottom carby throttle cam, it became obvious to me that it was not totally closed and very little, less than 1mm, in it!
So, I loosened the bottom cam screw and made sure the bottom carb throttle bodies were in the completely snap closed position and re-tightened screw. It was so hard to pick for me as obviously when I reinstalled the bottom carby again on the 26th and tightened the 4 nuts up, it went back in a position where the bottom throttle bodies were completely shutting when the arm was inserted. There you go guys!


 Racerone I have an update for you. Took spark plugs out and I think I am getting somewhere finally! If you look at pics, the plugs on the right are from cylinders 3 & 4 (I have my finger pointing out for cylinder 1 and with 3 next to it and then 2 and 4 in the other pic). So, the plugs on the right are from the problematic bottom carby that I replaced the float valve, seat, washer, pin and float and cleaned out the 4 side screws and jets on the float bowl. It is obviously running a lot richer and fouling bottom cylinder plugs. Why is that so? Any suggestions on where to go from now please? Cheers
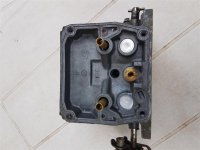
 Cheers.