Logo

BF20D Power tilt problem

BarryK3

Contributing Member
Hi All,

Today the power tilt struggled to raise the motor and now it will not tilt down. There is also a small oil slick on the water coming from the unit.

Any idea where the leak might be coming from? The unit worked perfectly prior to today but I have noticed a slight sheen on the water for several weeks which I thought was fuel but now I realize it was coming from the power tilt unit.

I have the service manual. It says to use ATF. Does it matter what type?

Thanks,
Barry
 
As you can see in the parts page link below....lots of bits to this thing.

It's been awhile too since I rebuilt one of these so memory fades a bit. But I remember that repairing them isn't as daunting as the picture indicates.

https://www.boats.net/catalog/honda...p/bf20dk3-srta-2007-and-later/power-trim-tilt

To pinpoint the leak you may need to separate the trim from the outboard. This requires splitting the stern bracket and removing one side. I believe it's the stbd side but...it's been awhile.

Before doing that though, check the manual tilt valve and drain plug orings (23 and 24 in the parts list)

Don't try doing this over the water! Those are common leak points and could indicate a rebuild is needed as well but you might just get away with an EZ fix here. Much care must be taken not to lose parts or get things out of order...of course!

The other place is, of course, the cylinder piston seal.

While most Dexxron fluid is "backwards compatible" I would stay clear of the V (5) and Vl (6) renditions for servicing this trim. In my experience with hydraulic systems, I have encountered some some warnings about using those sophisticated transmission fluids in straight up pumping systems. Dexxron lll (3) is still readily available at most auto parts retailers and is a commonly used hydraulic pump fluid going back many years. The old "F type" fluid will work too...if you can find it. Also, "power steering fluid" would probably do in a pinch with no harm. Just use a "major brand"...like Lucas... if you do.

If you do end up disassembling this, you should also install new brushes in the motor and seal the point of entry for the power wires with Permatex "Right Stuff" sealer/gasket maker.

CAUTION: DO NOT USE SILICONE SEALER CONTAINING ACETIC ACID (smells like vinegar) FOR SEALING ELECTRICAL COMPONENTS OR WHERE THE ACID CURE CAN "POISON" SENSITIVE DEVICES LIKE OXYGEN (O2) AND AIR/FUEL RATIO (AFR) SENSORS!

I'll leave you with this: Once these units get air in them, they can be very difficult to get get properly bled. It takes a lot of patience and can be a bit worrisome as you're going through the process. But it's totally doable and will eventually work out if you just keep at it.

Good luck.
 
Thanks so much for the detailed instructions! I have the service manual which has the air bleeding/ATF filling instructions. The engine is supposed to be tilted 30 deg. to port while doing this. I will pull the boat out of the water in the next day or 2 and inspect. I may have more questions as I get deeper into this.

Thanks again!
Barry
 
Well, asking and answering questions is why all of us have washed up on this shore. We do our best to help.
Ask away and here's to your total success.
 
I found the leak. It is from the base of the cylinder where it attaches to the body of the tilt unit. Advice?

Thanks!
 
I looked on eBay: none listed right now. I am pretty handy and I have rebuilt a Force outboard trim and tilt before. So, I think I can do the same with this one.
 
From the parts diagram that you sent it looks like the O-rings #48, 49 need replacement. I'm not sure, maybe also the washer #39. Maybe leave the rest of the piston and cylinder alone? Or would you also replace 28, 46, 50, etc?
 
The bad thing about these trims is that they have no power to trim in while underway. The good thing about these trims is that they have no power to trim in while underway!

What I'm getting at is that the lack of force exerted on the piston means that wear doesn't take place as much in these cylinders as it does in larger units. Although, time and frequency of use causes wear too.

Inspect the housing very carefully to make sure that it isn't cracked.

As you can see from the parts blow-up, the cylinder is threaded into the housing and sealed with an oring. If the housing isn't cracked or deformed then you might get by with just the lower housing oring.

BUT...if you get ambitious (like I do) and curious about wear on the piston (like I do) and disassemble the cylinder for inspection....then you will need to replace all the seals and dust cover.

Keep everything as sterile as you can since even a very small amount of blown dust in there can eat one up quickly.

Good luck.
 
I'm starting to disassemble everything.

Any advice about how to remove the large snap ring to free up #14 on the parts diagram, the joint at the top of the piston rod, where it attaches to the stern bracket?

Also, I have to split the brackets in order to remove the large collar and bush at the bottom.

https://www.boats.net/catalog/honda...p/bf20dk3-srta-2007-and-later/stern-bracket-2

These are #17, 18 in the above parts diagram.

My engine has remote control and steering wheel, so it is a real pain to disconnect everything and remove the engine from the boat. I am thinking about just freeing up the starboard bracket and moving it about an inch laterally to free the collar and bush. Do you think this will work, or go ahead and remove the whole motor?

Thanks,
Barry
 
I'd like to be more help, but I have no experience with the BF20 at all. On the will it fit tilt question, you might try comparing a few part numbers. That should answer your question.
 
Why didn't I think of that? I looked it up on the parts diagram. 15 and 20 hp share the same unit. 25 and 30 hp share the same unit.

Thanks,
Barry
 
Sorry for the late response...too much going on right now. I will have to look at my outboard because the snap ring question I have no answer for off the top of my head. I will take a look tomorrow to see if I can recall how that's accomplished.

You don't need to remove the outboard from the hull to take off the one side of the mount. What I found that works is to disconnect the trim and then tilt the motor as far up as it will go then lash the powerhead down to keep it there. If your boat has stern cleats on each side, those will aid in doing so.
 
What I should have explained about tilting the motor up is that, as the powerhead comes "inboard" in relation to the transom, it balances the weight of the engine against the weight of the extension so that a sort of equilibrium exists that takes a large load off of the stern bracket. This "unloading" of the bracket facilitates you being able to remove one side (stbd f I remember correctly) while the other side supports the outboard.

Of course this all depends on if your splash well isn't too close and thus "catches" the engine before it can come down enough. I used to do this on open hulls with no decks so clearance wasn't a problem. I hope it can work ok for you.
 
Hi Barry,
Sorry to leave you hanging but had a bit of an emergency here to deal with.

I see the snap ring but don't remember how I got it off. I have so many different sets of snap ring pliers and interchangeable tips, including 90°, 45° and xtra long of all sizes, I'm sure I must have found the "key".

But, I have also used screwdrivers and ice picks to get snap rings off too. It's in an awkward spot to access but it's also why I remember taking the starboard mount off.
That and that the tilt pin will only slide out in one direction...to stbd.

I guess this doesn't help much but it's all I can suggest.
 
Thanks! I was able to twist the E ring around with a small vicegrip pliers and the I used a set of punches to drive it off. That part went pretty well. I drove out the shaft with a small steel bar and a hammer (after penetrating oil). I also got the 2 transom bolts out of the starboard bracket.

BUT the clamp screw on the front of the bracket is completely frozen. After several soakings with Seafoam Deep Creep (my go-to penetrating oil) it is still frozen. I'm afraid I will break off the plastic handle so I was thinking about drilling out the rivet and removing the plastic, then getting a wrench directly on the metal.

I hope your emergency had a good outcome!

Any other ideas?

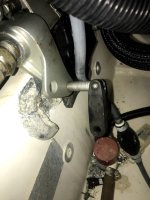
Clamp Honda BF20.jpg
 
Well, while not ideal, it looks like you have enough exposed clamp bolt to use curved jaw Vise Grip or (my favorite) a large pair of parrot beak slip joint pliers. I like parrot beak to grip threaded shafts like that because they won't slip if used properly and you can then dress the threads you may damage with a small three corner file.

I would first try using heat from an electric heat gun or even a hair dryer to try and aid the penetrant to flow further into the joint. This is where I would choose to use a bit of my precious Aero Kroil penetrant too. It is the best penetrant that I know of. I've never tried the Sea Foam stuff.

This is the type of thing I learned to hit with the Aero Kroil a week or two in advance of needing to turn it. But I also know I've forgotten to do it more times than I care to think about. Don't forget to dose the other clamp and any others you may think of. You never know!

Good going on the snap ring!
 
Back
Top