Logo

GT150 lower unit reconnect

trey915

New member
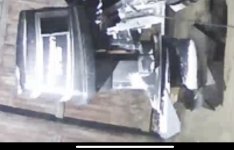
I just pulled my LU and replaced the dog clutch and reverse gear, along with a water pump replacement. When I pulled the LU I marked the shift rod so I could reassemble properly. Unfortunately the mark rubbed off. My manual (non Seloc) says to screw it in 9 turns, which I’ve done. I can’t seem to get the shift rod to line up with the linkage. Is there a trick that I’m missing? I pulled the 3 carbs off to try to get better access but it’s a PITA to get at the screw and I can’t get at the shift rod to save my life. Thank you.
 

Attachments

  • 0C341287-44FA-4750-8F1D-A3A6FC00C9B9.jpeg
    0C341287-44FA-4750-8F1D-A3A6FC00C9B9.jpeg
    798.8 KB · Views: 9
Last edited:
There is a measurement to set the shift rod at !-----I never use the " number of turns " method----Disconnect the shift cable so that you can line it up to put the pin in.
 
Ok. I’ll try that. I’ve got the carbs all removed along with the shifter and throttle cables. I’ve put the lower unit on more than 10 times adjusting the shift rod or turning it or shifting back into reverse (because it didn’t stay), etc. I’ll try actually measuring and see how it goes. I figured maybe I was missing something or some pro trick. Thank you.
 
STOP-----You need to set the shift rod height.-----Once that is set you do not turn it for any reason !!!----You move the shift cable and linkage on the motor to line up the pin and the pin holes..------Failure to heed may result in damage to gears and clutch dog again.
 
??----I believe the crossflow V-6 ( 1987 here ) all used the same shift rod dimension.---It be 22-1/16" for long shaft.
 
Last edited:
That is the dimension I used. I did have to poke a screwdriver in the starboard side to push the shift rod forward a bit, but it went in fairly easily after that. Thank you, thank you, thank you. I built a custom tool by using an aluminum yard stick and drilling a hole at the 22 1/16 mark. I put a bolt through with a nut and used that.

Now, when I was reassembling the lower unit it said something about an oring for the driveshaft but the water pump kit did not come with it. Also, the oring that goes around the bottom of the water pump housing was a little small. I think I got it in most of the way right but I am concerned that it might have pinched instead of seating in the groove. So, my questions:
1) if that oring did get pinched how big of a deal is that?
2) I had an oring at the bottom of the driveshaft below the water pump but nothing above the water pump housing. Am I missing an oring and if so, what issue(s) would I notice?
 
For a 1987 model 150 It shows an o-ring for " driveshaft to crankcase "------It fits in a groove just below the spline.-----Common to grease the spline and install a new o-ring there.
 
What does that o-ring do and am I hurting anything if I don’t put one on? My motor is either an 88 or 89. The parts diagram in my manual doesn’t show one but the instructions say there is one. I know the book covers several years and models so I wonder if mine needs one.
 
The 88 and 89 models also show that o-ring on the gearcase page.----It keeps grease on the spline and moisture out.----Your motor / your choice.
 
Back
Top