Logo

New here AQ130 manifold question.

I am not paid by the forums I am on either. It's a labor of love, sometimes. But I do go out of my way to help those I start up a conversation with, and try not to leave them hanging. Or I simply tell them I do not know. But I don't leave them hanging and wasting their time waiting for a reply that doesn't come.
 
Quick update. Got 99% of the parts in, everything cleaned up and ready to put back together. Part I am waiting for? The exhaust manifold gasket from Bulgaria, should be here next week.


The biggest hurtle I foresee, is getting the goofy copper cooling line back into the top of the exhaust manifold and all lined up. Ricardo prolly ticked at me, but any tip would be helpful. If not, I get it and I am sure I will figure it out. But thanks if you do! It might help someone else down the line.

Will keep updating as I go.. Thanks! Jim
 
Up-date. Still waiting on the manifold gasket and now an oil cooler. As Tom Petty use to say, the waiting is the hardest part! Changed the oil & filter today. Came out black and not milk colored gathering that's a good thing. Did not see any metal shavings or the like in the pan.

Looking at the front end of the oil cooler, I could tell someone used gasket maker to seal it. I removed the bolt and found a 1/4" chunk of the cooler tube lip rim was broken off and no way it would seal from just the O-ring. Step back move forward.

Deck wise, I have checked all the stringers and they are all solid, as is the transom. Decking at this point is going to take a back seat. Will get a game plan and do this winter maybe sooner if all goes well on sea/lake trails.

Other then the parts. The manifold, the used copper cooling tube for the top of the manifold, oil cooler and misc nuts bolts and crap not doing bad yet. Guessing around 500 or so. Labor is priceless, specially drilling out the broken manifold bolt and re-tapping the existing threads. PIA!

Sanity wise, considering I am not a mechanic and have never attempted anything like this. Doing pretty good.
 
You are getting a first hand look at what previous owners can do to a boat.
I spent approx 24 years doing AQ series repair..... and while I have not seen it all..... I have seen some amazingly stupid and silly things done.

Keep up the good work!
 
Thank you, I appreciate the comment! And yes, I am seeing some things and thinking WTH was this guy thinking.


I need to get the oil cooler nut off. I don't have a deep socket that size nor can I find the size of the nut itself online. Looks like it's an 1" 1/8th but guessing maybe metric? Thoughts?
 
So I finally got all the parts in, and can start putting this thing back together. But work is getting in the way.. Oil cooler nut for anyone searching is 1" 1/8th. 24 dollar deep socket for a 10 min job.

On the exhaust manifold gasket, does the raised side of the gasket go against the head? Guessing so?
 
From what I gather, "on youtube" the manifold gasket should go the thicker raised side towards the head. That said, tonight I was able to get the goofy copper cooling line that goes into the top of the manifold seated down pretty good. Again who ever came up with this design was either a genius or a complete KA KA head! I am pretty sure they are dead now and never thought some idiot would be even wondering how the hell how to put one in 43 years later.


Debating if after I mount the manifold to the head and line up the cooling line to the thermostat fitting, if I should put a bit of RTV into the top gaps over the rubber gaskets that fit into the top of the manifold or not?

I also got the oil cooler in yesterday, picked up for 60 bucks. In really good condition. I will say, from the searches I am doing. Parts and info in general for the AQ130 are becoming scarce. If anyone reading this next week, a month from now, or even a year or more from now. DO YOURSELF A FAVOR AND PASS ON THE BOAT WITH THIS ENGINE IN IT! Good deal or not pass on it. I am not smacking my head against a wall yet, but honestly I myself should have passed on it. It has been a great experience working on it. I am by no means a mechanic at all! But I will say my son and I have had a good time, other then some crap getting in the way working on this thing.


FYI a re-cap for the search engines. The boat is a1976 Reinell tri-hull with a Volvo AQ130 engine/270 drive.
 
Debating if after I mount the manifold to the head and line up the cooling line to the thermostat fitting, if I should put a bit of RTV into the top gaps over the rubber gaskets that fit into the top of the manifold or not?

I would wait until you get the engine running to see if there are any water leaks. With that said, the manifold cooling lines on my AQ130 are all sealed with black RTV and I have used blue RTV on the lines that aren't exposed to high temps with success.
 
Thanks for the info! I don't know if it would make a difference or just added security? I was thinking about using a couple of large hose clamps around the manifold and cooling tubes. Not really tightened down though, just tight enough to hold them down/in place to keep it from popping out. Ay idea how much pressure it is under?


I forgot, there is the stainless clamp thing that mounts mid section to the 2 to cooling lines. I assume that's to help keep it in place as well?
 
Last edited:
Ok, so I got pretty much everything back together. I need to get the battery hooked up and a couple of new electrical connections to the alternator redone. Then get some fresh gas in there and the oil, fire it off and see what we get. I to he valve cover off, and someone used blue gasket maker on top of the cork. I should have checked it sooner, but I didn't. Ordered a new one for 6 bucks, should be here Friday easy fix.


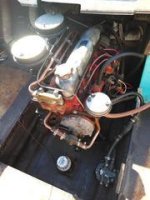
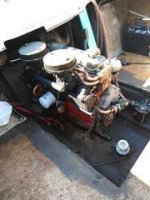
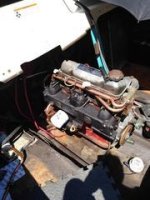
Overall everything went back together really well, I used new nuts and washers where needed. Here is a current pic for those interested.
 

Attachments

  • p5Mf8F.jpg
    p5Mf8F.jpg
    11.4 KB · Views: 69
  • 1TodhF.jpg
    1TodhF.jpg
    11.9 KB · Views: 66
  • OCTOGt.jpg
    OCTOGt.jpg
    12.2 KB · Views: 62
Last edited:
So a bit of a set back. Engine fired right up and came to temp and held at 170. But. Water pump leaked/dripped against the timing cover, and the manifold cooling tube leaked at 2 of the fittings. One other problem, the gas line fitting to the forward carb was dripping gas. Not something I was expecting.

Everything lines up right, and when I take the fitting out and swap it with the other it still leaks/drips. Look like it's where it meets the carb. When I squeeze the fuel bulb I can see it come out. Not sure if I can put a small gasket in there or not?

As far as the cooling line, I guess I will have to pop it out and try again and maybe try sealing with some RTV or something else, but will it even old or not? If it doesn't, not sure what to do at that point?


Would appreciate some feedback if possible. Thanks! Jim
 
Went back out and took the manifold cooling tube off, thank God I can remove it with out removing all the other crap. I got it to stop leaking about 90%, I can see now I am going to have to tweak it a bit to get it to fit properly, which I had thought I did. It had other plans. And I will most likely need some RTV or something to help seal it. The 2 center ones now do not leak at all. Its either one end or the other rocking against each end. Sucks it's copper, you can't just whack away at it. I am hopeful though on this though!

I need to figure the carb supply fitting leaking, may look for a small round gasket to slip in there. Maybe a motorcycle shop or else?

The water pump does quit leaking after it's warmed up, still need to deal with it though.


Temp wise, as long as I have the water pressure right from the hose (no ears) it idles at just below 170* or so. I took it up from 1000 to 2600 RPMs and it stayed below 170 as well. So I am assuming the internals are working right.


Again any expert advice/tips would be helpful!
 
Last edited:
I was able to pull the water pump off, a bit of it on the timing case side was corroded at the btm lip. Pretty much like the oil cooler was only not as bad. I cleaned it up and put a new bit larger O-ring in, and initial test it is holding. I am trying to figure out on how to seal the cooling tube better though. Looking at it, do I put a little black RTV on it and the o-ring, then press it into place? Or press it into place, then RTV around it?
 
Went back out and took the manifold cooling tube off, thank God I can remove it with out removing all the other crap. I got it to stop leaking about 90%, I can see now I am going to have to tweak it a bit to get it to fit properly, which I had thought I did. It had other plans. And I will most likely need some RTV or something to help seal it. The 2 center ones now do not leak at all. Its either one end or the other rocking against each end. Sucks it's copper, you can't just whack away at it. I am hopeful though on this though!

I need to figure the carb supply fitting leaking, may look for a small round gasket to slip in there. Maybe a motorcycle shop or else?

The water pump does quit leaking after it's warmed up, still need to deal with it though.


Temp wise, as long as I have the water pressure right from the hose (no ears) it idles at just below 170* or so. I took it up from 1000 to 2600 RPMs and it stayed below 170 as well. So I am assuming the internals are working right.


Again any expert advice/tips would be helpful!

Long ago I had an AQ110 with those goofy water tubes. While I was able to get it to work, for a while I was considering tapping the holes in the manifolds etc and using hoses and threaded barb fittings. You might consider doing that. I sold the boat before that got to be an issue....https://www.mcmaster.com/stainless-threaded-pipe-to-hose-fittings

re: carb fittings... My AQ110 had "banjo" fittings and as I recall had copper washers as gaskets.
 
Last edited:
Thanks for taking the time to reply! On the carb I figured out I was missing the thin stainless O-rings, found it in the bag I had those parts in. Should have figured it out sooner. What's funny though, the back carb was fine with out it.


On the cooling line another thought was to cut a space between each of the fittings and splice with hose then clamp? I am thinking it would allow each one to seat individually vs being all one rigid line and having one fitting fighting with the other to stay in the hole. If that makes sense? That would probably be a last ditch effort.

I do like your idea on the fittings, Not sure I am capable of threading the cast iron though, will have to research that. Great tip, thank you!
 
Update 9.0 I messed with that main cooling tube tonight, the only one leaking just a bit, is the aft one. I am going to remove it and try to bend it a bit down and see if that helps. This system still bothers me! If it blows and or fails, and starts squirting out under way in the middle of bay or lake that could really be a bad thing. Not sure if a bilge could keep up? Been in worse situations when I lived in Dutch Hbr Alaska, so will deal with it if it happens I guess.

The water pump leak is good and no water dripping. The fuel line carb fitting, I still see a very minute bit of fuel wetting the fitting. So I Will probably pick up a couple of new aluminum gaskets. Got the valve gasket in today and installed it so good there, not that it was a real life problem.


I fired it up, let it come up to temp, then slowly took it up to 2800 RPMs and the temp stayed steady at 168*. Brought it down to idle with the same temps. I do think some of the cooling tube issue might be from the pressure from the hose. I have it turned up just enough to keep it cool, but may be more pressure then normal suction from the drive?

The intake water strainer did leak a bit out of the two top brass screws yesterday, and I by-passed it with the hose tonight. Might order a new one or a different style, doesn't look like much to it. Guessing there are different types/styles out there that are retrofitable?


Again thanks for any and all info!
 
.......................
Update 9.0 I messed with that main cooling tube tonight, the only one leaking just a bit, is the aft one. I am going to remove it and try to bend it a bit down and see if that helps. This system still bothers me! If it blows and or fails, and starts squirting out under way in the middle of bay or lake that could really be a bad thing. Not sure if a bilge could keep up? Been in worse situations when I lived in Dutch Hbr Alaska, so will deal with it if it happens I guess.
I would suggest that you ask a buddy to go out with you (for the first few times) in his/her boat just for safety reasons.
Be sure to have a tow line with you!


The water pump leak is good and no water dripping. The fuel line carb fitting, I still see a very minute bit of fuel wetting the fitting. So I Will probably pick up a couple of new aluminum gaskets.
If these are the banjo style fittings, I would suggest that you use the OEM sealing washers.
 
Thanks for the tip, but I really don't no anyone with a boat. But I will have a line with me and there are always people on the lake. And yes they are the banjo type. I was going to try local at one of the larger motorcycle/jet ski type places and see if they have them, or will just order online.

Gettng there slowly
 
Update star log 22.375. I got the cooling tubes sealed in with permatex high temp rtv so hopefully that does the trick, just letting in set up. I pulled the fuel tank out from the port side back corner and replaced a couple of questionable hoses and cleaned the area out. The deck back there was solid, and the tank overall looked good. Albeit needed some cleaning. I also am going to replace the blower line 3" tube and the other 3 fresh air in I assume since they just run to the vents. The original outer vents, one was broke in half the other is gone. Would love to get the original as they look kinda retro, but will probably have to settle for after market? Unless any of you know places that might sell that vintage type boat parts other then Ebay?

Back to the fuel end of it. The filter is a mercury 35 802839T water separator type, and no telling how old. That said, the fact it took all I had to unscrew it, tells me it's been there awhile. I cleaned the housing up where the filter screws on, some of the rubber gasket was fused on, but I got it off with no gouges and all is good there.

I assume I need the same type, or can I just put a standard fuel filter in or just re-place with the same? There is about a gallon of gas left in the tank, least what came out of the line before the filter looked clean/good. I am no expert on gas, and think it's fresh? Or I might just pour it out and start fresh for pcs of mind Since I can't see in the tank, no idea how the condition is inside, so will have to live with it. It is a large stainless tank, probably holds 20 to 25 gallons guessing.


That's it for now, again any advice or tips are welcome!
 
Back to the fuel end of it. The filter is a mercury 35 802839T water separator type, and no telling how old. That said, the fact it took all I had to unscrew it, tells me it's been there awhile. I cleaned the housing up where the filter screws on, some of the rubber gasket was fused on, but I got it off with no gouges and all is good there.

I assume I need the same type, or can I just put a standard fuel filter in or just re-place with the same?

The Merc filter is not a true water separating filter. In fact, none of this type are. They only absorb water via the filtration media until it becomes saturated.
None-the-less, you do not need the Merc OEM. You can use Sierra or one of the others.
The thread size/pitch will vary, so be sure to match the threads up.

If you want a true water separating fuel filter, you'll need to go with the RACOR system for an I/B.


.
 
Thanks for the reply! I tried to remove the fuel supply fitting from the tank, no way it was coming off, and I wasn't ready to open another can of worms.

Do you know if the manufacturer typically installed a small fuel filter inside the tank, like they do say in a lawn mower? I am thinking not just from looking at the size of the fitting there, no way it would fit.
 
Thanks for taking the time to reply! On the carb I figured out I was missing the thin stainless O-rings, found it in the bag I had those parts in. Should have figured it out sooner. What's funny though, the back carb was fine with out it.


On the cooling line another thought was to cut a space between each of the fittings and splice with hose then clamp? I am thinking it would allow each one to seat individually vs being all one rigid line and having one fitting fighting with the other to stay in the hole. If that makes sense? That would probably be a last ditch effort.

I do like your idea on the fittings, Not sure I am capable of threading the cast iron though, will have to research that. Great tip, thank you!

Would not try the cut and splice hose solution as this original system depends on the rigidity and fit of the pipes to maintain pressure on seals.

Re "Threading" or tapping cast iron. I never tried this myself but if it did I'd use a "blind tap" , i.e one with a flat nose.
 
I was re-thinking that as well, and thought the same! With the blind tap I am hoping it won't come to that! I got them pressed in pretty good with bit of RTV around the gaskets, then used the RTV to fill the hole. I was also able to us 2 of those dbl clamps that came on it originally, and secured it to the line coming off the top of the 90 back to the housing.

Thanks again! Jim
 
When reinstalling the fuel filter/seperator, pull the dipstick and wet your fnger with the oil from the dipstick and wipe a thin film of oil on the rubber gasket on the filter before installing. Do not over tighten. The only time I ever let a mechanic at a marine change mine I needed a hammer and chisel to remove it. Housing crushed before the band wrench was able to move it.
 
It was close to that. I even had to mount the filter top to a 4x4 fence post with lags to reef on it. No way I could have done it in the boat with out ripping it off. I do know the oil trick, thanks though!
 
Up-date Ahh who cares what the date is...

Got the fuel system back in, and a new filter in. Painted the tank, cut back some of the fuel lines back to good rubber (no splits) and added new hose clamps. Also installed new vents and vent hose. Again, sure wish I could find the original exterior corner vents for this boat but it's not happening, so made due with aftermarket..

On a side note, I was on Craig's list perusing boat parts just because. And kick myself in the a--! There is a guy selling a AQ130 complete motor for 600 bucks, 40 min from my house. No I did not buy it, but I will be damned if I wouldn't have 3 weeks+ ago just for parts alone, or maybe just yanked mine out and installed it?.

After the trial and error on what I have done to this engine so far, not being a mechanic. I probably could have done it with help from a friend with his lift/shop. Though without seeing it and taking the chance, who knows. Different ball of wax for sure!


https://skagit.craigslist.org/bpo/d/anacortes-volvo-4-cylinder-gas-engine/6919693171.html


Guessing he probably would have taken less then 600 to get rid of it. Right now, I am close to that amount in major parts and misc crap here and there. Again labor is priceless! That said, I also would have been sitting on a engine block/head/parts for Lord knows how long?
 
......................
Got the fuel system back in, and a new filter in. Painted the tank, cut back some of the fuel lines back to good rubber (no splits) and added new hose clamps.
Suggestions:
Use only A1-15 fuel line.
Use the Euro style band clamps.
 
re: "It is a large stainless tank, probably holds 20 to 25 gallons guessing."

Hopefully NOT... Stainless not allowed for fuel tanks on boats! Aluminum, steel, monel yes... and some plastics OLD boats often used "terneplate" a steel tank with a hot dip finish.
 
Last edited:
It's aluminum. As far as the hose and clamps. The hose was good, but to late for the clamps. I will keep an eye on it for leaking, and can replace them at some point . Right now, I just need to get this thing in the water and see how she does. Hopeful all this work is not for nothing!

I still need to take a on-line boater safety class, 40 bucks. Then the lake has a 60 buck a year inspection fee. Then throw in license & registration, which I have waited on because it runs July to July. So if I did it in June, I'd be buying them again in July.

Now throw in my wife's Dodge decided to blow the radiator which is 750.00

Lord help me! LOL
 
Been caught up in life and work and rain so delayed a bit. I got the outside of the boat cleaned up and waxed. Might not run, but it dang sure would look good in a parade.

I went ahead and fired it up tonight after re-seating/sealing the manifold cooling tubes with RTV on the 4th. It held fine, not a drop of water to be seen, and it made my day. Long term will see, but encouraging!

The water strainer leaks at the incoming fitting, but I can deal with that! So I ran the motor for about 10/15 min, temp again came up to 170* and all was good. That said, when I shut it down, and killed the water flow. I just happened to touch the top & sides of the drive and it was pretty warm to the touch. Not sure this is normal or not? The drive is tilted all the way down. Bellow was replaced a year plus ago, so he said and it looks like it. I turned the water back on and let it run for 15 min or so and it cooled off. I am by-passing the drive and hooking direct to the strainer with water.

Other then that, the trailer needs new back lights. I also need to start on the deck, so I at least can stand and drive. Been searching resins and fiberglass and youtube of course on how to do it. Does not look to difficult over all for the small amount I need to do. Anyone know where the good prices are besides ebay? I shopped locally and was quoted 275.00 for everything which seemed pretty high from what I have seen.

That's it for the update, carry on people. Always thought's and tips appreciated!

Thanks, Jim
 
Back
Top