Logo

Honda BF90D DK2 Wiring Issues - Main Harness Connector

Topcat256

New member
Hi Everyone, my first post on the forum!!!!
I've had a few issues lately with my Honda90, which has round 1200hrs on it and up until recently has had the usual Honda reliability. A couple of months ago I had a water pipe split, the one that goes from under the vapour sep into the side of the engine block, which resulted in the engine hydraulicing on the bottom 2 cylinders but causing no lasting mechanical damage. However cut to 2 months later and one day while travelling out to sea the engine just cut out from full speed, very slight beep from the buzzer and momentary flicker of all the lights on the remote but no continuous alarm or lights. Turned the ignition off and back on, engine started up no problems and ran the next 4 hours without issue. Next trip out, on initial turning of the ignition key, no lights or double check buzz, gave the remotes a tap and everything came back to life, engine ran all day with no issues (12hrs).
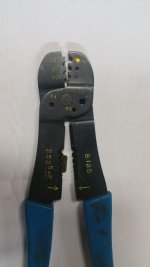
HOWEVER........ next time out, no lights, buzzer or anything on ignition switch on. Eventually traced problem to main 14 pin harness connector under engine cover which had the dreaded green verdigris corrosion resulting in one the pins becoming very thin and breaking off while I was trying to clean it. New harness ordered from main dealer (£160), however when I fitted this I still had same problem, no lights or double check buzz on ignition. Eventually traced it to the same connector but the female side of it on main engine harness side. One of the female connector receptacles has partially corroded away as i cannot see the springy looking part of the female side. It was on the Black/Yellow wire which looks like it takes power from the ignition down to switch the main relay on? I managed to do a bit of a Heath Robinson type repair by dropping some strands of tinned marine wire in the female side and remaking the connector after having given it a good clean with electraclean and applying silicone grease. The engine then ran fine all day (12hrs) with no issues at all. However, it is still on my mind, so what i was wondering is can you replace just one of these female pins in the connector (2.8mm??) or would i be better snipping this wire either side of the connector and either soldering/shrink-wrapping it or crimping/self-amalgamating tape it all up? I didn't really want to go down the road of replacing the main harness on the engine itself. What do you guys think?
On another note, since flooding the engine with water, the trim/tilt gauge is not working, this was the initial problem that alerted me that there was something wrong, as it was giving some funny readings. Checked the sender and this is free, not sure if this is a 14 pin connector issue as well maybe?? The 3 pin connector it goes through looks fine, the only signs of corrosion were on the 14 pin connector.
 
Last edited:
My recommendation is to change the individual male pins and/or their female counterparts if they are deteriorated at all.

The pin part number is 07JAZ-001080A

The female part number is 07JAZ-001090A

The 14 pin connector could very well be the issue with your trim issue. You have limited parts in the circuit. The sender, the 3 pin connector that it plugs into, the 14 pin connector, then the 6 pin connector at the other end of the harness (under the helm), to the bullet connector where it gets connected into the gauge wiring harness.

Of course, it could be the gauge.

The lead color is yellow/blue, which you probably already know. The voltage at the gauge should vary from 5 volts to 0 volts depending on the angle of the motor.

Mike
 
You can replace the socket in the connector IF you can find the socket. Honda sells kits of connectors and the wire ends that fit them but only to their dealers, not retail. If you have a good raport with your local dealer you may get them to let you have one. You will probably need the correct unlock tool also to release it from the connector but oftentimes you can use needles or other makeshift tools to accomplish the task.

Besides the dealer you may be able to match up a socket from connector suppliers like Weather Pack, Amphenol or Deutsch.

There's certainly nothing wrong with doing it the other way you describe by snipping and splicing although, using a waterproof connector for the "bypass" keeps the connection accessible for service without having to cut every time.

I really don't have an answer for your trim gauge question but, hopefully, someone else here does.

Good luck with it.
 
Cheers Mike, Star Man!! I take it the female connectors are locked into the engine side connector by means of a little tab? I'll order some up this week for replacement. The male side are all ok as they are all part of the new harness from the remotes.

Paul
 
Another thought is that the connectors for the Honda cars may be the same as the outboards. A Honda auto dealer parts department may be able to help you find what you need.

Good luck.
 
Cheers jgmo, I thought that yesterday, found a few on ebay for Honda motorbikes that looked similar but now I have the part number I will check with my local Honda dealer, like you mentioned I have a good rapport with their main mechanic. I take it the ends are soldered into the female side. I wanted to do the job properly rather than snip the troubled wire out and bypass it so that when I trade-in or sell it on in future years everything is in order. I'm just hoping they re-release the 90's over here again like you's have over there as I didn't really want to drop down to 80HP or upgrade to 100hp because of licensing issues. My only other option at present over here is the Tohatsu BFT90 as its the same baby in different paint, only problem is the Tohatsu dealer isn't as local to me as the Honda guys, whom I happen to get on with well also.
 
Mike, just a thought, are the individual wire seals into the back of the connectors reusable or do I need to order these as well??
 
Opps... I forgot those.

They are reusable, if still in good shape.

Part # 07JAZ-001100A

The wires, as well as the seal are crimped.

There is a little tab that holds them in, but you probably could use a small screwdriver (small like you would use for glasses) or maybe the pointed end of a test light or an ice pick (if you are old enough to remember what that is).

If you bevel the end of a strong paper clip, that might just be enough to fit under the tab to release it while you pull the wire out.

Mike
 
Cheers Mike, I've got a set of Jewellers Screwdrivers in the shed from when I was Offshore as an Instrument Tech - should just do the job fine.
Thanks for the replies guys - and what a cracking forum!!

Paul
 
Hi Mike,

I’ve just been to collect my female connectors and seals from my Honda Dealer, hoping to put the boat on the slipway Monday to fit them. Just a couple of quick questions, what sort of tool is the best to crimp them with, we’ve got like a tapered jaw crimper at work I could borrow but I don’t know if the jaws of the crimper might be too wide for the female blades as they are quite small.
My other question is are the tabs that hold the female connectors in place on the main plug itself, as I was expecting to see little “bent out” tabs on the female connector to push in while I pull the connector out if you get my drift, but there just seems to be a little recessed square hole on them. It’s hard for me to visualise it till I get the boat on the slip Monday,

Cheers,

Paul

imagejpeg
 
Last edited:
There are special crimpers that are part of the Honda connector kit. See picture. However, if you are real careful and inventive, you could use a regular butt connector crimper or even the jagged edges in the jaw of a small pliers. You just have to be careful not to get carried away and bend the connector....then it will not go into the connector.

As for the other tabs you referred to ......I think, once you see them, it will probably make sense.

Mike
 

Attachments

  • CRIMPER.jpg
    CRIMPER.jpg
    30.3 KB · Views: 56
Mike,

Got the new connectors fitted today, the ones I took out were completely black with oxidisation, the black/yellow which was giving me the initial trouble was partly what wore away as well......
HOWEVER...... lol, a new problem has appeared last two days I've ran the engine, including putting it on the slip today. On initial ignition,all beeps and buzzers good, go for first start and just get a single solenoid click, this happens once maybe twice, then say third time engine turns over slowly but fires up. Then no sign of problem at all all day then, I've tried switching engine off then start again and it turns over fast and fires straight away. Local Honda guy on phone reckons it could be the starter solenoid starting to fail but i'm not convinced. If it was solenoid would it not be doing it all the time?? I'm more thinking is it the battery starting to fail (AGM leisure battery 4 years old, 110Ah 1000MCA) or could it be main cables starting to break down, especially where they go through grommet on front of engine, maybe with me tilting it up at the end of each day. Checked all terminals and connections, including negative side today and all clean and tight.
Any thoughts??

Cheers,

Paul
 
Should have posted before, every engine flooding I have seen has resulted in water in the flywheel housing which ultimately ends up in the starter motor, you might get away with cleaning and a set of brushes but with saltwater you usually end up needing full starter replacement
 
Cheers Ian, could well be that then. Would it not be the case that the starter would be lazy all the time though if that was the problem?
 
If you have water in there the only thing to do is remove the power head and clean it up properly and then spray everything with a good quality corrosion gaurd. Saltwater is so damaging if not treated properly
 
The starter performance becomes erratic until it eventually fails completely. I would pull it out and have a look anyway, it will save big money in the near future
 
Cheers Ian, just another couple of questions! Is the starter motor easy enough to pop out? And does the flywheel chamber have any sort of drain or will the water from the flooding still be in there? I'm wondering now if the slow turning over at first is now a starter issue or could it be possible that the main crank bearings could be corroded/seizing. Once the engine starts it runs sweet as a nut but obviously there could be underlying issues. The whole bottom cowl was full of water, albeit with the hood off, for around an hour while we ran the boat home....

Cheers,

Paul
 
The starter has an O ring but somehow water gets in. This does not get into the engine itself but can corrode the lower main seal track. Starter removal requires the electrical box to be removed first. Remove starter and check inside the flywheel housing and starter bendix for rust
 
The case in its entirety needs to be removed in order to remove the starter, it isn't as hard as it looks. Just remove the ecm, disconnect the plugs from the mounting bracket, disconnect temp sensor,rectifier, two earth cables, solenoid exciter wire and then unclip harness brackets. You should then be able to work the casing out which will then give you ample space to remove the starter.
 
Back
Top