Logo

Exhaust leak, Adaptor plate - driveshaft housing. 2005 EFI 60hp

Kronos

New member
Hi.

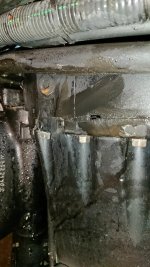
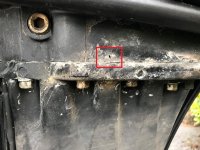
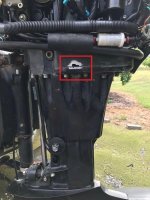
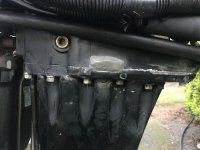
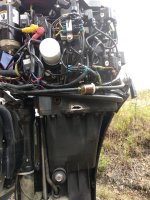
On my 2005 Mercury EFI 60hp outboard I have an exhaust leak between the adaptor plate and the driveshaft housing. There is quite some of the aluminum that has corroded away from both casings so not really sure if it will be reparable. I have sent both casings to a guy claiming to be aluminum weld spe******t - so we will see how that turns out.

However, I do have two questions that I was hoping to get some help on!

#1, How to properly assemble these casings again? I read somewhere that a sealant of some kind was recommended? If so, what type? I am expecting quite hot temperatures here since a lot of the aluminium has been corroded away.

#2, Aluminum has not only been corroded away where the leak is, also at like the first "bend" of the exhaust gas channel in the adapotor plate casing. What could be the reason for this? Is the engine running to hot for some reason?

Br,
Henrik
 
Hi Henrick,

I have the same outboard with corrosion hole in the exact same spot. Can you advise how you went fixing it? Also what symptoms was your engine having?

Thanks,
Luke
 
Hi Henrick,

I have the same outboard with corrosion hole in the exact same spot. Can you advise how you went fixing it? Also what symptoms was your engine having?

Thanks,
Luke

Hi Luke,

I sent the adaptor plate and the driveshaft housing to a guy who weld repaired them. Taking care not to overheat the casings - it turned out quite good - but I don't expect the repair to last for ever :) The major work is disassembly and assembly since you literary have to take everything off - but I did it myself. The weld repair was ~200$. When I assembled I bought new original gaskets and they where thicker than the old ones, maybe it will help keeping a good seal.

So far I have just tested the engine on idle - but it seems to work fine. There is still snow outside so it will take some time before I know for sure how well it works.

The symptoms where noise, like when you have a broken exhaust/muffler on your car. It could also have been some loss of performance but not sure.

I haven't really identified possible causes to this error. What was a bit strange was the sacrificial anode on the gear case - trim tab anode. I think it was of bad quality since it did not corrode at all and didn't eclectically ground to the engine. So maaaaybe that contributed to the corrosion of the adaptor plate.
 
Thanks Kronos for the information.

I ended up using Dynagrip steel putty:
View attachment 17564

https://www.dynagrip.biz/16002

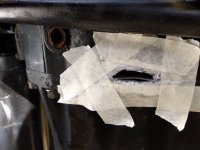
Here are some before/after photos. This is before sanding the area back.
IMG_4437-before.jpg

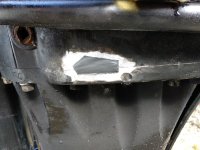
This is after sanding the area back. The hole opened up much larger.
IMG_4481-before2.jpg

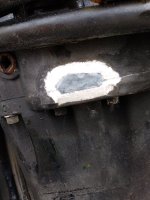
Here is after applied the putty.
IMG_4487-after.jpg

Since then I have traveled over 250Klm and it has held up well. Alot at wide open throttle for 30mins+

I don't expect the repair to last forever either, but saved having to pull everything off.
 
Nice to see it worked and thanks for posting the information! Would be great if you could keep the thread updated when(if) the reapair fails. I do expect my much more labour intensive weld repair also will fail at some point. Then I will try your method :)

So far I have done one only WOT test run in the water and it worked - but not perfectly. There was some minor oil leakage that I have not yet really explored - guess it is from the reapair but could be something else also.
 
I recently discovered the same problem on the exact same spot on my Mariner 50hp 2004 model.
before.jpg
I decided to go for a similar solution as lukea37 above.
First I sanded the area (sanded and also used a tiny grinding machine)
sanded_closeup.jpg
I was a bit worried about using epoxy putty in direct contact with the exhaust temperatures, so I decided use an exhaust-paste instead of epoxy putty for a first layer. It needs 24 hour to harden, and seam to stick quite well to the surface. Not quite as strong as the putty though.
exaustpaste.jpg
Next I sanded/grinded a bit more around the area. Two reasons for this, first reason is that I wanted a wider area for the putty to glue itself onto, second reason is that I wanted a fresh metal surface and not an area that was sanded a few days earlier.
sanded_2.jpg
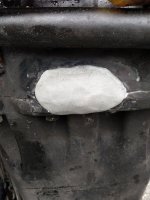
Now it was ready for the putty to be applied.
alu_expoxy_putty.jpg
I could not find a reseller for the dynagrip brand in my area, so I baught 3 different variants locally and did a strengt test a few days earier. It was two steel based and one aluminium based epoxy putty. The strenght of these 3 I found quite similar, so I decided to go for the aluminium variant, since it was closest to the material I was going to repair.

The outside fiberglass cover did have a burnt hole from the exhaust exposure already. This I repaired with fiberglass filler om the outside, and painted it. On the inside I did apply a patch using a layer of the exhaust paste. This to prevent it being burnt again in case the putty repair fails later.

By the way, I did have contact with lukea37 and was informed that his first repair did last for about a year before it failed. After this he did repeat the repair, then by using a thicker layer of putty. That last repair lasted 2-3 years up until the engine was replaced for other reasons.

I was happy to receive that feedback from lukea37's repair, and it gives me hope that my own repair will last as well.
 
Back
Top