Logo

99 Ocean Pro 150 prop shaft seals.....back to back???? Help

JPV7774

Member
I have shop manual and I have the lower unit apart w gear case bearing carrier removed. I am replacing all gaskets and seals. My shop manual has a drawing of how the seals should go in....followed by written word that makes no sense. I have watched 100 videos and I am seeing different answers. So what is the right way to install the prop shaft seals????

Back to back?
Both facing out?
Both facing in?

Help.......

1999 Johnson Ocean Pro 150 J150PXEES
 
I have shop manual and I have the lower unit apart w gear case bearing carrier removed. I am replacing all gaskets and seals. My shop manual has a drawing of how the seals should go in....followed by written word that makes no sense. I have watched 100 videos and I am seeing different answers. So what is the right way to install the prop shaft seals???? Back to back? Both facing out? Both facing in? <-- None Of These! Help.......
1999 Johnson Ocean Pro 150 J150PXEES

Notice that the seals have a spring setting within their groove.

The first seal is installed with the spring facing the gears... facing inward. (Preventing lube from escaping)

The second seal has the spring facing outward. (Preventing water from entering)
 
Thanks guys....that confirms what I am reading in my shop manual......it just doesnt say the spring side....it says install back to back ..install inner seal with ( lip ) facing towards bearing housing and install outer seal with ( lip ) facing away from bearing housing. So my next question to you guys is.....
Please tell me how to install the driveshaft seals??? Orientation.......oddly enough the manual uses diff terminology regarding these seals. I believe one is called upper and the other lower. The manual again says to install back to back....but says install the inner seal with ( flush lip ) facing toward bearing housing and install outer with ( extended lip ) facing away from bearing housing. Unfortunately i am a moron and the cartoon drawing in the manual doesnt work well with my brain....seems like they are saying this orientation is different from prop shaft seal........seams like they want inner... spring out and outer.... spring out
 
The seals are installed in the identical manner..............

1st seal = spring inward

2nd seal = spring outward.

All dual seal installations are installed in this same manner for the reasons I originally mentioned (lube/water)
 
Thanks Joe.....I was practicing on my parts motor that has a good lower unit. I certainly wish I had paid attention as I pounded or pulled the seals out but I thought it was a no brainer. Also who knows who put those seals in last. I have watch 100 Youtube vids on this subject and seen 5 different ways suggested. Apparently Yamaha does it differently. Being that you have probably done 100 of these.....I will be smart and just listen to you. You gotta admit the use of diff terminology for the drive shaft bearings sound like they are suggesting a different install method.
 
Thanks Joe.....I was practicing on my parts motor that has a good lower unit. I certainly wish I had paid attention as I pounded or pulled the seals out but I thought it was a no brainer. Also who knows who put those seals in last. I have watch 100 Youtube vids on this subject and seen 5 different ways suggested. Apparently Yamaha does it differently. Being that you have probably done 100 of these.....I will be smart and just listen to you. You gotta admit the use of diff terminology for the drive shaft bearings sound like they are suggesting a different install method.

Yeah, understood... it can get confusing. Note that when they (the factory guys) say "back to back", they're speaking of putting the two flat metal sides of the seal together. In this fashion, no matter which way you flip them, the spring side faces in the proper direction.

I've done a hundred of them?...... per month most likely. :)
 
Ha...when I wrote 100.....I figured it might be a few more zero's......I am going to boat today to remove lower unit off of my so called good engine. Will get it home to the garage and pressure test...then tear it down. I have a box of seals and gaskets to freshin the ole girl up.

Since I have u on the line.......I will see if I can squeeze another answer out of you.

The back story....bought this engine off of craigslist...it was running on a boat on muffs when i purchased....I did a compression test before I bought it. I should have checked lower unit oil :) .....then the engine sat for 2 years while I restored my boat. 3 weeks a go I finally launched. The engine fired right up and ran strong however...... it had a vibrating shutter at just above trolling speed...it was not happy at that speed.....but ran perfect other then that. Also.....and here is the real question....when I was sitting next to the engine while at trolling speed I could hear a metal sort of faint chattering sound...I put my ear against the cowling...and even removed the cowling but the sound appeared to be coming from the lower unit or the leg. Have u ever heard of this ???? The engine shifted smooth.....ran strong......previous owner did tell me he did a water pump and lower unit service so obviously he had water intrusion....maybe he wore out a bearing or something. When I drained the lower unit before initial launch there was water in the LU.....I drained and refilled....crossed my fingers......but after a short first sea trial I had water intrusion in the LU. I am replacing all seals and gaskets......including removing the LU bearing housing for large O rings and prop shaft seals. Pressure test should reveal where it is leaking.

Sorry for the ramble.......any suggestions???? I dont like metal chatter sounds :)
 
Yeah... metal chattering sounds would make me nervous also. It's hard without a mechanic's stethoscope... available at any auto parts store, harbor freight, etc... to tell where it's coming from as a chipped gear sound will travel up the driveshaft and sound like a piston slap. With the stethoscope, one can pinpoint the loudest area of the sound.

You can also check piston/wrist-pin/crankshaft play.... all plugs out, turning flywheel to bring each piston up to TDC, then down slightly, then holding onto the flywheel, press hard on the top of the piston with a large screwdriver or tool of your choosing. Obviously there should be NO movement without moving the flywheel. Works for me.

Sitting two years+.... it'll be a good idea to clean and rebuild the carburetors. Carefully clean the high speed jets (6 of them) with a piece of single strand steel wire... located horizontally in the bottom center of the float chambers, way in back of the drain screws. Also double check the compression.
 
Ya I was hoping to not have to clean the carbs....but might just have to do that. Have only had one sea trial in which my lower unit failed to seal. So will give her another shot after lower unit is water tight and listen for metal chattering ....might get lucky and blow out my low speed shutter......

I removed the lower unit yesterday.....will work on it tomorrow and hope to reinstall mid week. Before removing lower unit I decided to pull out on the prop to feel for play......in fact there was some play....not a lot....but some. is that normal?
 
Thanks Joe........so now we move forward to today.....I lugged the lower unit with heavy prop still installed out of truck and onto my home made lower unit stand. I remove the prop to inspect prop shaft seals....they look great. I visually inspect shift rod top portion of housing above the O rings .....it looks corroded and I think I have my culprit......I prep the LU and hook my mini air compressor up to LU and hit it with about 10lbs .....I spray the prop seals....shift rod housing.......and nothing....not a bubble....huh. I spray the large bearing carrier housing and nothing......I eventually spray the upper drain plug and whala!!! it was leaking. I tighten it and it no longer leaks. In fact the LU was holding air so well that the drive shaft rose up from the air pressure. I was just about to give up defeated when I wiggled the drive shaft ( impeller and housing removed seals in plain sight ) ...when i wiggled the drive shaft air spit out. So I figured thats not a good test because the drive shaft doesnt wiggle.......So I turned the drive shaft while a friend sprayed the seals and it leaked. This is a more fair test right? Bottom line the LU held air pretty darn well....had to almost cheat to get it to leak. Given my long ramble do u think I nailed it with the drive shaft seals given my test....or was that test horse crap?
Yes ....I know what your gunna say......and yes.....Since i am already there I will replace all of those seals anyway :) but just asking about my tests......and maybe if u know of a better way.........because without moving the driveshaft that sucker was air tight.
Thanks
 
You have 2 piece driveshaft and the results you had are normal when wiggling driveshaft.. You need to vacuum test as this is usually when they leak.
 
Guess I gotta make a trip to harbor freight for a cheap vacuum tester. Im gunna replace all seals anyway....the previous owner that did the water pump didnt have any gasket sealer on the water pump bolts or the top of the water pump gasket. Its a shame to rip those prop shaft seals out because they look perfect. It all comes down to if I want to gamble and just do the top end stuff.....or do it all while its on the bench.
 
I will replace all of those seals anyway :) but just asking about my tests.........because without moving the driveshaft that sucker was air tight. Thanks

When OMC went to the two piece driveshaft, I noticed immediately that the top portion of the shaft could be wiggled around which obviously caused air leakage. I still don't understand that bit of engineering... but since retiring, I don't lose any sleep over it.

Possibly those seals were okay... BUT... as long as you're there, why not install new ones for peace of mind if nothing else. That's what I would have done.
 
I will def replace all of the upper stuff.....still contemplating pulling the prop bearing carrier. I did the job on my parts motor no problem....but something tells me this ole girl will want some heat.
 
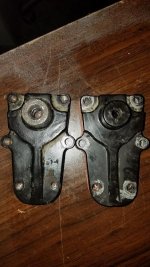
Hey Joe....sorry to keep milkin the cow....but if u still have a few answers in ya......lets give it a shot. I broke down the top portion of my lower unit tonight. Water pump housing and drive shaft bearing housing. So far the bearing housing seals arent coming out so I am soaking them over night vs using heat. Im not sure if the bearing that is so close would like the heat. So I found something interesting tonight........I have a 1998 parts motor same exact model....my good motor is a 1999.....the shift shaft housing had a smaller opening in the 98.....bigger opening in the 99....I am talking about the opening where the shift rod goes through the housing...that hole is much larger in the 99 model. My question is......do u prefer one housing over the other for some reason.....I can use either one...have them both on my table. see pic.shift.jpg
 
One more for you Joe........I still have not committed to removing the gear case bearing housing/ prop shaft seals...etc......It seems pretty clear to me that the leaking must have been from the water pump or shift rod areas......possibly the drain or vent plug area..................One question is.....how can those plastic looking washers on the drain and vent plug seal anything?
Question number two.....lets just say hypothetically I wussed out and didnt pull the gear case bearing carrier but still wanted to flush out the remaining contaminated oil....if i poured new oil down the now exposed shift rod area....would that oil flow right into the gear case ....thus flushing the old out with new????

Thanks Joe......I know that was 2 questions....but as u can tell.....I am obsessed with this project and getting in right
 
I have no preference over which shift housing to use excepting I normally stick with whatever the unit was designed with.

The nylon washers?.... Yeah, they do seal great, but there are other type drain screws that incorporate "O" Rings for sealing.

Oil poured down the forward shift rod area would have immediate access to the gearcase lube area.
 
I will enclose a pic of the washers.....they look plastic to me......your saying they are good.......vs say a fiber washer? I am motivating myself to pull the large bearing carrier tonight...prop shaft seals etc....

Thanks for your replies....
 
I will enclose a pic of the washers.....they look plastic to me......your saying they are good.......vs say a fiber washer? I am motivating myself to pull the large bearing carrier tonight...prop shaft seals etc.

Those white washers are listed as "nylon", and yes, they've been around for many years and seal quite well as long as they're matched up with the flat underside type drain screw. The fiber washer is a thing of the past (way back).
 
Hey Joe.....got my lower unit completely broke down now w exception of the gears. I should be starting the installation of new parts today assuming I can get the prop shaft seals out....they are stuck in there pretty good. Question for you sir......I believe my manual says to install the prop shaft seals back to back and to bottom the seals out against the inner bearing. Both of my motors when I broke them down....there was a gap between the seals and the bearing........what is your take on this??? Do u intall just flush with aft portion of bearing carrier....or do u intall prop shaft seals bottomed out against the inner bearing???
Thanks!

oh ps.....do the nylon washers have a front or back??? or just install either way on the drain plug.
 
against the inner bearing??

I have no idea why a service manual would state that. The seals are installed so that the 2nd seal installed would be viewed "spring out" with its metal frame flush with the carrier housing.

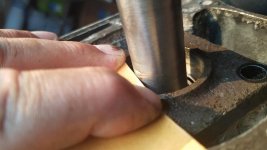
I always installed them by having a gasket scraper (looks like a putty knife but heavier blade) laying on top of the seal and with a thrusty hammer, seating them, one by one until that scraper blade is flush with the carrier housing... never had a problem.
 
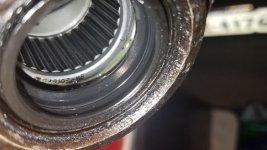
Thank you sir......I figured after seeing two of them not bottomed out that I shouldnt bottom them out. They would prob seal either way......but thats why I asked the pro. I will include a pic of the seals I am working on now....clearly a gap between the bearing and the seals.lu100.jpg
 
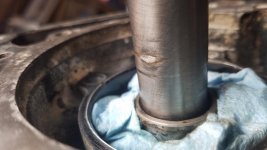
Hey Joe...yep....me again. Sorry man....Im a lower unit rookie. This will be a breeze next time. Used PB Blaster last night on prop seals....they popped out pretty easy this morning. I cleaned up the housing lightly sanded all mating surfaces. I was able to install the prop shaft bearing using your mud knife trick with no issues at all...thanks for the tip. I was about to try to complete the large bearing carrier install when I decided to take a look at my driveshaft. Woops....I noticed it had a pretty good nick in it. To the best of my knowledge this nick looks like it would line up with water pump plate so I am hoping I might be alright. I must admit before I sanded it with emory cloth it actually had a sharp edge to it. Maybe this is where I had water intrusion???? Although this nick appears to be above the seals.....and the LU held air tight on pressure test. Anyway sir.....are these groves or nicks anything out of the ordinary???? I have sanded pretty smooth so far....I could take it to the next level and grind the sucker if need be....Maybe JB WELD the nick completely smooth??? What do u think???
Also can u recommend a RTV sealant for me....The manual calls for RTV on the aft in of the carrier. Ooops also can u suggest an exact style or number/color of the locktite I should use for the prop shaft bearing carrier housing....for the 2 bolts in the back please. The manual calls for something like Johnson Ultra lock or something.
I will enclose some pics.
Thanks Joe....
I appreciate the assist
Jimtop1.jpgtop2.jpgtop3.jpg
 
JOOOOOOOOOOEEEEEEEEE!!!!! Did I scare u away man? Did I go to the well a few too many times? I need ya man if u can throw me a bone.

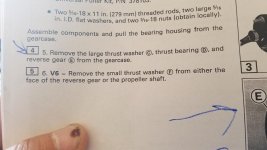
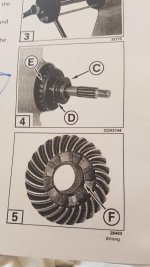
I got all the parts and sealants needed and jumped all over the lower unit job with hopes to finish it all in an hour or so. I followed the manual to a tee......loaded up the large prop shaft bearing carrier with new prop shaft seals....large O rings....gasket sealer and RTV. I slid the small thrust washer that came out w the reverse gear on first then the rev gear washer...bearing..washer then carrier.....it slid in perfectly then stopped when it was flush with the housing. At the time I didnt realize it needed to go in another 1/4 to 1/2 inch past flush so I got flustered trying to install the locking tabs.....as the tabs got tight the whole carrier would turn....anyway...let me just bullet point my questions for you or anyone else that can help........You should know before the questions...I aborted the install before the locktite set up.....scraped off all RTV and gasket sealant so I am back to square 1.

Questions......

1. It appeared to me that when I mocked up the locking tabs against the bearing carrier in a flush position I could not get the bolt past the tab......are there any trick to getting the locking tab bolts past the tabs once I get the carrier in the correct position? I used high strength Locktite red for these bolts.....is that correct or too strong???

2. The carrier bottomed out before it was all the way in. I decided not to pound it in because I did not want to chip any gears....I am not sure if it bottomed out too soon due to the new prop shaft inner seal or the small thrust washer in front of the reverse gear getting hung up on the prop shaft. Should I just go ahead and use a block of wood and hammer the carrier in.....and the gears will mesh just fine?????

3. Once I bottom out the carrier.....will I be able to tighten the locking tab bolts without the entire carrier spinning or is there a trick???? See pics.....

Thank you!!!!thru1.jpgthru2.jpg

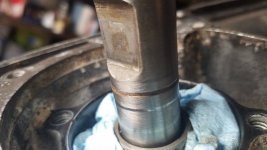
The pics are just to show u what small thrust washer in front of reverse gear I was talking about.....its hung up on the prop shaft all the way in the housing....I am sure its fine.....but thought it could be one of my issues....
 
Now we are into a area whereas my knowledge is lacking due to retiring 8 years earlier in 1991, and anything I say here would be guess work falling back into another era. I think it better that I leave the answer to your latest questions to other members who possess that up to date knowledge.
 
Ok thanks Joe......its really hard to find knowledgeable mechanics like yourself in a forum setting that are answering questions about old engines like mine. I am a member of another forum that I can try......thank you sir
 
Back
Top