Logo

Just bought a boat - been standing about 2 years, what to check? 89-92 mariner 60hp

FstaRockr Burns

Regular Contributor
Hi everyone.. my first post here, and I just bought my first boat an hour ago.. killer deal (im hoping) on a rib with a mariner 60 - not sure what model, maybe someone can comment..I do rebuild bikes and cars and carbs.. so not unfamiliar with the mechanical bit - just new to outboards..


Anyway - what do i check before firing her up? Is there an achilles heel with these motors? We used the same model different HP on our family fishing boat when i was young - think we had 2 issues in 8 years..

Is a compression check one of them?

What else?


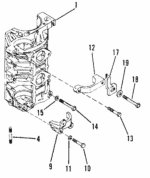
This is the motor - looks like there's hydraulic trim/tilt too yes?

boat3.jpg

boat4.jpg
 
Check fuel lines and internal wiring for deterioration & repair as required. Pull the spark plugs & squirt some lubricating oil into each cylinder, then turn the flywheel over by hand a half-dozen turns or so. A 15/16" socket will fit the flywheel nut. A little lube will prevent damage from dry cylinder walls after prolonged non-use.

It does look like you have PT&T, there should be a toggle switch on your control box for that. Throw a fresh battery in there and see if the trim motor runs.

With the spark plugs still removed, stick them back into the plug wires and lay each spark plug so the plug body is firmly grounded on the block. Be sure the kill switch is "On" and the engine in Neutral before cranking.

With the engine lowered to its normal operating position and in a bucket of water, crank over the starter and check for spark. If you have a nice, hot, purplish spark, you're in business. Clean the plugs & reinstall.

You can also do a compression check with the plugs out, but this time make sure the kill switch is in the "Off" position.

Note on the bucket of water, you don't even want to crank the engine over for testing without the water pump being lubricated; it will ruin the impeller or drastically shorten its life. You can use a "muff" type flusher as well if you don't have a handy bucket.

Now's the time to connect a fresh tank of 50:1 mixed fuel (straight fuel if you have an auto-oiling system) and pump-up the bulb. You should hear an inrush of fuel into the carbs and the bulb should get hard to pump. Hopefully the carbs won't leak. If you get a lot of gas running out the carbs, you'll need to pull them for cleaning. Gasket/packing kits are inexpensive.

If all looks well, you're ready to fire it up. A bit of fast-idle in Neutral, hold the key in when cranking to prime, and see what happens.

The 3-cyl cooling system is somewhat marginal at best, so you'd better plan on (at minimum) replacing the impeller after you've test-run the engine. There's no telling on how long the current impeller has been in there.

You can pick up a pump kit here that'll have the impeller, all the gaskets you need, a new upper pump body with stainless cup, pump plate, new impeller key, etc. If the existing cup and plate have any wear on them at all, they should be replaced.

A new impeller pretty much every season on these will help it last a long time. When the impellers go on a 3-cyl, it's almost guaranteed the block will crack on #1 cylinder, and who needs that!

Another good maintenance item, check your lower unit oil. Drain/refill with marine-grade "Hi-Vis" gear oil. Grease the propshaft splines when installing the prop, it'll never get stuck.

One thing of note I've had happen with the last couple of 80's-model 50's I've worked on: they have a 2-piece driveshaft-to-crankshaft seal. One part is a plastic sleeve that slides over the crank splines in a certain direction. The other is a rubber seal which pushes up against the crankshaft to keep water out of the splines.

On both of my motors, one or both of the seal parts were gone. And the splines were lightly stuck (or worse). In that case, if the L/U doesn't come off easily, don't beat on it. Use wooden or plastic wedges to help pry the L/U from the mid-section.

The P/N for the seal assy is 78654A1. If you don't see both parts of the seal assy when you pull the L/U down, use a strong light to check the bottom of the crankshaft. It's possible for the rubber piece to stick to the crank.

Anyway, that's just an overview, but it should get you going.

HTH & let us know what you find and if you get it running..........ed
 

Attachments

  • 78654A1 Driveshaft Seal Assy.jpg
    78654A1 Driveshaft Seal Assy.jpg
    43.4 KB · Views: 442
gee ed - thats a brilliant reply, tx a milion! shd be a darn sticky! ill try get a new impeller before i get to boat.. i tend to be a bit skeptical about the internal gaskets / etc - and wd hate to burn/blow something! in the future id really like to setup a temp gauge to the motor - is something like this possible?
 
gee ed - thats a brilliant reply, tx a milion! shd be a darn sticky! ill try get a new impeller before i get to boat.. i tend to be a bit skeptical about the internal gaskets / etc - and wd hate to burn/blow something! in the future id really like to setup a temp gauge to the motor - is something like this possible?

Thanks for the kind words! Some of these actually had a machined pad at the back of the cyl block water jacket cover, and an overheat sensor was screwed in there. In that case, you could replace that with a temp gage, but then the OEM alarm system is defeated.

Typically, by the time you'd see the rise on a temp gage following catastrophic failure of the cooling system, it's too late and the engine is toast.

What might be better is a water pressure gauge, this will allow you to immediately see loss of water pressure in the block. Just splice in a suitable tee in the telltale hose and connect to there. The other good thing about a water pressure gage is you can monitor the the cooling system for drop in pressure over time, which is a good indication the pump needs servicing.

If you can't find a kit here, I've found some bargains on eBay in the past.

Cheers..........ed
 
great - when im at the motor in a week ill have a look see, maybe send a pic - Ive heard horror stories where one cylinder loses spark and gets toasted.. just wouldnt want that happening! Are these considered reliable?

Someone noted that flywheel torque is critical - I might re torque those too if its not a major job - one at a time ..

I wouldn't expect cylinder damage with lost spark on a cyl unless it's run for a long time in that condition. As long as that cyl was sucking fuel, it's just gonna blow a lot of unburnt fuel out the exhaust and make a slimy grey mess. It's still getting oil along with the fuel, so no issue with that.

And yes, flywheel torque is important as you don't want it to fall off! Use a strap wrench or similar to hold the flywheel in place when torquing. BTW if you've torqued it once to the proper value, you don't need to torque it again.
 
ed thanks a mil - got the motor running! after 3 hours i caled the PO and said whats the problem. he never told me to push in the key(!!!!!!)..

anyway - the tell tale worked fine for 3 mins then started dribbling and then stopped.. and the water started coming out at the bottom of the head between the shaft section and the top section - out of a mount hole.. so i assume it got blocked - so will have to remove the lower unit which is fine, but it seems the mid section will also have to come out which i am not looking fwd to..
 
The telltale might have plugged-up. You can blow some air in the telltale tube to see if it'll clear. Maybe post a pic of where water is coming out, then we can advise you before teardown.

Probably a good idea to pull the L/U, you can inspect the old impeller then replace. You can also blow compressed air up the copper water supply tube to check for any blocked passages.
 
This is where the water started dribbling out.. Engine wasn't 100% vertical because it was a bit far up trailer..

2016-02-18 07.22.35.jpg

In followed the hose from tell tale to the top of the head.. It probably started leaking after it got blocked.. Probably very important I check it out lol.. If the head isn't cooled its big problems..

Also at first when I turned key on the control unit beeped, but stopped after a while..

I saw a small wire broke off on head from a brass nut, looks like a temp switch.. Does that sound right?
 
One way to know for sure that you're getting coolant flow thru the powerhead is to feel the exhaust manifold cover. It shouldn't get more than lukewarm and will likely be cool. Water flows thru there, so if there is no cooling water, the cover will get hot really fast. Another way to tell is to feel the temp of the water discharging out of the prop hub when running. It should feel considerably warmer than the water supply to the motor.

The rubber seal that's partially pushed out of the upper shock mount area is the cause of your leak; the only way to fix that would be to pull the powerhead for access to the mounts. Probably a good idea to replace both seals while you're in there. P/N 96401 but you'll want to look that up under your motor's serial number to be sure. Far as I know, though, all the 4-cyl 50's and 3-cyl 50-60-etc using the same-design midsection as the 44-cube-Four would use the same part.

The busted sensor would be for temperature, it has very small threads which are easily broken. And a replacement costs $236 or $360 depending on the year of your outboard! An aftermarket water pressure gauge kit would be much cheaper! If it is only the wire that's busted, you may be able to repair it if there's enough sticking out of the sensor.

BTW there is no cyl. head on this engine. The cylinders (including the tops) are integrally cast with the block, and the cover seals the entire area where water circulates over the cylinders. Such that the machined areas that you see where the spark plugs screw in, are actually the tops of each cylinder.

Probably a good idea to service the impeller, get it running and evaluate before pulling the powerhead and doing a bunch of work to it. The water leaking out of the mount area isn't gonna hurt anything if you run the motor.

HTH..........ed
 

Attachments

  • 96401 - Upper Mount Seal.jpg
    96401 - Upper Mount Seal.jpg
    20.9 KB · Views: 59
Hey ed - sorry, been a while! been working on the boat last 2 days.. got motor fired up again.. I soldered the little wire on the back - looks like it might hold for a while :) but the beep from the control still isnt there, heard it first few times then it vanished.. I presume its the switch check for the tem switch? FYI mine was on the top cylinder..

Tried to removed lower rubber bolts, and of course the 4th one snapped off! Will take to engineers to try remove - rubbers look ok..

Im a bit wary of fiddling with the motor now - the nuts are really corroded on this thing - and my love for drilling out snapped / ceased bolts is not much.. Ill have to invest in a top quality stud remover..

So my tell tale still isnt squirting.. popped some nylon wire up there - still nothing.. will take it to garage and blow out with compressed air from the top.. although the 2 exhaust ports beneath the head are spitting out a constant amount of lukewarm water - i take it this is ok? exhaust at bottom also..

Another thing - the wire from the enricher on the carb pulled off, the PO had a wire crimped onto it.. but For the love of me cannot find it - so far ive managed to get motor running by spraying thru the 2 holes in front cover into carbs to get her running.. Hope I dont have to pull carbs of for this..

Probably taking the boat out on the water today for first run, will just do some slow manoeuvres next to bank - I also saw the fast idle cable has some play on the motor, and it doesnt return the idle back 100%, so idles a wee bit high..

I will shoot a small vid of the motor running and perhaps u can give some feedback..

Irony is i thought these were all metric because of the yamaha parts, but theyre SAE so I left my whole US made thread kit (3 boxes) at home 100 miles away :p

ANyway - thanks so much for giving me advice ed - really appreciate it.. Once the motor is running ill pull into the lower seal and inspect the impeller etc..

For now just want to ride her!

Found the fuel nozzle was leaking at the motor, saw the connector has a seal and beneath that an oring so will replace that today :) hopefully she will be ready then
 
This is where I lost the wire - boat is almost impossible to start unless i spray something in the front holes into carbs :p according to this diagram looks like the choke solenoid?

Also - how would I check to make sure the motor is charging? run voltage while idling? should be higher than batt & max 14.7v?

carb-wire.jpg

And I take it this is my serial number?

20160308_164434.jpg
 
Sounds like you're making progress! The "beep" when you first turn the key is a self-check and as long as it only beeps then and goes away, you're good.

On the enrichening circuit, the linkage on the Port side of the carbs is pulled upwards by a solenoid, via a plunger with black plastic tie-piece. There's also a manual choke plunger at the top of the airbox that you can pull up to do the same thing. It's connected to the linkage via a piece of braided stainless wire.

Here's a diagram for the carb linkage and "choke" solenoid:

http://www.marineengine.com/parts/m...749-usa/carburetor-linkage-and-choke-solenoid

On cooling, water spitting out the exhaust ports is normal and a good sign you have circulation. The exhaust manifold cover shouldn't get hot at all, just barely warm. It'll probably take air to clean out the telltale, since the wire didn't work. Probably plugged by silt/debris way up there.

G'luck on your maiden voyage!.........ed
 
This is where I lost the wire - boat is almost impossible to start unless i spray something in the front holes into carbs :p according to this diagram looks like the choke solenoid?

Also - how would I check to make sure the motor is charging? run voltage while idling? should be higher than batt & max 14.7v?

View attachment 12928

And I take it this is my serial number?

View attachment 12929

Not sure I recognize that piece but you can see where your choke solenoid mounts. You may have to take the airbox off to work out the linkage.

Note the black linkage at the bottom side of the carbs, this is part of the enrichening linkage and if you manually lift that upwards, you've opened the enrichening valves and that should make it easier to start. Of course, you'd need another person to hold it or just block/wire the linkage to stay in the up position until the engine fires.

That number looks like a casting number to me. Your serial number should be on a plate or decal on the side of the transom clamps/steering yoke assembly.
 
Hi thanks for the info.. Pulled carbs and found one was stuck.. The brass enrichment tube was gunked and solenoid wasn't pulling the rod up, and one float needle had some dirt.. All back together but raining today!

Have to get trim rod bolt and check why it's not beeping.. Also when I push back fast idle she sticks a bit, seems to be some play in cable at plastic end on motor control, might use a 2 part epoxy there, and look at adjusting the cables under console.. Also bit of play on steering wheel..

Small things.. And oring leaks on quick connection at motor so can't fuel it without pushing on it.. Thank goodness it's small things..

I managed to clear tell tale, put hose on it and it popped after some pressure so I'm sure it will hold..
Think I'm going to trace back the water hoses to before the head and flush from the top out, and prime water pump and flush up and out before head.. Think there's corrosion in there I want out..

Maybe circulate some strong vinegar solution in a bucket.. Really want to make sure it's not going to over heat..
 
Hi Ed, finally looks like I got everything sorted! Water flowing very well, just need a hand with timing.. I disconnected all 3 plugs, grounded them and Hooked up timing light to 1.. At tdc #1 I have zero on the cut in the fly wheel cover.. So I assume that's the timing mark?

Now not 100% sure..

This is my linkage:

2016-03-18 19.55.07.jpg

When I crank it, I get around 28 on the same place with top timing stop almost bottomed out, manual calls for 24 cranking.. Does that mean I bottom out the timing stop, and crank cos that's what I've been doing..

Getting bit much, the max timing words flash in the cut out..

How sensitive is it really?

FYI all throttle cables disconnected..
 
Last edited:
You do need to have the max spark advance in spec for longevity of the engine; too much advance can cause detonation & piston damage. As long as you have the plastic tip of the adjustment screw bottomed-out on the "spark stop", you're doing it the right way.

To reduce max spark advance, loosen the locknut on the spark stop adjusting screw, and turn the screw clockwise. This limits travel of the advance arm, thus less spark advance since the trigger assy can't rotate further.

Sounds like you're almost ready for your maiden voyage, G'luck!.......ed
 
Only do the timing if you are sure somebody messed with it.

If the timing is incorrect, it needs to be set properly!

Are you really recommending that he leave the timing at 28 deg advanced and risk burning pistons?

Or are you questioning the ability to actually check the timing in the first place?

It's a relatively straightforward procedure; as long as the markings are accurate and the scale is on Zero when #1 piston is at TDC, there shouldn't be any issues.
 
That is exactly what I am saying leave it alone.
#1 He bought a complete motor not in pieces why would the timing stop be moved.
#2 the motor needs to be in gear for timing no mention of a test prop or having it on the lake.
#3 how would the motor go out of time if it hasn't been touched.
#4 Most outboard problems get blamed on timing you have a better chance of wrecking it if you time it yourself.
#5 9 times out of 10 you will see if the timing stop has been moved the threads will be different colors.
#6 Mercury marks the bolt so easy to tell if it has been moved.
#7 No mention of problems from the previous owner.
#8 Very very rare for an outboard to just suddenly go out of time unless it has been touched
That is why now if the timing stop has been moved by all means time it JMHO If you put everything back where it was I bet you end up close to where you need to be.
 
Last edited:
All my adjustment screws were jammed up, one had to be drilled out and re-tapped - so its all ready now.. Im keen to familiarize myself with it - and who knows if it was set right or not?

Id rather have it in spec than assuming and possibly ruining a motor thanks -


So i have confirmed this:

disconnect all cables
sync carb links
make sure MAX THROTTLE STOP is set where carb butterflies are 100% open, not before or after - in case they start closing again at WOT..


the manual calls for the .464 / 11.8 setting - my dial indicator isnt here, but I can closely get TDC - I can also just use the piston stop method to get a perfect tdc - either way, im not sure where the tdc mark/pointer is/should be on this engine, right now its kind of between the centerline of the boat ad the starter (more toward boat ctr line) -

Then I set the timing adjuster all the way onto the WOT/Full position - and time the light here at 28 degrees (im glad because my prev number was in error! GOt the correct manual -

Ill figure it out 2moro and make a video to help folks out - but it seems after linking up the carbs, setting the max stop timing - theres also the secondary pickup to set - I think this sets the ignition advance during acelaration:


So in short we have:

1 - disconnect cables
2 - sync carbs to be fully close and open at the exact same time
3 - set max timing bolt onto stop - use timing light to get it to 28 degrees - tighten lock nut
4- adjust secondary spark stop till just at beginning of the carb cam - this i think applies spark during acceleration, you want it just as carbs start opening -
5 - Make sure the idle stop screw is fully seated at idle - NOT the carb springs.
6 - Re-connect throttle / fast idle cables - make sure that when Control lever is set back to neutral that the idle stop is contacted perfectly, not too soon or too late. This is adjusted at the nylon cable mount thread.

Phew - brain sore but that should be that. I think this is a better method for TDC because some ppl have complained they arent sure where tdc is - because some fly wheels dont have the keyed spline for a one way fit..

Will def make a great write up 2moro and some vids and post online -


thanks again all - even if just for motivation to figure this out!

FYI the timing curve is handled by the black cam beneath the fly wheel on this model - all i can do is limit it basically... I think a good check is to make sure there is NO advance on the cam at idle - my spec calls for 0 degree at idle.. in other words, make sure the advance ring cam is not touching the cam at all (in zero advance position).
 
You do need to make sure the timing pointer is accurate before adjusting the spark advance. If you have a piston stop handy to screw into #1 cylinder, that's a quick way to Zero-out the pointer with the timing scale.

Got to know that the pointer and scale are correct before-hand or the max advance adjustment will be inaccurate.
 
Totally Ed.. Gonna try find a long thread plug.. No stop here. Any idea where it should be? Pointer I mean.. On these mid 80s Merc/Mariners .. Just off center to starboard facing forward?
 
ok so still not having much luck - keep going in circles..

all i have sorted is the max throttle stop, its a no brainer - adjusted till carb butterflies are perfectly open..


Whats confusing is the primary pickup screw.. and idle - also I dont have a tach.. so not 100% sure where to set idle and base advance...?


Like i said I have some pics of the setup - so can get it back there no prob.. Also- the darn advance link broke when i tried removing the throttle linkage(!!) - tried gluing it back but just came off again..

So looks like now Ill have to pull the fly wheel off to do a proper repair there..


One thing im noticing is the primary pickup seems to move the timing when I turn it in and out.. but i thought the primary pickup is only there to set the throttle and carb connection?


If not - perhaps i set the idle advance at the primary pickup and the MAX advance with the top nut? and then the idle.. not sure where it shd be - when i move that around the primary goes out again..
 
Here's a decent flywheel puller on eBay, which includes a lifting eye if you ever need to take the motor off the boat:

http://www.ebay.com/itm/191465625308

Try not to get too far into the weeds on the settings; you'll need to adjust idle speed once the motor is in the water, warmed up and idling in gear.

The primary pickup is a static adjustment, to make sure the carbs start to open at a certain advance setting. So, yes, the timing does change while the carb linkage is moving, that's the way an outboard works (since there is no automatic advance such as in a car engine).

So basically, when you start with no throttle, the carbs are supposed to start opening at a certain degree setting as read on the flywheel's timing scale. You have to have the timing pointer (mounted on the starter bracket) aligned properly before you begin, or it's all for naught.

I've attached a screen shot of the pointer assy (#17 in the diagram).

Here's what you'd want to do, in order:

>Verify the timing arrow points to "Zero" on the flywheel scale, when #1 cyl is at TDC;

>Check/adjust the primary throttle pickup;

>Check/adjust the throttle stop, the carbs should be fully open (and no farther) with the adjusting screw against the stop. Unless you have moved the adjuster, this setting will probaby be ok;

>Check/adjust max spark advance with the adjusting screw against the "spark advance" stop.

That's it!

Hopefully that link I sent you helps.

Here's something else that will help with pulling the flywheel; I just got one of these from Home Depot and it looks like a decent unit at a good price:

http://www.homedepot.com/p/Powerbuilt-Flywheel-Turning-Tool-648455/204505230

Shipping to store is free.

HTH.........ed

p.s. the trigger assy is plastic, it might look like bakelite. I've seen some epoxy plastic repair kits that make a very good repair. Check at Amazon, pretty sure I've seen something there that may work. Hope you can fix it, otherwise this site carries a replacement.
 

Attachments

  • Merc 3-Cyl Timing Pointer.JPG
    Merc 3-Cyl Timing Pointer.JPG
    39.3 KB · Views: 49
Ed - thanks a mil for clearing that up - My first repair on the advance broke off yesterday - so i layered on 4 times the amount around the little elbow - checked this morning - looks real good - luckily not too much stress on it - more the rattling. Im in south africa so will have to look for a replacement here or in the US when im back -

I read somewhere having the carbs start opening at 4 degrees is about ideal -


>Verify the timing arrow points to "Zero" on the flywheel scale, when #1 cyl is at TDC; Done

>Check/adjust the primary throttle pickup;

Am i correct in saying the primary pickup affects the initial carb opening AND the base timing? SO is should wait till im idling in gear and re-adjust this on the water? Manual calls for 0 degrees at idle - when i try set primary pickup it advances spark so idle picks up alot - this seems to be the only part where im confused - but will play with it. Manual says to set it where the cam just about starts to open carbs on the plastic shoulder - also noticed it affects the max spark stop - hence why i do that after..


>Check/adjust the throttle stop, the carbs should be fully open (and no farther) with the adjusting screw against the stop. Unless you have moved the adjuster, this setting will probably be ok; Done

>Check/adjust max spark advance with the adjusting screw against the "spark advance" stop. Done


Will try get machine setup today..


Here is a short vid of it idling before I started fiddling -
<span style="color: rgb(0, 128, 0);">


Does that sound about right or a little high? And does the idle sound good?
 
Last edited:
It sounds pretty good, like all the cylinders are hitting. You might find that idle a bit high, but you really need to adjust it in the water, in gear, with the engine warmed. Note that it's better to have the L/U submerged fully in the bucket when running that way. If you have a larger container you probably can get it more in the water.

I have a large fiber-plastic barrel that once held Greek peppers and I can fit up to an Inline Six in it. You can actually idle the motor in gear to check idle speed, and adjust mixture. Well, at least get a pretty close adjustment, since it's best done on the water, too.

Almost time for a trip to the lake or river I think! I'd imagine it's pretty hard to find Merc parts over there in S. Africa. Quite warm I bet, too!
 
great - yep been pretty hot, but we are slowly heading into autumn :) cooler evenings, but pristine blue skies :)

Had a bunch of mariners here, quite popular actually - our family boat actually had 2 of these when I was a kid :) But yes - you pay yr ar$e off for some parts lol.. so much so that its quite ridiculous - given the age of these im not surprised anyway..

I will get a new impeller anyway at some point, but now water is flowing incredibly well - Just so bummed I broke that darn plastic gizmo(!!).. well I hope epoxy holds - To pull flywheel now without puller and torque wrenches 150 miles away aint gonna cut it - yes.. shd have a trial run this week at last!

Will try set the timing a bit closer then and check how she runs :)

I read somewhere the idle is set by timing only - not carbs..? not sure - anyway - I guess a test run / holeshot will tell the final verdict.. Just want this motor running as smooth as possible and economically too - Im a stickler to have things set properly and not "assuming" they do - not after the nonsense Ive seen. Just realised the PO or whoever put the darn pump gasket between the impeller and base plate!!! Gasket got chewed up of course and that what stopped my water flow - had I not ventured in there Id have cooked the bloody motor!

Obviously fixed now - but just amazing how some ppl who try fix these things dont even have a scrap of common sense!
 
Hi Ed, man what a mission I've been through with this motor! Trouble shooting bad running for 2 weeks, found broken magnets in coils! Anyway running great now, except everytime I run motor carbs seriously leak fuel, first it was the top one, pulled and cleaned it, now its the bottom one.. I usually test with primer bulb but the fuel pump obviously delivers more pressure.. What do u reckon I shd do? Raise float 1mm? Fuel comes out of the jet right in the mouth of the opening and drips into transom area. Also butterflies not closing 100% .. Could the spring be a bit weak?

Will pull them 2moro and inspect..

Thanks!
 
Coils are a common problem in ADI motors. Many times you can hear the arcing of a bad coil at idle. Pulling back the rubber cover and finding cracks or arc marks is another sure sign of a bad/weak coil.

You may need to replace the needle & seat in the carbs to keep them from leaking. Or you may find some "trash" in the needles. Make sure the floats aren't fuel-logged or deteriorated. And yeah, maybe as simple as an adjustment to float level, but you never know until you get them apart.

G'luck...........ed
 
Back
Top