Logo

Bravo 3 - R/R Gimbal Ring - While There... ?

abl1111

Regular Contributor
Looks like I will be in for removing and replacing the gimbal ring on my 2003 Bravo 3. I have a few questions:

1) Would you recommend replacing just the ring if that's what's bad, or should I replace the entire gig; mount, gimbal ring, gimbal housing
2) If I find a clean used one, what years will fit with my 2003 drive ?
3) I'm planning to remove the 5.7L 350 Horizon MAG MPI engine to do this. While the engine is out, what should I replace / inspect ?
4) While replacing the gimbal ring, what else should I replace - I know the seal on the gimbal ring is shot, the shaft itself should probably be replaced - what else ?

Is there any advice to do make this easier ? The official Mercruiser shop manual is a little vague and the more directions I get, the easier the job will be. i.e removing the engine - it seems over simplified as to what has to be done to disconnect all ( for example, what's a 'bullhorn' ).

Thx
 
Remove drive
remove motor
disconnect steering arm from power steering/cable (clevis pin)
Loosen steering arm pinch bolt, remove steering pin nut, remove steering arm, large hex nut holding it down. Requires the moving of the arm back and forth while loosening the nut.

Once the steering arm is off,

Remove trim sender and trim limit
remove hinge screws (each side of gimbal ring (12 and 3 o'clock) Special tool required
At bottom of gimbal ring remove swivel pin, may have a cotter pin going thru it and may require some effort to remove. Either way up or down which ever works best.

Replace ring,
steering arm nut,
steering pin (the one with the square, square that is loose to the ring)
Possibly the swivel pin with cotter pin. If it comes out easy you may be able to salvage it.

That is about all can remember.......

Nothing on motor, nothing on transom assembly. Maybe bellows if needed both the cable and ujoint (only if needed)


Reassemble in reverse and when setting ring height maintain .010" to .020" clearance between top of ring to bottom of gimbal housing.

install motor and align.....special tool required

install drive.

I don't think you would need anything else other than if the trim sender and limit are ng replace while apart.....
 
When removing motor,
connect lift chains to motor.

disconnect all cables, disconnect any wiring that is going to battery, grounds, any other misc wires, disconnect gas line to fuel pump

disconnect main cable connector,

attach lifting chain device and put light tension on motor.

Loosen the hose clamps attaching rubber boots to exhaust. Best to loosen the ones that are vertical to the "rams horns" the Y pipe the exhaust flows down thru.

remove large hex nuts from motor mounts being careful not to change height of lower nut, Mark studs if possible

remove power steering hoses from assist. Cap hoses so fluid does not leak out.

Remove the two rear motor mounts

pull motor

I think that covers it.

I could be missing a few things but pulling a motor can be done in a hour or so.....it is somewhat modular I design. easy in and easy out.......
 
OK - That sounds awesome. I think I should be good - at least I should be able to get the motor out. This project will be done after striper season although I wish I could do it now. I definitely feel a vibration and hear a louder noise that I did not feel or hear before when I trim the motor up while cruising - feels like almost cavitation. My theory is that the drive is moving around a bit while cruising and the props are somehow cavitating.

Going down a canal at idle is an adventure. It is very hard to go straight without spinning the wheel a lot.

BTW - What causes this gimbal ring issue ? Could it be from running aground ( into sand ) - and the drive being snapped into a different direction quickly ? It happens around by me as the shallows and channels are tight and always moving - not to mention the tremendous variation in currents.
 
""""BTW - What causes this gimbal ring issue ? Could it be from running aground ( into sand ) - and the drive being snapped into a different direction quickly ? It happens around by me as the shallows and channels are tight and always moving - not to mention the tremendous variation in currents."""


Poor maintenance...........that U bolt that pinches the gimbal ring to the steering pin needs to be tightened periodically to keep it tight.
Once it gets loose and stays that way for a while this is what happens. In some cases it can be corrosion of the steering pin but mostly it is loose and it wears the aluminum ring away......
 
Then it's on me - as I do all the maintenance ! I never read anywhere in the official Mercruiser shop manuals to re-torque those nuts ! I'll pay for it, literally and figuratively - now !
 
It may or may not be in the manual...........it is for sure something that I check on every outdrive service I have ever done.

See how much side to side slop is in the drive before the steering cable makes contact. If any is present (ANY) tighten the (in your case) the U bolt. In the case of the Alpha it is two separate bolts.

Now remember, all the drives no matter what model there is only so much the bolts/nuts/ U bolts nuts can be tightened. The threads are only so long.

If you reach the end of the threaded portion of the bolt then wear has set in and the parts will need replacement at some point.

There is a kit available to do all this without removing the motor but I prefer the clean look of the outdrive vs having large plastic threaded plugs sticking out of both sides. Especially when you are doing it your self and time is relevant to you and not a question of labor hours to be charged to a customer.....
 
Caution when removing oil fill line from the reservoir to the OD. The pass thru part is plastic and hardened OD oil hose is difficult to disconnect from the plastic nipple. I just cut it then when all is removed carefully remove the old hose then attach a new hose to the plastic nipple 1st upon reassembling OD parts.
 
Holy Cr*p. I just watched a vid on Youtube about the process. Essentially, I will be removing the engine and the entire transom assembly - inner, outer, gimbal ring, housing. What a project ! I watched a vid out of curiosity where a guy was doing the ' leave the engine in, cut through the outer transom plate for steering bolt access, and cover with SS plate ' option.

This is a big project.

It's obviously do-able, but my balls are shrinking ! :) I'll be fine after a beer.
 
You do not need to remove the inner and outer transom assemblies.............only the drive and the motor and then remove as I described above.
 
Jack OK - I re-read your info - I feel better again. I CAN do this !

There is more to it - i.e. knowing how to remove and install bellows, using bellows adhesive, tricks to remove/install water cooling hose - and again using adhesive there. Is it necessary to heat up the hinge screw area as the vid I saw says - they say there is loctite holding it in place and if not heated, theres a potential to do damage. There's also a shim / spacer/ washer VERY thin, that is between the lower gimbal ring and the mount, holding the ring from rubbing against the mount - and… getting the uppegimbal ring shaft out requires finesse and there is a seal that must be replaced up there too. Lastly - something about the oil unit reservoir hose and that it feeds to an easily snapped plastic hose fitting - which would be a be'atch !...

There's a lot going on and as a first time attempt - I don't want to do anything wrong to: a) damage something I don't want to and, b) do it incorrectly and have to duo it again !
 
Update - Motor is out. The motor has 750 or so hours. A few questions:

The oil pan has a few spots that look cruddy. Can this be welded or should I just replace ?
The coupler is original and aluminum - it looks great, but the sticker shock of $750 for the steel replacement is killing me, ( especially when I look at the total estimate ) Should I do this ?
Starter is fine, should I rebuild now - it it something that can be done when engine is in ?

After buying the transom assembly and the estimate from the mechanic for all these 'other items, I'm in $$$$ shock !
 
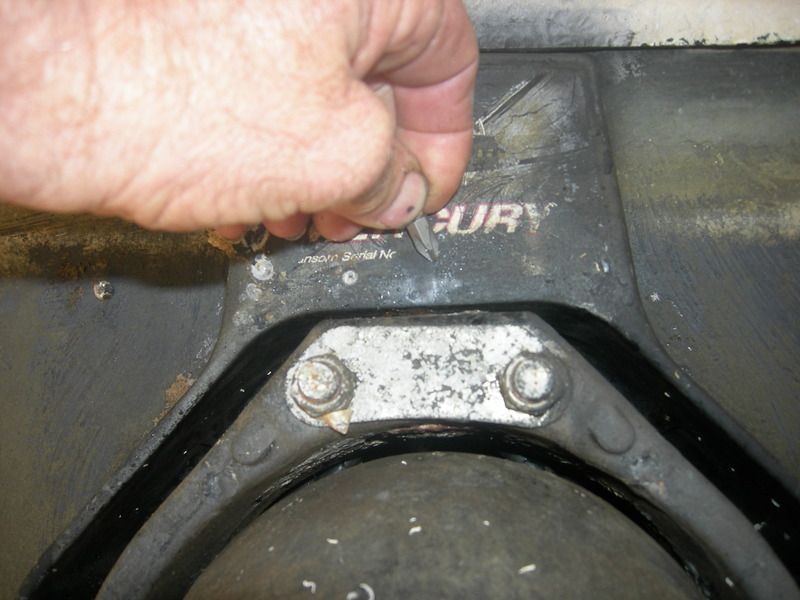
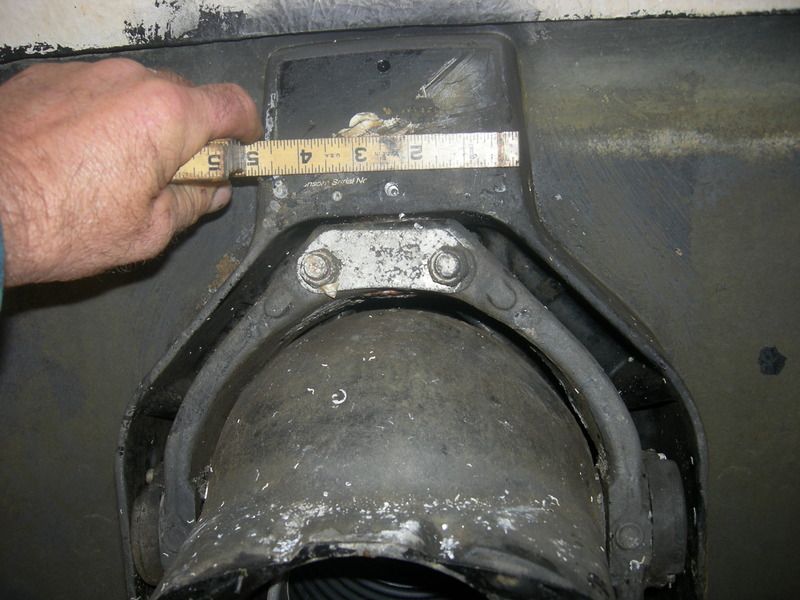
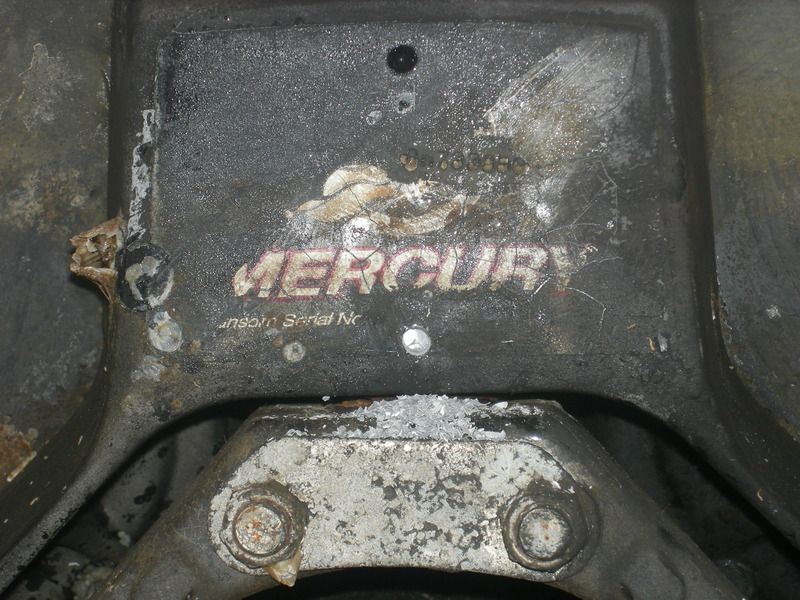
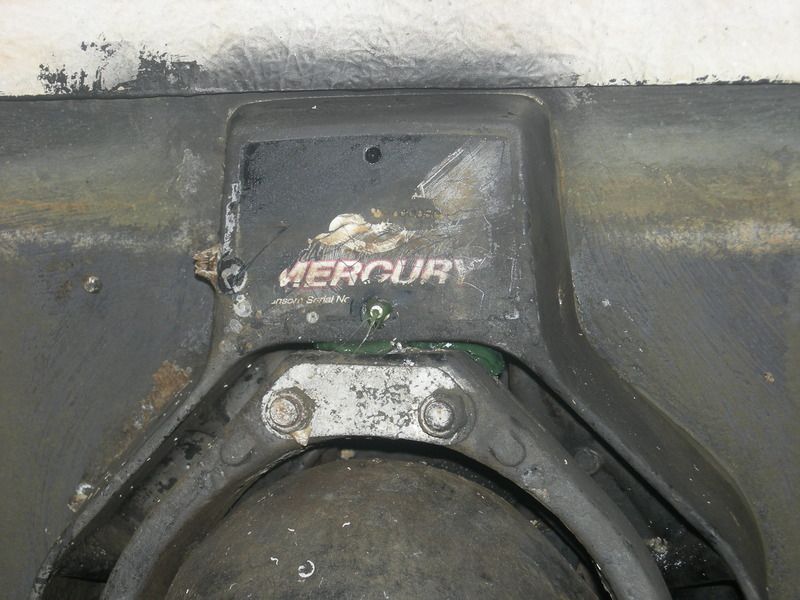
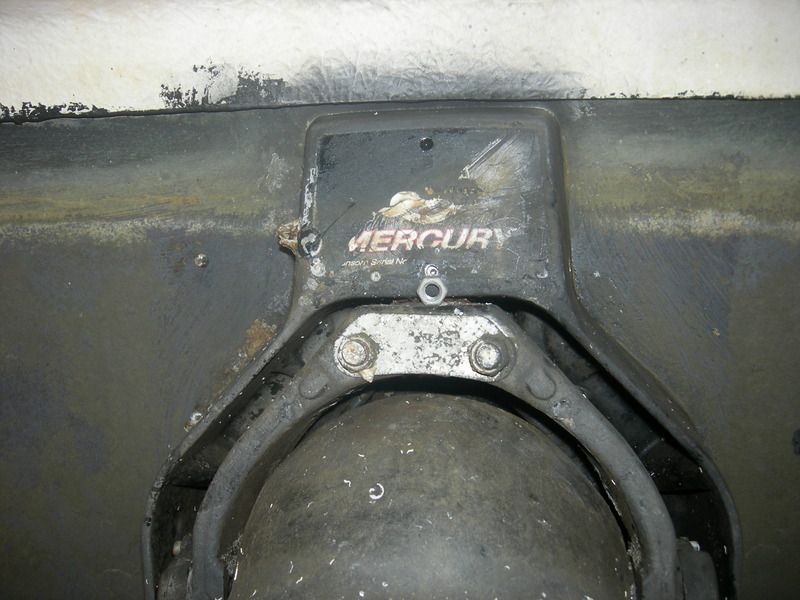
If is not already there, install the missing grease fitting , helps the seal live a very long life
DSCN3595_zpsvjho7uqq.jpg

DSCN3594_zpsn1ksly9j.jpg

DSCN3600_zps2n9ljrke.jpg


locate the center of the pin ,can be done visually
DSCN3596%20-%20Copy_zpsdto3cytz.jpg

Drill in 3/8 ths of an inch with a #3 drill bit for 1/4 x 28 thread and tap .
DSCN3598_zpsvoabnrlx.jpg

using a 3/64 drill bit CAREFULLY drill approx. 3/4 to 1 inch into the housing until the magnet picks up steel shavings.STOP DRILLING. Install grease fitting.inject grease until you see it between the steering yoke and transom.
DSCN3602_zpslputctrs.jpg

Your now done.
another measuring device is to use a 5/16 ths hex nut
DSCN3601_zpsbd6k7xav.jpg
 
Last edited:
I would replace coupler with OEM original aluminum........

Starter, I would look on ebay or amazon and purchase a brand new one..........They should only be about $100.00 +/- And yes replace it!!

No one said this type of work is cheap or the parts.........

The labor alone is going be a fair amount if you have to pay someone else to do it.........Motor, transom, drive, remove and then reinstall!!


Been there and done that............very labor (hard labor) intensive.
 
I have only seen aluminum ones....

How long has the steel ones been used? Or were they used on HP or heavy applications mostly?

ALso would that tie into the use of the grease fitting on the coupler for the shaft/coupler greasing?

I always though it had to with the fact they went to non serviceable joint's thus the drive would not be removed and the shaft greased manually???
 
I am going to go with the steel coupler. The frustrating thing is to have to do it all - especially since my alum one looks fine. But, it could 'go' at anytime...

As for the starter - I've looked for an OEM one and can't find the price pint you mentioned… Any insight ?
 
give me the specs I need to look,

year of motor and size?

Maybe a part number you are looking at now?
 
is this what your starter looks like?

http://www.lowcostboatingstore.com/QUICKSILVER-50-808011A-STARTER-MOTOR-ASSY_p_24229.html#

if so...

http://www.eastcoastbattery.com/marine_starters.htm

at bottom of page

http://www.rakuten.com/prod/starter...vc:c|adp:1o5&gclid=CMGuvJaU5skCFcMRHwodWpIEmg
Not sure how reliable the web site is but it came up in a search

Here are some from ebay....not sure about the CCW counter clock wise ones.....
http://www.ebay.com/sch/i.html?_fro...0&_nkw=50-808011+A4+starter+motor&_sacat=6000
 
Last edited:
Thank you. I bought an OEM one for $160. $35 more than a rebuilt one. I also bough that steel coupler. It looks different than aluminum, it has an extended shaft receiver,as opposed too the aluminum which is more flush.
 
Back
Top