Logo

Method to replace steering arm? (DIY BF130)

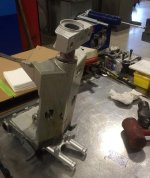
I've cut off the bottom frame mount and removed the circlip (which was part of what was cut off anyway) and pulled out the oil seal, so if I'm not mistaken the only mechanical friction is between the steering tube and the plastic swivel case liners top and bottom. So if I melt those sumbiches it should give me some play, reckon?
 
In case it helps, here is a quote from another forum dealing with tilt tube replacement:

[FONT=Verdana, Arial][FONT=Verdana, Arial]Most likely you will require some heat. I use an oxy/acetylene torch for heat. I heat the aluminum evenly and carefully around the tube. I leave one of the tilt tube nuts on and use a large breaker bar and socket and try and get the tube rotating. Once you get it to rotate freely then you should be able to pound it out. Don't bother pounding until you can get it to rotate.[/FONT][/FONT]
 
ah-hah, thanks for finding that. I don't have a torch but I can find someone who does. I'm not convinced a press would get it out without heat either. Although I fear I'll roast those nylon bushings then, too. But hey what's another $20? SMH
 
Nutin' but time and money :)

I also noticed that once the tube is broke loose, they use the new tube to drive out the old tube - keeps everything in alignment. That must assume that all of the other parts remain usable though.
 
Last edited:
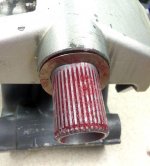
Mwahahaha partial success. Got the old steering pin out. Looks like a baby crapped all over it. Nasty old wet grease.

Also so made enough gap between the tilt tube ends to slide a sawzall blade in there and cut the tube. That means I can take the end brackets off and only fight the seized tube ends individually instead of fighting both simultaneously. No damage to the surrounding parts.

https://www.dropbox.com/s/03tr2onx6bunyz2/photo aug 03, 6 11 46 pm.jpg?dl=0

What a mess. Might have to burn the house down when this is over. Notice the axe maul, I used it to pound the steering tube out!

https://www.dropbox.com/s/8idn73e186k3sbs/photo aug 03, 7 45 41 pm.jpg?dl=0
 
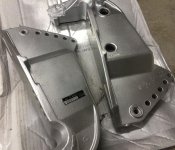
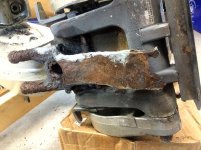
I ended up cutting the old tilt tube on both sides which left a section of seized tube in either side bracket that simply won't come out with the tools I have at hand. Plus with all the beating on them I've made some non-discreet dings in the pieces. Luckily an eBayer had the pieces dirt cheap and I went ahead and purchased them. Rare that you can find the parts you need for less than the cost of tools required to reuse flawed parts.

The center section of the tilt tube pushed right out of the swivel mount leaving the nylon bushings in good shape. Just had to get some old grease out of there and it's completely useable. I'd be done with the steering arm replacement by now if I hadn't decided to replace the tilt tube, which wasn't absolutely necessary, but I wouldn't be able to relax knowing the ends were seized in the brackets. 60% of this project has been dealing with that tilt tube, making the steering arm 'mount frame' downright simple by comparison. Take care of your tilt tubes, guys!! The replacement brackets, studs and nuts for the steering arm extension (which I just realized was required for my new hyd cyl), some wire clips to replace broken ones and other small bits should arrive next week. Guess I've got the weekend off.

3 parts and some very hard working tools
https://www.dropbox.com/s/vn9114732ek1k3p/Photo Aug 06, 8 17 56 PM.jpg?dl=0

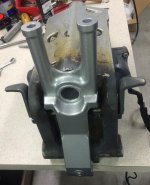
Since I'm back to waiting for parts again I decided to clean up the case
Before
https://www.dropbox.com/s/irqzibmzez75gqk/Photo Jul 28, 12 25 31 PM.jpg?dl=0
https://www.dropbox.com/s/w0f0ylafgkqch09/Photo Jul 28, 12 33 48 PM.jpg?dl=0
https://www.dropbox.com/s/hfkoiaz3sz9le5u/Photo Jul 29, 1 38 13 PM.jpg?dl=0

After
https://www.dropbox.com/s/y3xgw8d294ds0lg/Photo Aug 06, 8 17 24 PM.jpg?dl=0
 
Looking nice and clean!

So, regarding the parts with the seized steering tube pieces, are those the brackets that are in the top part of the first picture in your last post?
 
Yep those are the culprits. Parts 12 and 13 in this diagram, part 16 is the tilt tube I cut in two places. Unrelated to the steering pieces, but when I removed one of the nuts on the end of the tilt tube and saw it had rusted off some threads, and knowing that my brand new hydraulic steering system will need to depend on the strength of that part, I decided to replace it in advance.

http://www.boats.net/parts/search/H...130AX LA/STERN BRACKET SWIVEL CASE/parts.html

You can see the condition of the tilt tube on the left of this pic. Under that grey anti-corrosion paint mess it was missing 1/8" of threads.
https://www.dropbox.com/s/5molquka7ep5v25/Photo Jul 15, 6 13 35 PM.jpg?dl=0

The mounting rod for this steering cyl will be going through the center of the hollow tilt tube and need some of those threads. I could have 'gotten by' but it wouldn't feel right.
https://www.dropbox.com/s/f8o6ru5vmwh24zh/Photo Jul 25, 5 14 13 PM.jpg?dl=0
 
Yamaham - that's been great documentation throughout this process. You should write it up in detail and post it somewhere where folks will have access from an Internet search. It's been educational for me and I suspect it could be a lifesaver for other outboard owners.
 
Thanks chawk. I would like to put together a little more complete info than the smattering posted so far. Yesterday I received notice that the bolt collars for the lower mount bolts are now on extended backorder. I've been waiting on them to complete the refit. My originals aren't in terrible shape so I may clean them up and reinstall for now. I can always use the hoist to support the motor and change them out when they come in. Otherwise I think I'm ready to go.

New Uflex UC94 hydraulic cylinder
New Uflex bulkhead hydraulic steering hoses
New OEM steering mount arm, liners, oil seal, washers, circlip, nuts
New OEM lower mount bracket, nuts
New OEM grease nipples, various nuts, washers
New OEM steering arm extension plate, studs, nuts
Used OEM tilt tube and nuts - cleaned up and polished
Used OEM stern brackets port & starbd - cleaned up and painted

So far I'm at $800 in above listed parts incl S&H, plus some others I don't count because they were cosmetic pieces, plus tools to do the work. I figure it's about half the cost of someone else doing it, and they wouldn't have wiped down the engine, polished the metal parts, or taught me how things work or route, what needs to be greased, etc. I've tried to make the best of waiting on parts to arrive by removing any bolt that doesn't shine, hitting it with WD40 and a slow wire wheel, applying anti-seize to the threads and wiping a thin layer of 2-4-C grease on the head. I hope that helps me the next time I need to take the cowl off and fiddle with something.

Other projects to complete:
Oil change (Honda 10W-30)
New thermostat
Check water pump, service as needed
Check gear oil, service as needed
Possibly have the prop serviced, some edges have a slight bend
 
I started reassembly! The new mount frame went in like a dream. All greased and buttery smooth - it will move if you poke it with a stiff zip tie, wow. Before, a hammer blow moved it maybe 1/2" which means the steering was fighting for its life with every input.

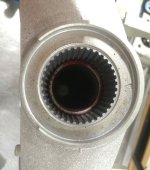
However not all is going my way. The manual is serious about using a press to put the lower mount bracket on. I tried dry fitting it by hand just to make sure things line up and I wasn't convinced I even had the right parts! The splines don't even begin to mesh. I counted the teeth and measured different angles with calipers and I guess it should match up, but this is a seriously tight fit and will require incredible pressure. No wonder the old part wouldn't even budge. I'm going to a shop tomorrow to have it mated. Liquid nitrogen and a torch came to mind but I'll leave redneck injuneering out of the reassembly process.
 
Something to make me feel a little better. Progress pics.
 

Attachments

  • Photo-Aug-14,-7-43-07-PM.jpg
    Photo-Aug-14,-7-43-07-PM.jpg
    68.6 KB · Views: 94
  • Photo-Aug-14,-7-43-18-PM.jpg
    Photo-Aug-14,-7-43-18-PM.jpg
    66.6 KB · Views: 131
  • Photo-Aug-14,-7-43-50-PM.jpg
    Photo-Aug-14,-7-43-50-PM.jpg
    79.5 KB · Views: 92
  • Photo-Jul-29,-1-27-28-PM.jpg
    Photo-Jul-29,-1-27-28-PM.jpg
    83 KB · Views: 135
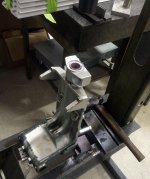
Headed to a shop with a press. Really glad I didn't attempt to press this assembly myself. We ended up having to cut some stock to press the bottom mount on, then mill out a few mm to clear the splines coming through it. I wouldn't have had stuff just laying around and PVC would burst! Honda has a special tool for pressing it on but I can only imagine how much those pieces cost.

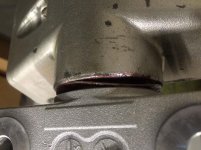
We lined up the top and bottom pieces then gave it a couple blows with a BFH (big frickn hammer) to set it. Then we went over to the giant hydraulic press that was way more prepared for this type of work than the cheap Harbor Freight stuff I was eyeballing. We pressed it on until there was clearance for the cir-clip in the groove. Bingo, time to take it home and start reassembly!

Got it pretty much ready to hang on the transom again. Everything that has a grease nipple gets coated with Liquid Wrench GR015 grease during assembly, then pumped full of grease. Everything that doesn't have a nipple gets Mercury 2-4-C with Teflon applied. Every steel thread into aluminum gets Permatex anti-seize. All reused stainless pieces, nuts, bolts, washers, etc. get a trip to the drill press with a wire cup brush in the chuck to remove any surface buildup. It's a lot more labor but I'm not planning to deal with gross parts on this ever again.
 

Attachments

  • Photo-Aug-15,-1-11-40-PM.jpg
    Photo-Aug-15,-1-11-40-PM.jpg
    66.2 KB · Views: 96
  • Photo-Aug-15,-1-13-03-PM.jpg
    Photo-Aug-15,-1-13-03-PM.jpg
    93.9 KB · Views: 83
  • Photo-Aug-15,-1-30-25-PM.jpg
    Photo-Aug-15,-1-30-25-PM.jpg
    71.5 KB · Views: 104
  • Photo-Aug-15,-1-30-38-PM.jpg
    Photo-Aug-15,-1-30-38-PM.jpg
    69.5 KB · Views: 80
  • Photo-Aug-15,-7-47-02-PM.jpg
    Photo-Aug-15,-7-47-02-PM.jpg
    67.6 KB · Views: 110
Last edited:
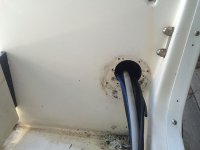
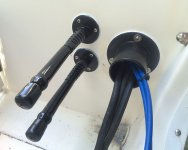
Still sitting in the garage waiting to finish some other projects. I got rid of the crusty old rubber rigging boot and installed a rigging tube flange in its place. Also installed the new hydraulic steering hose bulkheads. Got a used warning light panel for the dash since the Honda graphics had worn off mine. Maybe another week before I reinstall the motor.
 
I need to change the topside line from the water sep to the outboard. Here's my current fuel line setup. Should the last bit also be 3/8?

Tank to primer bulb 3/8" A2
Primer bulb to water sep 3/8" A2
Water sep to outboard 5/16" B2 (topside)
 
Couple pics after removing the crusty old rigging boot and where I stopped with its replacements.
 

Attachments

  • Photo-Sep-13,-10-53-19-AM.jpg
    Photo-Sep-13,-10-53-19-AM.jpg
    58.9 KB · Views: 35
  • Photo-Sep-20,-3-33-33-PM.jpg
    Photo-Sep-20,-3-33-33-PM.jpg
    57.1 KB · Views: 44
Thanks hondadude. Hung the motor on the transom today! Took about 2 hours by myself including applying the gooey, stinky BoatLife Life-Calk to seal up the bolt holes. Tomorrow I'll hit the marine supply store(s) looking for a couple odds-n-ends to get everything reconnected. Hopefully I'll get it running this weekend.
 
Got some new Trident A1 and B1 hoses to replace the janky bits, some ABA clamps to strap it all down, and another bit on order to finish the fuel refit.

I had time to flush new fluid through the used helm and main run of hydraulic steering hoses in preparation for coupling to my new bulkhead hoses.

With that out of the way and since I'm back to waiting for parts (again) I decided to install the new steering cylinder - yay! New parts going on is always exciting. First issue I ran into was my eBay used tilt tube was not as clean on the inside as I thought it was and I had to spend a lot of time chipping old gunk out of it. Not so easy with it installed, but I battled my way through it. Then I installed the new hydraulic steering cylinder without too much trouble until it came time to connect it to the steering arm extension plate. It seems the factory assembled the cylinder's arm backwards and it interferes with the studs under the Honda steering arm extension plate. It curves too early and comes in from the side. If I could flip it around it would come from nearly straight ahead and provide clearance. I flipped it over and there's a hex key in the bottom. I tried with 6mm but it started to slip, so I grabbed 1/4" and it was too large. Tried a different 6mm and fumbled with it enough that it's nearly stripped. Great. I've contacted the manufacturer. :\
 
...and received the replacement today. Whole kit, all new bolts, tilt rods, horns. Incredible. I know SeaStar gets most of the press for the outboard market but I urge anyone to contact Ultraflex USA direct before making any purchases. They've gone above and beyond each and every time. Sure there was a mistake at the factory but they sent out an advance replacement THAT DAY. Who does that?

I should be finishing it up this weekend if the weather is favorable!
 
Got the steering cylinder on - yay! First off, the motor turns SO smooth by hand. I can push it back and forth with just two fingers on the steering arm extension plate. It's like buttah!

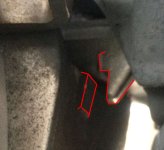
Ok new question. With the steering cylinder now connected to the steering arm extension plate, using the hole closest to the motor as the steering install manual states, the motor doesn't seem to turn fully to either side. I know the steering is supposed to reach maximum before the motor angle does, but the gap is 1/4" to 3/8". It looks like I'm losing a lot of turning ability. I've never run the boat and I don't remember how far over it used to turn. I looked in the Honda service manual and couldn't find an angle to aim for, particularly because it only discusses cable steering and those have much greater range.

Here's a terrible picture of the gap that I tried to highlight and a pic pretty much straight on behind the motor at full angle.
 

Attachments

  • Photo-Sep-25,-6-14-59-PM.jpg
    Photo-Sep-25,-6-14-59-PM.jpg
    93.7 KB · Views: 64
  • Photo-Sep-25,-6-15-13-PM.jpg
    Photo-Sep-25,-6-15-13-PM.jpg
    63 KB · Views: 54
If using a Sea Star System (which I understand that you are not), the 130 takes an HC5347 cylinder. All of the other Hondas and most Mercury's, Suzuki's etc use an HC5345.

So, something must be different in the steering.

If the 130 is so unique and not made any more, the Ultraflex folks may not have made a cylinder just for that one model.

Mike
 
In my research I have determined that the difference between Seastar's HC5345 and 5347 are the triangle shaped plate which link the cylinder to the motor. For example, their docs note that a 45 can be converted to a 47 by changing the plate out. Uflex has a special model no for this motor application and the install docs refer to it and the extension plate specifically - with illustrations. The difference from their normal model of its size is the link arm with a 90 degree elbow rather than a straight bar, not dissimilar to Seastar's adaptation. The difference I can identify is that Seastar links to the hole in the steering arm, closer to the motor pivot, which I believe provides more angle for the same throw. I roughly measured 22 degrees of motion from center. I think that would make maneuvers difficult.

This is is all very frustrating. I have put in a lot of very hard work to make it come out right. The boat has yet to see water. I'm going to contact the manuf tomorrow.
 
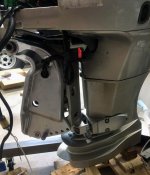
I've reached out to Uflex and they responded almost immediately. If nothing else, they have been a treat to deal with. I think we can get past this with a different link bar that connects to the normal mount hole rather than the extension plate nonsense. Anyway here's my install so far, functionally complete. The motor needs a coat of paint and some new decals - maybe once it's on the water and sorted out.

https://www.dropbox.com/s/wnt8hynp4bricsq/Photo Sep 27, 2 16 51 PM.jpg?dl=0

https://www.dropbox.com/s/paelle9vdpdfqpo/photo sep 27, 2 17 29 pm.jpg?dl=0
 
Splashed the boat for the first time today. All went well. Sort of freaked out when the in floor livewell filled up while idling the engine at the ramp. I put it back on the trailer and let it drain, then relaunched. But the motor ran well, if not a little underpowered. I've gotten spoiled by friends and family twin 300s on performance hulls. The 130 on a 19ft with 3 people is no rocket ship. Hull will take up to 150 but this is ok for us.
 
Back
Top