Logo

2003 350 5.7L MAG MPI with Bravo 3 - R/R Impeller

abl1111

Regular Contributor
I want to replace the raw water impeller in my 2003, 350 5.7L MAG MPI w/ a Bravo 3.

Does the entire pump have to be removed or can I remove just the impeller housing/ pulley, replace the impeller and re-install ?

The impeller has been changed only once in 650 hours ( about 300 hours ago ) - all original other than the impeller. I did inspect the backplate at that time and sanded it smooth.

Any tricks/ shortcuts to this job that can be shared ?

Should I replace:

- o ring
- rear oil seal
- bearing shaft assemb
- retainer seal

Thank you...
 
Thx for the reply. Your pump was shot - mine is, as far as I know fine - just a change of impeller for preventive maintenance. They whole pump is expensive to replace - but of source I would if I had to ! It's a be'atch to get out even with decent access, which I don't have ( I have to remove a battery shelf, batteries, trim pump, etc. to even start the project ).

I'm trying to get advice if I need, or rather should I - pull it all and inspect it all while ' I'm there '… And again, do yo need to pull the whole pump to replace just the impeller?
 
Ok, I guess what I am saying our boats are 12 years old. If that pump and the water circulation pump have bearing issues which are due for replacement your breaking down on the water.

Either way I have had my pump housing out twice. The serptine belt and maybe 5 bolts and 2 brackets keep in place. 2 hoses with clamps. Because the hoses and space are tight. I cut the water intake hose in half to remove. And then replace that hose. It an fitting to reach behind the engine. I don't recall if the bolts holding the pump face and pulley are on the outside face.

I agree I would of just replaced my impeller. I had 2 water related issues with in a month. So decided to replace the other pump. Tstat I did not change.

Best of boating to you.
 
I want to replace the raw water impeller in my 2003, 350 5.7L MAG MPI w/ a Bravo 3.

Does the entire pump have to be removed or can I remove just the impeller housing/ pulley, replace the impeller and re-install ?

The impeller has been changed only once in 650 hours ( about 300 hours ago ) - all original other than the impeller. I did inspect the backplate at that time and sanded it smooth.

Any tricks/ shortcuts to this job that can be shared ?

Should I replace:

- o ring
- rear oil seal
- bearing shaft assemb
- retainer seal

Thank you...

It is easier to pull the pump and change the imp on the bench.
 
OMG - This is like those 70's jokes about changing an oil filter in a japanese car. Tight as a mother-f$%^&^*&$%# !!!

Getting the water hoses off seems almost impossible as the clamps are deep and even after I was able to loosen the nuts on the clamps - the hoses are on the pump tight and there is no leverage - any ideas ? Cutting the intake hose wouldn't be necessary as I could disconnect on the valve side and pull if I needed. The output hose I didn't get a good look at. I did detach the pump from the bracket as I was hoping to be able to pull the pump more forward to get better access to the hose/pump connection - it's a little better but still a contortionist would be challenged and I couldn't get a better position - besides I want to pull the small diameter white and green hoses out first...

How do those pesky small diameter green and white hoses come off the pump ? I remember you could pull the collar away which I did, and I thought the hose would then slip out - this seems to not be the case - how do they disconnect ?

What a be'atchy job ! Dirty, bloody, .. lost daylight so I stopped - but I did pour a bourbon ! Feeling better already.

Advice ? Besides more bourbon :)
 
Got the pump out - took it apart - the impeller is shot. The non-pulley side of the pump housing needs to be sanded to remove grooves where the impeller edge spins - I remedied this the last time to remove these grooves using a 3/4 pc of glass as a perfectly flat 'table' then I held first 60 grit ( then 80 then 120 grit ) sand paper mounted to the glass it. I slid this flat, grooved part, cross hatching, along the sand paper till grooves were gone. Tedious but it worked. Is there a more effective way ?

The pulley, bearing and seal seems to be fine. Spins fine and it never leaked before. Should I rebuild these or leave them ?

Lastly. the pulley housing seems fine - minor grooving on the inside end - nothing I'm concerned with. Where the impeller fins spin is perfect.

Thanks for the help.

BTW - obviously got the pump away from the intake and circulator hoses; one came off easy enough - but the other had a small pc of hose, about 6" long, connected to a "Y" type connector 'thing' - I sacrificed that small hose to remove pump. It'll be easy enough to replace and reinstall.
 
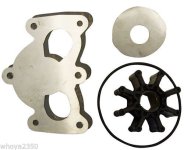
re: "the non pulley side..... needs to be sanded" .... There is a S/S wear plate that should be replaced at the same time as the impeller. It comes as part of the rebuild kit. Sanding down the worn plate will eventually increase the clearance between the raised seal ridge on the impeller face and the plate, thereby increasing both vacuum and pressure leakage (or sneak paths) within the pump and reducing pump efficiency. Also be sure to lube the impeller before inserting it in the housing and insert the impeller while rotating it in order to get the impeller blades "set" correctly.
 
Last edited:
I think this set-up is different. There is no SS wear plate. Its all bronze. The side I want to sand is flat ( with grooves from wear ) so sanding it, as long as it's uniformly flat will not be a problem. I will lube the impeller. Glad I did this project as (2) vanes were torn.

Any advice on re-doing the pulley bearing/ seals. Nothing leaks an it spins freely. BTW - What type of puller pulls the pulley and then the shaft ?
 
Quick question - when removing the pump for impeller change, there's a small diameter air hose that connects to the top of the pump via a plastic nipple - seems like this is part of the air purge system. As luck would have it, this nipple/hose barb broke off when pulling the hose off. Can I leave it like it this, or can you think of a small ( tiny, really ) hose barb with threads on one side and the hose barb on the other that I could tap in to repair ?
 
Quick question - when removing the pump for impeller change, there's a small diameter air hose that connects to the top of the pump via a plastic nipple - seems like this is part of the air purge system. As luck would have it, this nipple/hose barb broke off when pulling the hose off. Can I leave it like it this, or can you think of a small ( tiny, really ) hose barb with threads on one side and the hose barb on the other that I could tap in to repair ?
If it's the black hose on top of item #1 in the following link then you'll be fine to leave it broke off....If it's item 18 or 19, then you'll want to repair it as they are the main part of the quick winterization drain system. http://www.mercruiserparts.com/Show...r=7585&bnbr=270&bdesc=Sea+Water+Pump+Assembly
 
It was # 1 but I repaired it - took a car bleeder valve, cut the end off, tapped the top of water pump where the old one broke off ( it's a plastic area ), and screwed bleeder in. Air tight again. Thx.

Should I lube impeller with anything for install ? I've heard all sorts of stuff, oil, vaseline, dishwashing soap ? What's the right thing to do ?
 
Should I lube impeller with anything for install ? I've heard all sorts of stuff, oil, vaseline, dishwashing soap ? What's the right thing to do ?

No Pertroleum products.

Dish soap is OK if you'll be starting the engine soon.

Otherwise, I'd suggest using Glycerin from a drugstore.

.
 
As per your post #8, when you finally get tired of the belt driven seawater pump hassles, consider installing a crankshaft seawater pump.

It's a one-time-conversion ordeal, but once done you'll be thanking yourself!
 

Attachments

  • crankshaft pump.jpg
    crankshaft pump.jpg
    38.3 KB · Views: 552
Rick. Interesting conversion. I looked at it online. I see the kit to attach but obviously there's more to it than that. How much would it be to put the right conversion kit, complete on a motor, for example like mine. And, what would need to be done ?
 
Rick. Interesting conversion. I looked at it online. I see the kit to attach but obviously there's more to it than that. How much would it be to put the right conversion kit, complete on a motor, for example like mine. And, what would need to be done ?

Your OEM belt driven seawater pump goes away.... along with the mounting bracket.
Your OEM crankshaft pulley should be equipped with the alignment dowells for the Jonson pump mounting flange.
The Johnson F5B-9 and F6B-9 are both flanged to fit over these dowells for alignment.
The 3 bolt pattern will be there.
Your serpantine belt will need to be shortened.


Indmar, PCM, Volvo Penta, Marine Power, Alaska Diesel, Northern Lights and several more companies have been using the crankshaft mounted seawater pumps for years.

Advantages:

Easy impeller access via the front cover removal.
No belt tension side load on the pump shaft bearings.
Rotatible housing as long as the inlet/outlet ports are connected correctly.

Like said, this would be a one-time-ordeal that would involve some work and homework.
IMO, it would be well worth the effort given my experience and as to what I've seen and read regarding the belt driven seawater pumps and the difficulty in accessing the impeller, of which often results in defered impeller maintenance.

With this style pump, you can easily remove the impeller for winter layup and extend impeller lilfe.


.
 
Back
Top