RicardoMarine
Gold Medal Contributor
Do you know how to use something such as "Prussian blue" or a gear pattern tooth die?
.
.
Last edited:
MarineEngine.com does not offer troubleshooting assistance or repair advice by email or by telephone.
You are invited to join our public Boat Repair Forum to seek assistance from other members.
You may also visit the Boat Motor Manuals section of our site to obtain a service manual.
You just coat the teeth lightly, assemble, rotate then take apart and look at the gear mesh pattern. Correct?
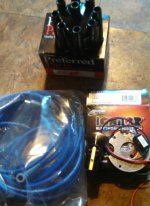
Pat, I'd suggest returning the P kit, and either go with a true electronic ignition, or stay with contact points.Forum sure dies down in the winter!
Not much to talk about but I did get this.
Can't seem to find the right impeller.
Mine measures 2 long by 2 1/4 wide with 12 vanes and the center has splines
Can some one point me to the proper one?
Numbers on the pump cover are 22300-05 Jabsco
Clarification..... I should have said.......The Johnson F6B-9 is a direct replacement for the old large volume Jabsco.
If raw water cooled, the F5B-9 will work.

Ricardo.
1..... What is the bearing number for the rear PDS?
Can't seem to find a real clear answer using the search
2.... Also after you get the snap rings out how hard is it to pull the bearing out?. I would think pulling it out of the housing and shaft at the same time can be a real PITA!
Also as a refresher It is a 290 outdrive with a GM 305 AQ225D
and what was there was almost gone. Yes it's outside. Has a water proof cover on it and a tarp over that. I also keep the snow cleaned off it.Sorry it took so long to get back to ya.
I have a new seal so no problem pulling the old one.
I forgot but i also need to get a grease hose to replace the plug.
Pat, some of these grease ports are 1/8" tapered pipe thread. The 18" grease gun extension hose will thread right into these.
However, some were 3/8" NC machine threads with a special cup style grease fitting.
You can run a 1/8" tapered pipe thread tap directly into the machine threads, and chase them out into 1/8" TP.
It won't make perfect 1/8" TP threads, but for this purpose, it works well enough.
(been there/done that many times)
There will be some aluminum debris from it that will need to be cleaned out.
What is "Bellows Adhesive" Im thinking some kind of contact cement?
Thanks Ricardo.
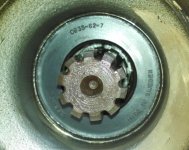
Started putting my out drive back on and i ran into this.
I have the rear pds area pretty well cleaned up and i could be wrong but i think the seal is backwards and there is no snap ring?
I can look at a diagram but there not clear enough to see for sure.
I have a new seal and i assume the spring side of the seal should be out and held in with a snap ring?
Also if it does need a snap ring do you know what size?
Hate to order one and be held up for a week waiting
Thanks Ricardo.
I do fear the front seal is pushed out though. I put 50 pumps of grease in it at the grease fitting on top of the bellhousing and never got any out the back with the transmission off