3-legged-dog
Contributing Member
I have a 2003 Mercruiser Bravo III, the boats first owner had issues with corrosion. I bought this boat, which is my first boat and feared corrosion because of the horror stories and the issues the previous owner had. I thought my boat would live on a trailer for the rest of my boating life. I truly didn't understand the issue. so that forced me to knee jerk and try to something out of the ordinary with the drive, maybe I was stupid.
Then I read a post about stripping the drive and repainting to prevent corrosion, Hail Mary, Right, the guy writing the post was confident... I thought about it for a while, briefly spoke with a Pettit rep. and I went for it. I followed the method used in the posting. I stripped the drive down to bare metal, used an aluminum cleaner DX533 and conditioner DX503 on the metal, then applied 3 coats of Pettit epoxy primer 4100 Part A and 4101 Part B white on the drive. followed by 2 coats of Pettit tie coat primer 6627 red and then finally by Pettit Ultima ECO antifouling copper free ablative black.
the post used a different paint brand, but spoke of epoxy, primer etc. I will hunt for the post and repost it here.
Mistakes:
As with everything the post I followed didn't mention any mistakes to watch for, maybe to much info. but I will list my mistakes bc it was a pain in the butt. I removed props. and separated the upper and lower unit to work smaller areas and I hung the units with chains to paint & dry.
DO NOT Paint mating surfaces, DO NOT Paint contact points of your zinc's. DO NOT paint your threaded holes or bolt mating surfaces.
you have 4 main mating surfaces, upper/lower and out drive face to the bell housing. just think about any mating surface when painting. a good solution would be to leave in or put on temporary bolts and zincs and paint unit. lastly I repeated this process on my gimbal housing, bell housing, trim arms.
Hull:
I also removed the old bottom paint down to fiberglass, applied 3 layers of epoxy coat white, 2 layers of primer tie coat red and vivid black copper free ablative to the bottom of the hull. So now reapplications of primer and ablative are now a visible were necessary based on color you see white, red or black.
Conclusion:
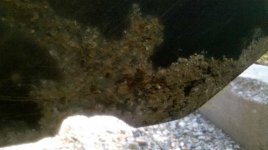
My boat was in brackish water from May 1st, until Dec. 20 this year with zero corrosion on the drive, zero barnacle growth on the drive and very minimal growth on the hull, which I didn't paint this season. I did have extensive growth on my trim tabs and plastic depth finder and transducer from my electronics which I didn't paint.
Electronics and timeline.
bought boat 2008 trailered until 2010.
I replaced the mercathode system my first year in the water in 2010 and I still had moderate to heavy corrosion issue on the drive.
I stripped and painted the drive in spring of 2012 and had zero corrosion on drive and hull that season. I did have a black paint peel on the drive, I believe bc I had oils on the drive prior to painting from handling the drive with gear lube.
And this year season I added a galvanic isolator between shore power and my electrical panel.
2 full seasons in brackish water and zero corrosion.
I will post pictures of the process and what the drive looks like after being pulled for the winter.
I felt the need to share the success of the project.. sorry for the long read.
Then I read a post about stripping the drive and repainting to prevent corrosion, Hail Mary, Right, the guy writing the post was confident... I thought about it for a while, briefly spoke with a Pettit rep. and I went for it. I followed the method used in the posting. I stripped the drive down to bare metal, used an aluminum cleaner DX533 and conditioner DX503 on the metal, then applied 3 coats of Pettit epoxy primer 4100 Part A and 4101 Part B white on the drive. followed by 2 coats of Pettit tie coat primer 6627 red and then finally by Pettit Ultima ECO antifouling copper free ablative black.
the post used a different paint brand, but spoke of epoxy, primer etc. I will hunt for the post and repost it here.
Mistakes:
As with everything the post I followed didn't mention any mistakes to watch for, maybe to much info. but I will list my mistakes bc it was a pain in the butt. I removed props. and separated the upper and lower unit to work smaller areas and I hung the units with chains to paint & dry.
DO NOT Paint mating surfaces, DO NOT Paint contact points of your zinc's. DO NOT paint your threaded holes or bolt mating surfaces.
you have 4 main mating surfaces, upper/lower and out drive face to the bell housing. just think about any mating surface when painting. a good solution would be to leave in or put on temporary bolts and zincs and paint unit. lastly I repeated this process on my gimbal housing, bell housing, trim arms.
Hull:
I also removed the old bottom paint down to fiberglass, applied 3 layers of epoxy coat white, 2 layers of primer tie coat red and vivid black copper free ablative to the bottom of the hull. So now reapplications of primer and ablative are now a visible were necessary based on color you see white, red or black.
Conclusion:
My boat was in brackish water from May 1st, until Dec. 20 this year with zero corrosion on the drive, zero barnacle growth on the drive and very minimal growth on the hull, which I didn't paint this season. I did have extensive growth on my trim tabs and plastic depth finder and transducer from my electronics which I didn't paint.
Electronics and timeline.
bought boat 2008 trailered until 2010.
I replaced the mercathode system my first year in the water in 2010 and I still had moderate to heavy corrosion issue on the drive.
I stripped and painted the drive in spring of 2012 and had zero corrosion on drive and hull that season. I did have a black paint peel on the drive, I believe bc I had oils on the drive prior to painting from handling the drive with gear lube.
And this year season I added a galvanic isolator between shore power and my electrical panel.
2 full seasons in brackish water and zero corrosion.
I will post pictures of the process and what the drive looks like after being pulled for the winter.
I felt the need to share the success of the project.. sorry for the long read.