Logo

1964 Evinrude Sportwin 9.5 will not reach W.O.T.

CarMech1969

Regular Contributor
Hello fellow mariners,

My Sportwin 9.5 (Model# 9422R) doesn't seem to reach maximum RPM. It revs great in Neutral, but when in gear and under load on the lake, it seems like it should have much more. I have heard clips of the same motor under way on YouTube, and the RPM sounds much higher.
I've attempted to clean the carb with a can of carb cleaner, cleaned out the fuel filter screen in the glass bowl. No appreciable change.
It's running on both cylinders, but it seems like one cylinder is getting more fuel than the other, as one plug appears 'washed', like as if too much fuel is dumping in there. The other plug has a typical light grey colour on the firing end.
The motor starts very easily (one pull) and runs great at lower throttle openings.
I'm thinking that I have carb problems, but any feedback from experienced marine mechanics would be greatly appreciated.
I am an auto mechanic by trade, but have very little experience with small motors, so I'd like to be educated before I start tearing into anything.
Thanks for reading, and have a great day!!

Regards,
Steven A
 
It is very common for those to run on one cylinder--This is usually caused by spark from one coil jumping to ground.---One test you can do is to set up a gap of 5/16" and see what happens to the spark.
 
The carb is always the first place to check on these little motors. A complete tear down of it is the only way to properly clean it. Just spraying carb cleaner with it assembled will not work, usually. Make sure all you hose fittings are tight and the ball pumps up nice and tight. The ignition would be the second place I would look as it is more complicated to diagnose.
 
It is very common for those to run on one cylinder--.
Are you suspecting this because of the one spark plug appearing washed?
I will try the spark test and see what happens.
If OK, what then?
Should I throw a carb kit at it?
Thanks guys for any additional info!
 
I personally have found the carburetor is the number one problem with small outboards. The smallest amount of gunk can make them run terrible. Not to say it couldn't be something else. Your time is best spent on the carb.
 
One test you can do is to set up a gap of 5/16" and see what happens to the spark.
Ok racerone, I picked up a spark tester, and set it with about a 5/16 inch gap.
The top cylinder fires it no problem.
However, upon attempting the lower cylinder several times, no spark appears.
When I reduced the gap, it still wouldn't fire.
I narrowed down the gap very small, and it finally jumped fire.
Guess this means my coil or lead is bad, huh?
Once I pop the flywheel off, should I change both coils, or just replace the bad one?
What is the best course of action here?
Thanks in advance for any further advice. I'm off to pull the flywheel and have a look.
Cheers, mates!
 
Ok all, here's the latest,
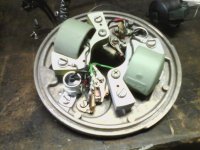
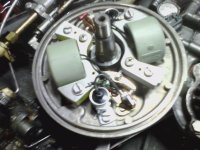
I pulled the flywheel to have a look at the points and coils.
I removed the breaker plate (the plate that the coils and points mount onto...is that what it's called?) to have a closer look, as my eyesight isn't so great anymore. lol.
Everything appears OK - the wires show no signs of abrasion or any cracks in the insulation, and there are no cracks in the coils - in fact, they appear new, although one is a different make than the other.
The only thing that seems out of order is the points. One set has a good contact pattern, while the other set's pattern appears to be misaligned.
And you can probably guess which cylinder the misaligned set goes to. Yup, the one with the weak spark!
Does this mean that the points are the issue?
Just wondering how I should proceed.
Thanks for your time!
 
Tried a bunch of things today.
Swapped over another breaker plate from a '72 parts motor I had, complete with all the wires, and points & condensers.
At one point, I had good spark from both wires.
Now I am back to nothing.
WHY?? What am I missing here?
I would like to be able to determine the problem before I toss any new parts at it.
Any help would be appreciated.
 
If you have the dark blue coils replace them along with points and condensers.
Hello there kimcrwbr1!
One coil is blue or black with an outlined M on it. One thing I noticed about it is that the coil winding assembly slips a little on the laminated metal bar that goes through the middle of it.
The other coil is light green, and made in Germany.
The weird thing is that I was getting spark from BOTH coils for a test or two, now nothing.
I can use a straight edge to align the front of the coil with the boss, correct? That is what I did.
Thanks for your input!
 
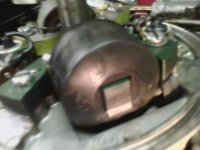
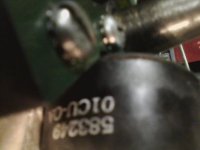
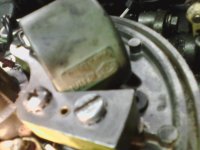
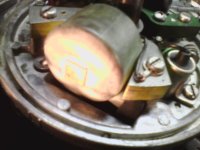
Here are some pictures of the ignition coils.
evinrude coils (1).jpgevinrude coils (2).jpgevinrude coils (3).jpgevinrude coils (4).jpg
The light green one was working great, and the black one had a weak spark.
Now, after swapping in different stuff from another motor, I had good spark from both. Now I have nothing.
This makes no sense to me.
How can I have good spark, and then suddenly have no spark?? :mad:
But then again, the electrical gods are that way as well, I suppose...
 
The wire and boot must be installed in the coil and then put the coil on the armature plate. Take a pic of the bottom of the plate so you know how to put it back together. Does your engine have a kill button if not you can add the shorting wires from the two sets of points and run them down to a button kill switch. The light green coil is probably good that is the newer style. A common mistake is replaceing the coils without pulling the plug wires they need to be pushed all the way in and then push the boot on then install into the armature plate. If you dont follow that procedure they will fail.

Thanks kimcrwbr1 for your response.
Can I use silicone to seal where the ignition wire goes into the coil?
Any finally, is there any quick way, besides a resistance test, to verify if the coil(s) are good before I go to the trouble of re-installing them again?
I did have spark from both coils momentarily, so could they still be failing?
Again, thanks very much.
 
Silicone wont work it has to be done correct.
Thanks, I understand that the ignition wire has to installed into the coil prior to installing the assembly onto the plate.
What I was asking is if you think it is a good idea to silicone the connection to help keep out dirt/moisture?


If you use new coils, wires, condensers and points your chances of sucess are 100%. I do not suggest using old parts just because it is a bit of work. Others have pieced it together and you fighting with the results. Clean the points and feeler guage when you adjust the points with acetone or laquer thinner will extend the life of a tuneup and replace the spark plugs regularly.
I have obtained new points and condensers as a starting point, and will go from there.


What are the results of the compression test you should see sround 60 or 70 psi with a pull start on both cyls. The most important part is the compression is even within 10% between cyls.
I will check that and get back to you. Thanks a million!! :cool:
 
As long as the coils ohm out evenly compare to the light green one.

I checked the ohms, and the black coil had about 4200 ohms resistance value, and the light green one had about 6800 ohms, on the secondary side.
I have the armature plate reassembled along with new points and condensers, and the coils are both firing on the spark tester.
However, the spark doesn't seem to be as frequent on the black coil, as it is with the light green coil, the spark seems to drop out sometimes.
I'm thinking to replace the black coil and see what happens.

If it has good compression take your time putting it back together and you should have a one pull dependable motor.

Compression is good - 70 PSI on the lower cylinder, and about 72-73 PSI on the upper.
 
Your gaining on it. If it was me knowing what I know I would just get two new coils that way you have a good spare. You should get several years out of a new set of points and condensers and a lifetime out of new coils. Have you rebuilt the carb go ahead and start it up and see if it needs a rebuild or if the water pump is working good. Check the gearoil and top it off and take it for a beat. Once you have gone through everything and got it running good it should be a nice dependable motor. Fire that mother up:)

Sounds like a good plan. It is a bit of work to mess around with the armature plate each time, lol.
The points were really tricky to get aligned properly, had to bend and tweak a little here and there.
I put a new water pump in it about a month ago just to be on the side of caution, as I had no clue how long the old one has been in there.
Changed out the gear oil too while I was at it.
Thanks for all your help. It will be good to see how the motor runs out on the lake!
 
Yup. that's what's happening on my motor. The water feels hot to the touch, but not hot enough to burn you.
Mine ain't revving like that sucker is though, but hopefully it soon will be!
 
You run 50:1 with that motor use a good TC-W3 outboard specific grade oil it may run OK now but you will want to at least replace the black coil for giggles.
Yeah I'm thinking to do that, as the spark seems rather intermittent on the black coil, and the secondary resistance value is a little lower than ideal.
Gonna go to NAPA and get one.
Will post back with the results.
Cheers!
 
Ok, and now more pics:

P290513_19.05.jpgP290513_19.54.jpg

It was good to see that NAPA carries Prufrex ignition coils, they are giving a good quality spark.
Once everything was reassembled, the result was nice blue lightning coming from both spark plug wires!
Put the motor in a test barrel, and it started on the second pull, even after it had been in a couple dozen pieces on the bench.
Once it had been running for a few minutes, restarting the motor required only a very brief pull of the cord.
It's now time to hit the lake and see what she's got!
Thanks again to everyone who offered advice.
 
Took it out on the lake today, and the engine ran great. However, it would intermittently run good, run like crap, run good...etc.
I drove it around for about an hour, and then headed for shore.
Once I had the boat out of the water, I took a quick look at the spark plugs.
The top one was dry, but the bottom one looked oil fouled.
Crap, I thought.
Later, when at home, I redid the spark test just for the hell of it.
Sparking great from both cylinders on my spark tester.
I'm going to get some new spark plugs (admittedly I forgot to get new ones lol) and see what happens.
What brand do you guys recommend?
It had a set of Champion J6C plugs in there, and they look like they've been there a while.
 
Last edited:
UPDATE:
Today, I decided to change the thermostat, as on my last test run the water coming out the pee hole was not warm at all :/
The thermostat looked like it had never been replaced before. It had a '64' stamped on it. Were they using degrees Celsius back in 1964?? lol
Got two sets of spark plugs too (they are cheap) just in case I foul again.
Was going to head out on the lake this evening, but it started to rain. Oh well.
Tomorrow's another day :)
 
Went for a boot again today, and no major improvement.
However, I noticed that if I restricted the fuel flow a bit by pinching the hose with my free hand while driving, I could get the engine to run much better, and faster!
This tells me that the float level in the carb is too high (flooding) by the looks of it.
When I got home, the outside of the carb was all wet with fuel.
Checked the spark plugs, same thing. Top one dry, bottom one wet, despite the fact that I have corrected the weak coil problem.
I'm not very well versed at carbs, but what is the best way to confirm the high float level? If in fact that is the case? :confused:
Appreciate all the help received so far!! :cool:
 
Get a new PLASTIC float. If your engine has a cork one ? It will dry out, run great for minutes to hours then soak with fuel & slowly sink. Causing a richer mixture.

Drives people crazy. NEW plastic float & a fuel gauge to set it. Check to see if you have the correct prop on it.

OLD motors are full of DIY suprises sometimes. :)
 
Did you try running it with the cover removed??? These motors commonly develop under the cover exhaust leaks causing problems at higher speeds.
 
Has the fuel pump been checked for a ruptured diaphragm ?

How do I check that? Is that done by ensuring the primer bulb gets hard? It appears to be OK if that is the case.

Get a new PLASTIC float. If your engine has a cork one ? It will dry out, run great for minutes to hours then soak with fuel & slowly sink. Causing a richer mixture.

Drives people crazy. NEW plastic float & a fuel gauge to set it. Check to see if you have the correct prop on it.

OLD motors are full of DIY suprises sometimes. :)

Lol, I never thought of that :D Thanks for the tip!

Did you try running it with the cover removed??? These motors commonly develop under the cover exhaust leaks causing problems at higher speeds.

I've tried that as well, doesn't seem to make any difference. Thank you!
 
UPDATE:
Today, I took apart my fuel pump to inspect the diaphragm, and it is OK. No holes, cracks, or splits of any kind.
Reassembled the pump after cleaning all the components, using some new gaskets, made from a roll of gasket material.
I have the very early style pump, so nothing is available anymore. And the price of a superseded pump is just ridiculous.
Anyway, the pump is working great, and the primer bulb pumps up solid.
The motor failed to start when in the test barrel. Somehow, the float got stuck closed (weird because I had it running previously).
Readjusted the float level and slipped the carb back in.
Attempted to do a link and sync, but could find no mark other than a little notch in the plate that holds the spark plug wires in the armature plate. This notch aligns with the cam follower when the throttle is turned to W.O.T.
I loosened the screw for the throttle lever, and turned the throttle butterfly to W.O.T.
Then I tightened the adjustment screw, and rechecked, moving the throttle from idle to W.O.T.
Seems ok now. The adjustment stayed where I set it.
Did I do this correctly, or was there anything I missed?
She's running now, seems to be a lot smoother than before. But the real test will be when I hit the lake again.
Hopefully, it will finally be good.
 
Did you use that TINY spring....if supplied... that connects the float to the needle ? It is used to prevent the needle from sticking closed.
 
Hey cyclops2

The carb I used (which is from my '72 parts motor) looks like brand new, so I decided to slip it on there and give it a try.
There was no spring connecting the float to the needle, although the needle was rubber tipped, which I thought was strange.
 
Back
Top