Logo

Merc 7.5hp (mid70's) Blow back

MikeMan

Contributing Member
Hi My 1973 Merc 7.5 Hp (decal blueband 75) started for a split second when i put fuel direct in the cylinders and reinserted sparkplugs, but it then stopped. It sounded great, but i noticed i had carb blow back which is why it wasnt starting. I took the carb off and put a piece of newspaper over the inlet and got hardly any blow or suction (but i was having to hold the paper while pulling the cord), but i did have fuel dripping from the carb before i pulled it off so im picking it had some suction to cause that, unless priming the bulb could of caused that.
Anyway i had to take the whole engine apart to look at the reeds and they were fine. There was however a look of lack of oil in the bottom cylinder. The lower bearing was dry whereas the top bearing wasnt. The bottom seal looked slightly torn on the bottom of it, i could see the bottom spring coming through but the rest of it seemed ok.
Im wondering if the lower seal could cause this or is this reed unit meant to be sealed to the crankcase with crankcase cement?
I just cant see how a bottom seal would cause this if the carb was also dribbling fuel while trying to start it??
Thanks
 
Hi Kim, no i didnt check end play,i did notice one of those shims though, both bearings seems good- now ive oiled them. Those philips head on the crankcase bolts were a problem, i had to use a cold chisel on them to get them loose, il probably replace wih some bolt heads. That bolthead screw that goes through the block and holds the reed block do i need to put something on its threads? Also there is a little hole just beneath the carb that goes right through the block and into the lower cylinder. It is machined so isnt a damage hole or anything. Its outer entrance is where the carb gasket is which blocks it totally- whats that small hole all about?
Thanks a lot
 
Last edited:
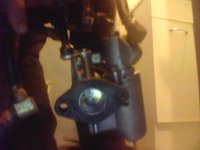
That impact screw driver looks real handy, shame i stuffed the heads but i will look at one for another time. Heres the carb, it seems IMG7101.jpgto have a fuel pump attached to it
 
Gees thats not much difference to add that much more HP. I cant get new seals until next weekend. The gearbox looks ok apart from the impellor, i suppose i should leave it in a bucket and try and swell the seals while i wait too?
 
A 7.5 HP wouls be identified with a sticker that says " comet "-------The 7.5 has smaller intake ports than the 9.8 HP block which is identified as a " lightning "
 
Yep Comet it has written on it. Its salt used so im amazed at how nothing has rusted apart from the surface of the head of a rear bolt holding on lower cowling
 
You can not change a " comet " into a " lightning " by putting on the 9.8 carburetor.----As usual with outboard motors there is a lot more to it.
 
7.5hp will do for the grandson/ grandma combination whom its for.

Anyone have figures for the torque specs/pattern for the crankcase screws so i can get going on it when the seals arrive? thanks
I think i will put some crankcase sealant around the reed block assay, but let me know please if thats a no no
 
When putting the crankcase back together should i use a hardening or non hardening sealant? I suppose its something like a high temperature silicon sealant i use? I cant see anything called crankcase sealant specifically at the shop i go to. I have used exhaust gasket maker on other smaller outboards in the past but i want to do this as it should be done.
The permatex range is available here
thanks
 
Last edited:
Loctite 518 or OMC / BRP " gel seal " is what I use.----------There must be no filler in the sealer !!------99% of the sealer should squeeze out to get a metal to metal joint. Very important to use the correct stuff.
 
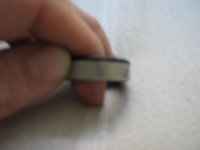
All those parts have arrived apart from the upper seal, so im just having to hold my horses til then. One thing is though that i have gotten the lower crankcase seal, i got the sierra one and it has a little black stripe around one of its edges whereas the other edge is slightly browny. Does it have to be inserted one particular way, does that black stuff do something. Sorry i dont have batteries for my camera at present,il try and sort it later
 
Sounds to me that your motor simply has a lean idle cough that easily remedied: simple open the idle mixture screw a 1/2 turn or so.

Jeff
 
Hi Jeff you may of being right but unfortunately she is in pieces on my workstation as im now replacing all the seals so if it doesnt start after that il see if the idle mixture screw does fix things. Im really keen to know if the black stuff around the edge of the bottom seal means anything still.
thanks
 
If you look at the top edge of the metal there is a light brown coating which is different to the rest of the middle colour of the metal seal. On the bottom edge there is a black coating which extends about 2mm up the seal which is different to the rest of the seal. So im wondering if the black edge and the brown edge indicate which way it goes on the crankshaft as theblackcoating sideis meant forthehigh temp exhaust side or something
Il try and post a photo soon
 
Last edited:
Not sure why you want to make this complicated .----Just install it the same way as the one that is in there now !!
 
Im glad i havent stuffed up a basic then! The problem is ive already removed the current one although i have a feeling that the black coating was on the exhaust side. Ive just checked a photo i took deconstructing it and yes the black coating is on the bottom side, whatever that means.
It was the failed seal as well
 
Last edited:
IMG_1774.jpg Heres the black rim on seal on one edge only.If someone knew the torque spec for the flywheel nut that would be great
 
Tight as you can get it--which is hard to do in most cases.

You may kick yourself if the problem all along was merely a "lean idle sneeze", correctable by merely opening the idle mixture scre a half turn. But look how much you've learned! And all those new parts going in there won't hurt either.

Jeff

PS: By the way, in case you didn't know it, all crank seals go in with the lips pointed down.
 
The lower piston was slightly discoloured (brownish)so im picking its possibly being running off for a while. The past owner is now buried so i cant get any maintenance answers but i wouldnt be surprised if they were original seals, none of the crankcase bolts showed any sign of paint being chipped off from tools. Thanks for the offer Kim, il see how i go rebuilding it when i start from late tomorrow on and il also post a picture of the upper end.
Unfortunately heavy duty batteries dont seem to be so heavy duty towards cameras.
I did remove the float and cleaned the bowl, there were some deposits at the bottom. I couldnt see any obvious way of getting the jets out and also which screws to remove to clean passages was hard to decipher so i thought id see how it ran before going further on that.
 
Last edited:
One has to modify a screw driver to get the jets and emulsion tube out. If you soak the carb overnight in carb cleaner, then blow everything out with compressed air, yiu might be okay.

Jeff
 
I put it back together, im glad i did the suggested dry run first, even the piston rings seemed trickier than normal to get in, i oiled everything before re-installing- i didnt put any in the reed valve assay shaft labyrinth, perhaps i should of put some two stroke down there. I was very pleased when i saw that the throttle control shaft has a special shaped spline so it only fits into the cog from the throttle linkage on the tiler in one position only, as when reassembling i realised i had not taken note of where it was positioned. I put some mix into the cylinders and it didnt start. After a couple of pulls i heard it take a bit more of a pleasing sound, i then put the choke on which i had mistakingly oversighted.
It then started & ran well- Thanks a lot Everyone, i shut it off as i didnt have the gearbox on. I could restart it again no problems.
My biggest tip with rebuilding is to make sure you get the proper seal on the bottom of the crankshaft as some engineering shops when trying to match seals dont realise the importance of its double lips. Also i strongly recommend Kims dry run tip too, for me there were quite a few things that didnt come to light until i did the dry run.
On to the gearbox and impellor next.
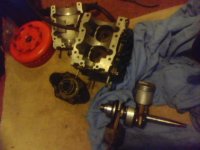
Heres a photo Kim, Im not sure what you meant by the top end so i took a picture of it all.IMG7101.jpg
 
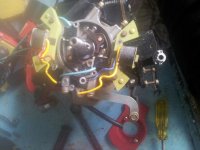
ignition merc.jpgHeres the upper end photo.
I had a look down the propshaft and my cover nut looks seized for sure, not keen on whacking away and breaking the casing thats for sure, thanks for the heads up. I drained the old oil and did a slight pressure test and it seemed to hold for three minutes so i thought i might bolt it back up and see how the gearoil holds on the water. Your post read like pandorras box Kim so i thought if its seems possible i may save that for next off season. An ominous sign is that the bottom of the skeg has had its lowest bit taken off and flattened so im picking the prop area may of had a hit of some sort although prop looks fine, only a couple of tiny dents on its soft edge. I havent had the impellor arrive yet.
Something that really interests me is that i had it in forward gear when i dropped the gearbox, it was changing fine between gears but after i dropped it out i couldnt turn the gear change shaft to change gear at all even while turning the prop so i thought i would bolt it back up to check i hadnt broken anything removing it. The moment i put the unit back into the head it would change gear. I know that i shouldnt be messing up alignments but i couldnt figure out what makes it have that feature of operation.It also made the prop click when turning it one way, so i decided to go hands off on it from there on til i know more.

The oil was slightly grey and there wasnt much in there, so im picking theres being a leak somewhere.....I looked at the gear change shaft seal, the seal has smoothed out the drive shaft where it seals so i guess that may be out of spec for the manufactured matched seal now too so im thinking i may try and get a spring to put around that seal to tighten it up, it looked ok still.
 
Last edited:
I used the following to set timing, anyone disagree with this?-
Shift into FWD gear, and remove spark plugs.
Install Dial indicator in #1 spark plug hole.( if twin cyl,top cyl)
Rotate fly wheel slowly clockwise to locate TDC(top dead center)
Once found, reset dial indicator to 0 .
connect one lead of ohm meter to white contact lead of point set for #1 cyl.
connect other meter lead to a good ground on engine.
slowly rotate flywheel counterclockwise until you reach .193 BTDC
Advance throttle to wide open.
In this position, adjust max advance stop screw until ohmmeter indicates points just opened.
Now, slowly rotate flywheel clockwise until dial meter indicates the piston is at .002 ATDC.(Actual Top Dead Center)
throttle down via tiller handle twist grip until the ohm meter shows the points just open.
at this point the throttle lever should barely make contact with ignition cam.

Now for the questions-
Whats the difference between top dead centre and actual dead centre?
Also the timing (if this procedure was correct)was pretty much bang on for the maximum throttle part but for the second part the throttle lever was contacting the ignition cam for at least about 3mm further after the points just open. What does that mean? Is the timing too far advanced? but if i change that wont it change the maximum setting? Is this a lyn &sync issue?
 
Last edited:
Thanks; im glad i dont have to change the ignition around at this stage after it started great the other day.
Im very much anticipating its first sea-trial but I have two things to do first. One is i will buy a barrel in town this weekend and give it a good run in that as the spring winds have turned up so im keen to give it a run onshore first and second i think the boat its for will need a jack plate put on it as the anti-cavitation plate will currently sit about 6cm below the bottom of the hull. I suppose a motor sitting too low would put more exhaust back-pressure on it too and onto the lower crankshaft seal that blew.
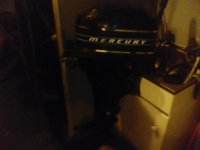
I wouldnt dare put it on my dinghy, being 8ft its pretty much a coracle. I got given the fuel tank yesterday i think its the original, its got merc decals on it.
Yes ive put the gearbox back on, putting in the impellor took a long time, trying to get the impellor to fit down onto the notch on the key took some persistance. Especially since you cant see down into the pump housing with the impellor in the way and the key was probably sitting somewhat proud from some surface rust. I had to cold chisel break the impellors inner brass-ring to get the last impellor off.Mercury Carb.jpg
Another thing I was wondering is the idle air mixture the one above the main air inlet or is it this screw in the middle of the photo with red sealant or something on it? (The pictures looking down from the flywheel on to the top of the carb
Thanks
 
Last edited:
Yep, it looked like it would probably sit low, its new main commander is a young boy, its his first motor so i think i better jack it up some, Ive got to minimise chances of needing to pull the prop shaft out..
I didnt quite understand what this is that you mention Kim "a exhaust relief for back pressure"
Wow $80 for the carb, im glad this ones in ok shape
Il report back with performances at idle and Goose. Might try and post a video too
Many thanks
 
i had wondered what that grate was on the upper leg as there wasnt any obvious hole horizontally into the leg like for other outboard exhaust reliefs, so im glad to know it has one. Looking on mine its the middle section of the grate only that has the hole on the vertical roof of it, the rest of the grate is all enclosed.

I also found the long fuel hose length and the height that the motor sat in the barrel quite interesting, it would seem to have the water level below the water pump at that height
 
Last edited:
Back
Top