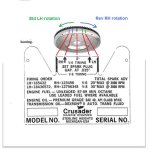
- OK, I do have a Mallory distributor - part number YL 670AV.
- Using this graph I can set the timing to a conservative setting between 22-26* BTDC off of my BASE of 10* BTDC.
- Then seeing this is conservative I may be able to tweak it a little higher - depends.
- This is all provided that my harmonic balancer diameter is validated so I can apply the correct tape.
- I will try this but I unless these puppy's are so sensitive I did have it se to 28* TA so the 22-26* is not that far off - which is what I thought before - I know I was close.
1... The YL670AV is an older Kettering System (points) style Mallory, mechanical advance.
Because these are old, and possibly worn, I have recommended that you replace them, rather than add the Pertronix conversion kits.
The kits only change the triggering. They do ZERO for any correction to advance characteristics, and ZERO to correct worn shaft bushings.
Electronic triggering, such as the Pertronix Hall Effect, still requires a consistance and controlled dimension between the magnet unit and the sensor unit. This controls Dwell Angle.
Just as with a kettering system, if dwell fluxuates, so does the triggering event.
2.... Not necessarily
"off of my BASE of 10* BTDC"..... but rather a result of
"including" BASE.
We can't help but see BASE advance as being part of the progressive and Full In TA.
These cannot be seperated visually once we fire up and begin strobing our timing marks.
(see ** below)
3.... At your descretion!
4... This should preceed all else, IMO.
5.... These old YL670AV's may be sensitive if the flyweight system, shaft bushings, etc, are worn beyond what is acceptible.
Hence my suggestion of NEW replacements.
Perhaps $270 a pop, but it only hurts once, and for a short while only!

******************************************
** Think of a distributor that offers ZERO advance because it has no centrifugal mechanical mechanism.
We install it, we set the advance at 5* BTDC.
We now fire up on 5*, we rev up on 5*, and we rev full up on 5*.
The only change that we can make to the advance, will be by moving the distributor one way or the other.
Now we add a centrifugal mechanical advancing mechanism to the distributor.
Below the RPM where the centrifugal begins (usually below 900 rpm), we strobe and see BASE ONLY.
We still have our base of 5*, but as we increase engine speed to above 900 RPM, we now see the rather linear progressive that is being
added to the BASE advance.
It will continue
adding to the BASE of 5*, until it reaches an RPM where the advance mechanism limits out.
.