Logo

UPDATE: Backfiring and starter bendix gear

Eric.C

Contributing Member
To those that were following this thread:
http://www.marineengine.com/boat-forum/showthread.php?385737-What-a-day...-backfiring-(

Sorry for the extra verbose story here, I have a tendency to elaborate.

Here is the latest update: We were on vacation for a while, so could not get much done until this last weekend. Two days after we got back, we got the call from Dana Point!! Time to move... but starboard motor still has chunks of starter behind the flywheel. I dropped the flywheel cover and was able to account for about 75% of the missing starter pieces. I literally spent 8 hours or more with picks, hooks, coathangers, mirrors, and a borescope; but I could not find the last bits of the starter, and I noticed at least two teeth broken off the flywheel...
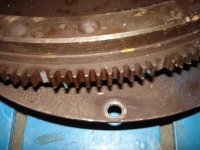
DSC01033.jpg

It just gets better. I was able to crank the engine by hand (plugs out), and I heard no rubbing noises, and everything seemed good, so I crossed my fingers, bolted up a new starter, and off for Dana Point.

Last trip out, starboard was backfiring at anything over 3000 rpms. On the way to Dana Point, it would backfire at 2500 rpms... still not sure about this one, but getting to it... SOON!!!

Now that we're in Dana Point, back to that flywheel. Thinking we could just unbolt the v-drive, unbolt the trans, and put a new starter ring on the flywheel, we were in for a surprise. The v-drive sits about one inch from the fuel tank, so there is not enough room to slide it off. We had to rig 4x12's and come-along straps to hoist and slide the engine back about two inches. Wouldn't you guess it... three of the engine mount bolts snapped from corrosion.

About 14 hours of labor later, we have the flywheel off, new starter ring on order, and I am going to repack the stuffing box while it is wide open access.

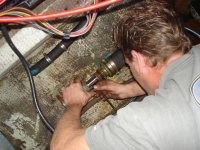
Measuring for size:
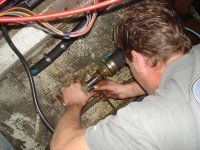
DSC01017.jpg

Oh, and I found that last huge chunk of the starter wedged behind the flywheel! Whew!

Soooo..... while the flywheel is off, I would think now is the time to replace the rear main seal also, but how? There is a flange the flywheel bolts to and it blocks access to the rear main. It appears to be part of the crank. I have never torn a Chevy down (Honda tech), so this is new to me. Is it possible to replace the rear main seal without dropping the pan and/or crank?
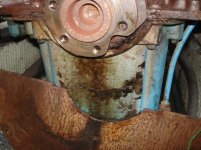
DSC01014.jpg

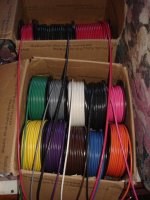
This is going to be one hell of a lay-up. We pulled off and are cleaning out the coolers and exchangers, replacing the starter ring gear, rebuilding the water pumps, repacking the stuffing boxes, replacing a couple pulleys, replacing valve cover gaskets, inspecting valvetrain components, replacing some of the older hoses, stripping and repainting everything we can, scrubbing and repainting the bilge, and re-wiring just about the entire boat (Greg's Marine Wire Supply on eBay).
 
your last picture shows the crank flange, you have the 2 piece rear main seal. The pan will have to come off, and the rear main cap removed. You can replace the seal with out pulling the crank, but the space you have is limited. Good luck,keep us posted
 
If that seal isn't leaking, leave it alone!

Jeff

PS: Good call on those anti-siphon valves. If you still have them--I tossed mine out--then you need to pull and clean them (or replace them).
 
your last picture shows the crank flange, you have the 2 piece rear main seal. The pan will have to come off, and the rear main cap removed. You can replace the seal with out pulling the crank, but the space you have is limited. Good luck,keep us posted

Sooo... not doing the rear main. It is not puking, but it is leaking, and I would have liked to replace it. Not this time I guess.
 
If that seal isn't leaking, leave it alone!

Jeff

PS: Good call on those anti-siphon valves. If you still have them--I tossed mine out--then you need to pull and clean them (or replace them).

Unfortunately, it is leaking a little bit. Not bad, but it would have been nice to replace it.

As for replacing the anti-siphon valves, my brother actually ruled that one out, because we ran both engines off one tank and only starboard backfired. Each engine has its own tank, and if it backfired off its own tank only, I would suspect the ASV, but it will backfire off either tank.
 
If you can lift the motor up about 10inches, you can drop the pan. Remove the oil pump (2bolts) then remove the rear main cap. Loosening the main bolts can be tough, and they will need to torque to specs. Since you got it this far, might as well replace. They make a tool to replace the rear seal in the block half of the main. ( http://www.jcwhitney.com/upper-rear...T2&zmam=15972153&zmas=21&zmac=165&zmap=28002G ) It helps remove and install the new seal. You can place cut squares of 2x4 under the mounts to shim it up. It will also let you clean the oil pan. They make 1 piece oil pan gaskets and they come with special plastic lock pins that hold the gasket in place as you put the pan back. Good luck on the project
 
If you can lift the motor up about 10inches, you can drop the pan. Remove the oil pump (2bolts) then remove the rear main cap. Loosening the main bolts can be tough, and they will need to torque to specs. Since you got it this far, might as well replace. They make a tool to replace the rear seal in the block half of the main. ( http://www.jcwhitney.com/upper-rear...T2&zmam=15972153&zmas=21&zmac=165&zmap=28002G ) It helps remove and install the new seal. You can place cut squares of 2x4 under the mounts to shim it up. It will also let you clean the oil pan. They make 1 piece oil pan gaskets and they come with special plastic lock pins that hold the gasket in place as you put the pan back. Good luck on the project

This is all good advice. For a first timer, doing this upside down in close quarters might be too much to ask, however!
Besides the sheared off bolts, are these engines difficult to pull completely out, using a davit, for instance? You into this 14 hours so far, and the engine is still in the boat?
 
Slap the new flywheel and starter on, then put an oil absorbent pad under the bellhousing. And go boating! You earned it.

Jeff
 
This is all good advice. For a first timer, doing this upside down in close quarters might be too much to ask, however!
Besides the sheared off bolts, are these engines difficult to pull completely out, using a davit, for instance? You into this 14 hours so far, and the engine is still in the boat?

We are doing all of this in the slip, so pulling them completely out is not possible. "First timer..." on a Chevy engine (or marine engine for that matter), yes. Certainly not my first time tearing an engine down (ASE and Honda Master Tech, and ex-Marine helicopter mechanic). Dropping a pan too much to ask? Wow, give me at least SOME credit, LOL. Messing with the two-piece seal... okay, now that one I have never done. Is it the seal itself that is difficult?

14 hours and the engine still in the boat... yes, and not too bad considering this includes pulling both coolers, both exchangers, both raw water pumps, removing all hosing (re-hosing both engines and the head), repacking the stuffing boxes, scrubbing and painting the bilge, and replacing all the zinc-to-component wiring. The engine is still physically in the boat, but completely disconnected. If I could get a pettibone over the boat, I could literally have the engine out as quickly as it takes to hook up the straps.

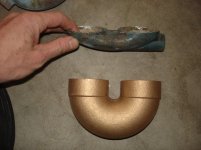
Last night, my brother and I dismantled and acid-dipped the coolers and exchangers, then cleaned them up real nice. I got the first coat of primer on all but one U-cooler last night. My brother (plumber) is going to upgrade the older cooler by replacing the U piece on the bottom to match the newer cooler. All four engine zincs will be the same size now.

Slap the new flywheel and starter on, then put an oil absorbent pad under the bellhousing. And go boating! You earned it.

Jeff

I sure FEEL that way, hehe. Thankfully, I am hearing the fishing SUCKS right now anyway!

At work right now, but I will post some more pictures of the project once I get home.
 
From the picture of the crank flange, access to the seal is not to bad. Getting the pan bolts off might scrap the arms up a bit, but doable. If you had a little more height, the pan would drop and slip out. You will get some oil drips into the boat, put something down to catch it. The seal is a 2 piece rubber, they are over size so they can be trimmed. The tool I listed allows the seal to be pulled out around the crankshaft. Once out, the tool allows the new to be pulled back around the shaft. Once the half seal is installed, trim with a razor blade. The half in the main cap is also trimmed, then reassemble use a good sealer to seal the ends. This will allow you to replace the pan gasket, an clean out any sludge from the years.

Depending on the boat layout, you can take a 4x4 and span across the boat (if you have space) and use a hoist to lift the motor an inch or 2 and block up to get more clearance.
 
paw and eric; mark had sent me the .pdf for this seal install. PM me your email and i can fire it off. You can better decide if you want/can do this upside down. For the several BBC seal jobs i've done, the Felpro seals work well; note that there is a different part no for the LH vs RH engine. I've not had to do any seal trimming. Use the RTV sparingly. THe trick is to keep the rtv off the crank and off the bearing cap. THe block square edge is very sharp and its easy to plane off the outside edge of the upper seal during insertion, especially when the crank is in and you need to rotate this seal in. Getting the pan off is easy compared to lining up the 4 pan gaskets with associated dabs of rtv; again, i've not had the pleasure of doing this upside down. I have had the pleasure of doing this and finding out i had a huge oil leak at the timing cover, using new gaskets, because the sand cast pan did not seal against the seal without rtv. Another opportunity there. THat's all the tricks i can remember; i too hate oil leaks.

Honda tech; ya, I recently did my Odyssey timing belt. Went ok, did kill an entire w/e. THe 400ft-lb crank bolt almost defeated me. Ended up using a floor jack on the end of a breaker bar to loosen the thing.
 
Last edited:
Honda tech; ya, I recently did my Odyssey timing belt. Went ok, did kill an entire w/e. THe 400ft-lb crank bolt almost defeated me. Ended up using a floor jack on the end of a breaker bar to loosen the thing.

Thanks, Dave. My email is my screen name @cox.net

That reminds me, I need to do the t-belt on my sisters Odyssey. Yeah, those crank bolts can be a pain. My 1/2" impact supposedly does 650ft/lbs in reverse and sometimes cannot bust them loose. Trick (if using air tools) is use a 3/4" drive socket with a 1/2"-3/4" step-up. For some reason it multiplies the torque. Guys around the shop nick-named it the torpedo.
 
Here are a few pictures from along the way.

Gauging the packing size, but note the dirty bilge:
bilge1.jpg

Scrubbed, primed, and painted:
bilge2.jpg

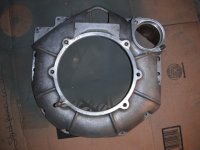
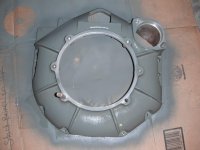
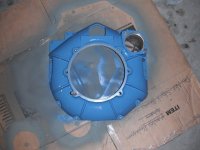
Trans bellhousing cleaned and stripped, primed, then painted:
DSCF0261.jpg
DSCF0262.jpg
DSCF0263.jpg

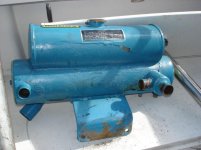
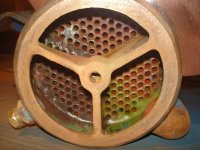
One exchanger as it came off the boat:
exchgr1.jpg
 
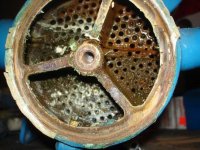
Popped the caps off, and WOW! A lot of build-up.
exchgr2.jpg

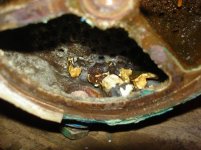
Got a few chunks of zinc in here:
exchgr3.jpg

After the 50/50 muriatic acid, all the ports are clear:
exchgr4.jpg

Lightly sanded any corrosion/cancer off, and noted serial numbers:
exchgr5.jpg

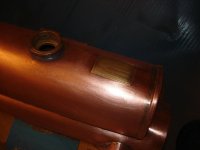
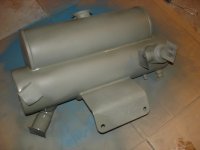
Kind of a shame to paint such a nice looking piece of copper, but here goes the primer...
exchgr6.jpg

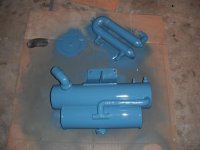
And paint:
exchgr7.jpg
 
U-cooler upgrade:
ucooler.jpg

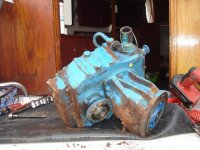
V-drive with flakes of rust falling off the bottom:
v-drive1.jpg

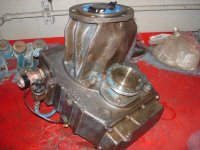
Stripped and ready for paint:
v-drive2.jpg

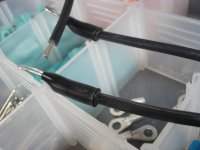
Waterproof wiring:
wire1.jpg

Part of the supplied from eBay:
wire2.jpg

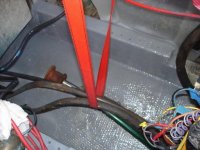
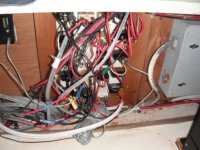
Any guess why I want to re-wire the boat? Dude has very nice 2/0 battery cables, but every DC component on the boat (everything off this breaker panel) is running off that single 10ga wire in the bottom right of this picture. Not a single sealed connection, crimps on top of spices, on top of twisted and taped ends... You should see under the helm! :eek:
wire3.jpg
 
I hope the new 'trap' on the u-cooler has adequate clearance at the raw water pump.

Something we honestly did not think of checking, but the new piece (shown) is the same as the other cooler. My brother said, "I can make these almost identical," and that is what he did. :cool:

I am not at the boat right now to look, but I would have to think it would clear just fine. On the newer cooler (starboard), the zinc goes in vertically. I have replaced the zincs before, and I do not remember any issues with raw water pump clearance. It should be fine, but only installing it will tell for sure.
 
Geez, That wiring is exactly what we had on our boat. and the pretty color spools I set up on a freewheeling display rack made of some old plywood scraps and dowels..Brings back some real engery sucking memories...Good luck....

BTW: have you calculated about how much you are spending on wire? I THINK we spent about $900 or so between the 2/0 and 4/0 battery pieces and the many 100' spools of 12/14 ga. add about $700.00 for AC and DC panels Then the Inverter/charger and lighting...should have bought a newer boat :)

Mark, you really DO think of everything
 
... should have bought a newer boat :)

Uh... yeah... with YOUR money? Note the name 'Cheap Hooker'. We bought it knowing it was a project. Besides, "That wiring is exactly what we had on our boat," why didn't YOU buy a newer boat? =P Hehe

As previously stated, all the battery wiring is good. There is also nothing wrong with any of the electrical components themselves (batteries/breakers/rockers/inverter/lighting... well, we're doing a few LED's). Total cost for the project, including wire (6ga-16ga), heat shrink, crimp connectors, insulated stainless clamps, stainless screws for clamps, wire tags, zip-ties, etc is just under $350. eBay!

We are up to about $1000 total for: above wiring stuff, new flywheel starter ring, complete engine re-hose, raw water pump rebuilds, thermostats, paint, valve cover gaskets, Gore GFO packing, muriatic acid (coolers and exchangers cleaned), exchanger cap gaskets, Raritan head rebuild, float switch for front bilge pump, new LED cockpit lighting, two new bilge blowers, a stock of engine zincs (24)... I know I am forgetting stuff, but I would have to say we are doing pretty well financially. Total invested into this boat over the last 8 months, including purchase, sales tax, upgrades, and repairs is around $18,000 split between two people.... 'CHEAP Hooker'.
 
Hoping NOT to be misinterpreted....It does mean " I " should have bought a newer boat....The written word fails to present the idea as intended ...SO......Between muddy balsa core, S#!T wiring, 1980's electronics and lovely 1980's interior decor and ZERO Maintainence...YUP, I should have bought a newer boat. Nearly as good as new now AFTER 5 years and so much elbow grease and a bathtub full of money....I SHOULD HAVE BOUGHT A NEWER BOAT! With what I have spent on restoration, and I have restored many vintage items, this clearly is NOT worth the expense for the given returns. Yes, even the fun of it. We clearly have the same goals and between my brother and myself we too split the cost. for the initial acquisition and subsequent immediate repairs I am thinking near a new LOADED Suburban in cost and today with all of that into it...it is worth 1/3 MAYBE. Hope that clarifies it some....sorry for the lack of communication.

Jeff said it best......" Whee, ain't boating fun !"
 
Last edited:
Ah, yes... the inability to include 'tone' to written word often leads to misinterpretation. Got it! I did not take offense to what you said, but I thought you were in fact implying -I- should have bought a newer boat. I also threw in the =P (tongue/blowing raspberry) in hopes to portray my sarcasm ("right back atcha"). I know we SHOULD have, and we WOULD have if we COULD have. =)

Honestly, I WISH we could have bought newer, and I realize with the money we will likely end up sinking into this one, we probably could have afforded newer; but money over the next several years is easier to come up with than money up front... if ya know what I mean. :cheers:

One of the biggest things we kick ourselves for was jumping into this a bit un-edumacated. We went from a $1k, 22' aluminum, single 140hp I/O Merc, simple, nothing ever broke, trailered boat that cost less than $20 in gas for a Catalina Island trip (kinda miss the thing) to this $14k (purchase), 32ft fiberglass, dual gas-guzzling, "ooh, it has a shower and sleeps 6", "wait, why did the trim tabs stop working?", "what does this switch do?", "there's an aweful lot of water in the bilge!", "what is this wire supposed to be connected to?" boat that costs over $300 in fuel for a Catalina trip.

We don't REGRET it, but wish we knew a little more before we jumped to 32 foot. We have had this thing for about eight, maybe nine months now, and it has been a rough ride so far. Windlass troubles, battery troubles, trim tab pump, alternator, gauges, toilet, starter, fume sensor, fuel sender, other starter.......... After the current project, I fear I may have a valve job to do on the back-firing engine (hoping ignition module or something stupid, but prepping for the worst). After that, we have honestly been up, down, and all around the boat, and everything should be, as you said, "as good as new." :) Well... minus a little teak work, paint, carpet.... yeah, I shoulda bought a newer boat! Hehe
 
backfiring: I had a marine 440 that had chronic exhaust valve erosion problems, and it would eventually result in backfiring. It would also show near zero on the compression gauge as well. If your pressures look even half way decent, I would not expect a valve job would fix a backfiring issue. Maybe if they were sticky.
 
Well, that may be good news then. All 16 cylinders were 150psi; with only three or four that were about 3psi low. So... going back to hoping it is something simple like an ignition module. Maybe the timing is not advancing? We have not really had a chance to dig into that issue yet. Shortly after it became an issue, we had to move to Dana Point, then we ripped the trans off to dig out the bendix pieces. The scary thing that leads me to think valves is that I pulled all four valve covers off to re-paint and replace gaskets, and I found port engine has already had a head job done (sparkling clean), and starboard (backfiring) looks original.

Being a "new age" Honda tech, I have never dealt with sticky valves. When you say sticky, do you mean the valves sticking to the seats? Or do you mean the stems sticking in the guides?
 
When I had discovered our valve disaster, I had taken Jeff's advice and tapped the valves on the keeper with a block of wood and light mallet. IF they would have sprung back up, I would have been a bit happier. However, it was when they stayed in place about 1" deeper like a 3" nail in a 2x4, I knew I was in trouble. Besides, the other pushrods laying about like broken pencil pieces was a dead giveaway. The valve job really was the fix and she has been great the last several years. We have actually gotten to decor last spring. But fishing is our real enjoyment so we (brother and I ) dont care about the looks as much as our spouses may. We try to keep the creature comforts in good shape so they can microwave a cup of tea or do something we don't have to listen to them whine about all day.

Your stories bring back many memories. We basically ran thru the same series of events and that unlimited towing package will be settling to a degree. As I said, we spent the last 4 years rebuilding but the last season was simply using and enjoying. Unfortunately, this year saw little free time to use it all and I am quite sure that 5 year maintenance cycle will begin all over again come April ! I already changed one set of elbows this fall and the other set poised for an April replacement.
 
Last edited:
Actually, no. Lean conditions at start up do not yet involve excessive heat.

Have you tried opening up the idle mixture screws a turn? If that won't do, it's possible that the idle passages are too small. (Don't laugh: I had to drill them out on one of my carbs.)

Jeff
 
Al * Eric:

FWIW, i went thru the same thing but our boat was NEW which was half of the issue. Turned out to be hull #7. Wonderful design - very poor construction (workmanship). It took us the better part of a decade to get it fully functional and reliable. then it was time to overhaul the drivelines....never ends.

Now, since fuel has risen so much (our initial fillup in Cape May was @ $1.019/gal) the usage has been reduced a lot. so stuff is used regularly and the "issues" are much more frequent. Damned if you do or don't. The issue free way is to just rent/hire somebody else's boat.....but then what would you do with all that "free" time that doesn't have to go into maintenance.....Only drawback is you are stuck with that rigid schedule.
 
Mark,

I was recently at a radar course and my assuption was that most of the people in the program were boat owners yet of the 8 there, 5 of them were charters...They rent for an extended time and walk away........hmm
 
Back
Top