Logo

454 XLI overheat

This is engineering data from sherwood. represents a modestly used impeller.

If you measure the flow from the pump and then compare it to the flow exiting the u-cooler, you can assess any gross restriction in the u-cooler. There will be a minor pressure drop but i don't think it will have any measurable reduction in the volume delivered.
 

Attachments

  • 10615 Impeller Performance-E-35.pdf
    40.1 KB · Views: 103
Two recent impeller changes.....????

Wonder if it happened to have been ignored and then the vanes separated. As noted earlier, they usually lodge in the u-cooler if they separate. The muriatic acid usually doesn't touch them. This is where that water 'backflush' may be helpful.

Before taking that task on, you may wanna check the flow of the raw water thru the system. I'll find the flow rate chart and post it following this one.

The first impeller change was done last year with other seasonal mx items so I assume it wasn't do to the issue. I had them changed this year when I had the elbows changed just to start from scratch to know what I was working with.

How can you check the flow of raw water or is meant simply as a guide to show that at higher rpms the water flow is 4 times as great as my standard 1000 rpm idle cruise.

How did they connect the ac pump directly to the strainer and mount it securely? A picture of that would be worth the effort to get.

I will get you a picture. The sea strainer and pump are mounted to a board which is then mounted to the boat. The pump is also on a small platform which is mounted to the board. If I could take off the bottom of the sea strainer then I could unscrew the board from the boat. This would give me more flexibility. Right now, don't know how I can untwist the pump to get it detached from the sea strainer.

In the plane I would call maintenance at this point...but part of the boat purchase justification was taking on some of these chores myself to make it affordable. At $90/hr these things get expensive in a hurry:eek:
 
Two recent impeller changes.....????

Wonder if it happened to have been ignored and then the vanes separated. As noted earlier, they usually lodge in the u-cooler if they separate. The muriatic acid usually doesn't touch them. This is where that water 'backflush' may be helpful.

Before taking that task on, you may wanna check the flow of the raw water thru the system. I'll find the flow rate chart and post it following this one.


How did they connect the ac pump directly to the strainer and mount it securely? A picture of that would be worth the effort to get.

The first impeller change was done last year with other seasonal mx items so I assume it wasn't do to the issue. I had them changed this year when I had the elbows changed just to start from scratch to know what I was working with.

How can you check the flow of raw water or is meant simply as a guide to show that at higher rpms the water flow is 4 times as great as my standard 1000 rpm idle cruise.

I will get you a picture. The sea strainer and pump are mounted to a board which is then mounted to the boat. The pump is also on a small platform which is mounted to the board. If I could take off the bottom of the sea strainer then I could unscrew the board from the boat. This would give me more flexibility. Right now, don't know how I can untwist the pump to get it detached from the sea strainer.

In the plane I would call maintenance at this point...but part of the boat purchase justification was taking on some of these chores myself to make it affordable. At $90/hr these things get expensive in a hurry:eek:
 
Take a peek at the heat exchanger tube ends. Pull the cover nearest the zinc pencil. THere can be hard debris thruout there, especially at and below the "waterline".
 
Could be a head gasket. Heats up pretty quick. Have you done a compression check? Should do one anyway. Isn't hard. Tells you alot.
 
The water flow is checked the old fashioned way. take off the hose and direct it into a bucket. start the engine and direct flow into bucket. let it run for 10, 15, or 20 seconds - value isn't critical, just has to be measured accurately. divert water flow away from bucket and stop engine. measure quantity of water in bucket.

You can repeat a few times and get an average. Also, the longer you fill the bucket, the more accurate the measurement will be. For a calculation, I'd say you need to be within 10% of the chart to have adequate cooling water flow.

Don't forget, a restriction anywhere in the cooling flow will inhibit the heat transfer. Going on your description, the pump and elbows should be ok - the issue should be in between the two.
 
I will get over and take a peak at the heat exchanger. A compression check was done during the survey and all checked good.

Back to the AC issue. Part of the problem is I can't get the hose off of the pump output. Any suggestions to make that go easier without having to cut it. I am still working on getting a picture to show the setup.
 
The easiest way to get the hose off is to cut it. The march pump's housing is plastic and won't take a lot of tugging on the fittings.

Another option would be to loosen the clamp and see if the hose will spin on the barb. If it does, you mmay be able to unscrew the barbed adapter from the housing.

The last thought would be to use a "cotter pin removal" tool. They are shaped like an ice pick, but with a bent or two at the end. I've been know to use mine to help get the hoses off of barbed fittings. Again, be careful with that housing.
 
Take a peek at the heat exchanger tube ends. Pull the cover nearest the zinc pencil. THere can be hard debris thruout there, especially at and below the "waterline".

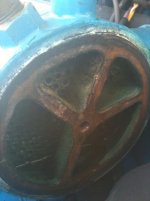
Ok guys. I took the heat exchanger cover off (side closest to the zinc) and took a photo which is attached. I didn't see any holes that were covered, however there was some corrosion throughout. I compared it with the same side on the other motor's heat exchanger and it was about the same.

I went ahead and took the cover of the other side of the heat exhcanger off to compare. All of the sections, except for one, looked like the side that is pictured (no blocked holes, but a layer of corrosion). One section had no corrosion at all. Is this normal..or could this be the problem?
 

Attachments

  • photo(3).jpg
    photo(3).jpg
    39.5 KB · Views: 61
I had a very similar situation. Took the heat exchanger to a local radiator shop to have it cleaned out. He was able to pressure test it and found it bad. New unit installed and everything was fine..temps held steady. BTW, the radiator guy doesn't sell the heat XC so I could trust him. He did pressure test and clean my oil coolers and the other heat XC, and they passed.
 
This brush thing can be made to be difficult without this simple caution.... I like to think I am an imaginative thinker so I immediately tried to use a .177 caliber rifle cleaning tool to brush out the core. By the second or third stroke the aluminum rod broke deep inside the exchanger core. Took an hour to finally get it out.

Don K. another pilot, found these 30" long handle and integrated wire brushes and was kind enough to order a bunch and distributed them to us as orders and supplies lasted. It is basically a brass bottle brush, can't break or screw up....itr has worked great for me this year. If this is a need you have, JUST keep this thought in mind....be careful of your own creativity. ;)
 
Appreciate the feedback. :) My plan was to take it to the radiator shop to have it boiled. Should I attempt the wire brush prior? Seems like some risk there which may lead me to the radiator shop anyway.
 
Like most mechanical issues - low risk with the right stuff.

If its going to the shop, no need to brush it as they'll likely repeat the process but with the help of their chemical tank.
 
Just a heads up, Barnacle Buster is a great product to chemically clean the inside of HX, oil coolers, hot water heaters, etc. Have used it twice, nice job! Look them up on line.

Good luck
 
I had an overheating issue it turned out to be the lower coolant hose on the engine water pump. My BB Chevy would idle all day but as soon as I brought the rpms up to 2000 the temp would rise. As the pump worked harder sucking the hose would collapse in on itself and restrict the flow. I put in a hose with a wire coil in it and problem solved. It was not easy to see. I believe the idea came from Jeff.
 
I have a 1997 3100 Open Tiara with the same engines (454 XLi Gas) and two weekends ago the port engine overheated, we changed the impeller and the water filter which was really nasty but it didn't solve the problem so a friend of us told us to check the thermostat. We took it out and noticed that it was stuck so we just bought it and are going to replace it on Saturday so we'll let you know. If you want you can take it out and run the boat without it and see if the engine still overheats then you can conclude if it's a thermostat problem or not.
 
Back
Top