Logo

1976 40HP Evinrude. Bad starter?

62SeaKing

Member
Okay, so I cleaned up my engine and put it all back together and found that the starter could be bad. when I turn the key in the ignition, the starter will engage the fly wheel sometimes, it'll go one rotation on the fly wheel and then it'll stop like there isn't enough "oomph" in the starter to make another turn. When I turn off the key and try again, it'll do the same thing. Sometimes the gear on the starter will just sit down at the bottom and spin and wont engage the fly wheel. :(
When I do a search to buy a new starter for it, every place I go says that a replacement starter is unavailable. :mad: Can this part be interchanged with a different year? :confused:
 
I just fitted a starter that didn't even go to my 1983 1.6 L Sea Drive V-4
so it is possible but I had to put washers under certain bolts and make sure it was level and didn't get stuck.

take your starter off,
try to turn your flywheel by hand it should be easy and should not get stuck
like really stuck not just compression stuck

and explain to me a bit more about the starter gear not going up but turning?

I can turn the flywheel by hand just fine. but the gear that moves up to engage the flywheel from the starter won't go up all the time. It's an outboard engine, yours sounds more like an inboard (or whatever it's called).
 
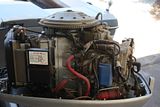
mines like this but between the carb and the red wire I now have a starter there

if it doesnt go up then its a gear issue on the starter itself, its a worm gear so it should go up everytime unless something is loose.


Last edited:
Remove and clean all cables and wires associated with the starter circuit. This includes the battery terminals, solenoid connections, ground cable at the powerhead, etc (all of them). Clean the cable end terminals and also the component they connect to. Tighten all connections with a wrench or pliers, not your fingers if any wing nuts are used.

Loose, or tight but dirty connections result in a voltage drop that will affect the electric starter's performance.

Sticking bendix even if the starter is turning at its normal (very fast) rpm...... usually caused by someone applying grease or excessive oil to it...... clean that stuff off with WD40.
 
Okay, I took the starter into NAPA and they tested it for me to see if it was bad. It's not thank god! So I bought a wire wheel for my drill and cleaned every place on it and where it was grounded, even cleaned up the pos cables and such. Got it all put back together and tried to start it...it started up! Ran for about a minute and a half or so and I shut it down. I see another problem though...there seems to be a high volume of gasoline coming from the carbouretor...any ideas?
 
Yes.... Purchase a carburetor kit either on this site, your dealership, NAPA, any marine type store, etc. Remove, clean, and rebuild the carburetor. Make sure the kit includes the float OR purchase a float separately.

(Carburetor Adjustment - Single S/S Adjustable Needle Valve)
(J. Reeves)
Initial setting is: Slow speed = seat gently, then open 1-1/2 turns.

Start engine and set the rpms to where it just stays running. In segments of 1/8 turns, start to turn the S/S needle valve in. Wait a few seconds for the engine to respond. As you turn the valve in, the rpms will increase. Lower the rpms again to where the engine will just stay running.

Eventually you'll hit the point where the engine wants to die out or it will spit back (sounds like a mild backfire). At that point, back out the valve 1/4 turn. Within that 1/4 turn, you'll find the smoothest slow speed setting.

Note 1: As a final double check setting of the slow speed valve(s), if the engine has more than one carburetor, do not attempt to gradually adjust all of the valves/carburetors at the same time. Do one at a time until you hit the above response (die out or spit back), then go on to the next valve/carburetor. It may be necessary to back out "all" of the slow speed adjustable needle valves 1/8 turn before doing this final adjustment due to the fact that one of the valves might be initially set ever so slightly lean.

Note 2: If the engine should be a three (3) cylinder engine with three (3) carburetors, start the adjustment sequence with the center carburetor.
When you have finished the above adjustment, you will have no reason to move them again unless the carburetor fouls/gums up from sitting, in which case you would be required to remove, clean, and rebuild the carburetor anyway.

(Carburetor Float Setting)
(J. Reeves)

With the carburetor body held upside down, the float being viewed from the side, adjust the float so that the free end of the float (the end opposite the hinge pin) is ever so slightly higher (just ever so slightly off level) than the other end. And when viewed from the end, make sure it is not cocked.


Thanks a ton, will give it a shot
 
I had the exact same problem with my '68 40hp. I took the starter apart and found that one wire to one of the brushes had worked loose. I reconnected it, put it back together and now it runs as if it were new.
 
Well I got the carb all cleaned up and rebuilt. Put it all back to gether and sure enough, started right up! It even stayed running! Thanks a lot for all the input, info and help guys!
 
One more thing...is there timing on this engine? I think my timing is off or somethin, but I'm used to working on cars so I don't know if they make the same sound when the timing is off.
 
The timing is set by the flywheel key being aligning the flywheel with the crankshaft. If the key isn't sheared. the engine is in time.

Hint..... If the key shears, the engine will not run at all. What makes you think the timing is off?
 
Not sure, usually when the timing is off in a car, you can hear it through the exhaust. Can sort of hear the same type of sound from the exhaust in my engine, could be just cause it's old though. Or I'm so nervous about this engine that I'm making things up that aren't even there.
 
The timing is set by the flywheel key being aligning the flywheel with the crankshaft. If the key isn't sheared. the engine is in time.

Hint..... If the key shears, the engine will not run at all. What makes you think the timing is off?
OK, Now I am confused!
Isn't the timing set by the stator plate throttle ramp and the throttle cam?
I am helping a son-in-law with a 40 hp 1975 modle 4055C that boggs down on full throotle. runs great in reverse and low speeds. The throttle cam seems independant of the stator plale, as in dose not touch it and adjustmensts seem to no avail.
?? :(
 
Gbrro..... The timer base in this case is not a timer base but rather what is called an armature plates. It is directly linked with the vertical throttle arm via a strong short coiled "V" shaped spring. There is no adjustable linkages associated with it.

Perhaps you are confusing timing with synchronization....... the point in time whereas the throttle butterfly will start to open in relation to the timing ie the scribe mark on the cam just touching the cam roller when it is dead center with the roller.
 
Last edited:
Yes I am misusing the trem timing in this.
I will get a repair manual to figure this one out.
The throttle cam roller seems to not work at all with the cam.
SIL got this package for very little. I am sure it was because of the WOT problem??
 
Gbro..... Perhaps the following will be of some help to you.

(Synchronization Of Older 2 Cyl Engines)
(Such As The 28, 33, 40hp Etc models )

On the linkage that runs from the armature plate (the plate the coils & points set on) to the carburetor throttle roller, loosen the set screw on the brass collar that you see there and temporarily move it away from the armature plate/vertical throttle arm clevis (clevis is that thing the linkage rod slides through). We'll refer to that vertical throttle arm/armature plate clevis simply as the "clevis" from this point on.

Look at the cam that's attached to the front of the armature plate.... the cam that slides up against the carburetor throttle roller. You'll notice that there's a scribe mark on it. The carburetor roller should contact the cam and just start to open the throttle butterfly when that scribe mark is dead
with the roller.

With the engine in gear (not running of course) have the armature plate advanced all the way (by hand) so that it is up against its stop. Now adjust the brass collar (set screw) on that associated linkage rod so that it is up against the clevis. It should be adjusted so that there is either no play, or just a hairs play between the collar and the clevis.

At this point, the armature plate movement is not advancing the throttle butterfly via the rod movement, but further movement of the throttle control, although the armature plate cannot move any farther, causes the tension spring at the armature plate to allow the vertical throttle arm to move farther which now advances the carburetor throttle butterfly via the rod.

If all else with your engine is as it should be, that should do it.
 
Back
Top